How To Fix Self-Leveling Compound Mistake
By simply the name, it’s often assumed that self-leveling compound does all the work for you. However, since it appears to be easy to use and dries incredibly fast, sometimes mistakes occur.
The whole process of installing and spreading self-leveling compound takes a mere 20 minutes, not allowing very much time for error. Most often what happens is, you begin tackling a project you may not be entirely prepared for, and the end result is a disaster.
To fix a small self-leveling compound mistake, use a chisel to remove bumps so the surface is level. If you need to remove all of the compound, use a chisel and hammer to break it up. Then, use a paint scraper to remove the rest. Afterward, sand the surface with an orbital sander to finish.
We’ll outline all the steps to fix your self-leveling compound mistake and offer some tips to achieve the desired result when working with this product.
Do You Need Concrete Foundation Repair Services?
Get free, zero-commitment quotes from pro contractors near you.

What is Self-Leveling Compound?
Self-leveling compound is generally used for smoothing out surfaces and prepping flooring for wood, carpet, tiles, stone, or other final coverings. It is a chemical mixture consisting of polymer-modified cement.
In contrast to conventional concrete, self-leveling compound has high flow features and doesn’t require an excessive amount of water for proper placement. When you’re planning to lay tile or any other flooring, it’s essential that you have a completely level work surface. Self-leveling compound has become an increasingly popular way to achieve this in very little time.
How to Fix a Self-Leveling Compound Mistake
It’s often understood that self-leveling compound is an easy and convenient way to level out an uneven surface. While this is true, it’s only effective when it’s done with the proper tools, knowledge, and care. Without the proper preparation, you could be presented with a number of issues. To fix a self-leveling compound job gone bad, follow the steps below.
Step 1: Assess the Situation
Before you proceed with fixing your self-leveling compound mistake, you need to understand what issue you are dealing with. Some of the possible problems include a surface that is too soft or even non-level areas of the floor.
If the compound is too soft, you’d be able to mark it with your fingernail. In this case, you need to remove it and completely start over. Whereas, if you’ve been left with uneven sections of your floor, depending on the individual situation, you may be able to fix it by simply sanding it down. Regardless, if the issue seems overwhelming, it’s always best to remove it and start fresh.
Step 2: Preliminary Preparations
During the removal process of self-leveling compound, you should expect to have a lot of dust and debris flying around the room. Take the necessary safety precautions and protect yourself from dust inhalation by wearing the proper gear. Use goggles, gloves and a face mask to ensure that you are safe from any possible flying debris.
Additionally, you can apply some water to the surface of the floor. This will add weight to the dust and make it less likely to float around the room.
Step 3: Remove the Self-Leveling Compound
Based on your assessment, if you’ve determined that you only need to remove certain uneven sections of the compound, you can get rid of them by chiseling. Use a chisel to very lightly remove any bumpy pieces and make them level to the ground. Follow this up with an orbital sander or a similar device, to further flatten the area.
Quick Tip: It’s perfectly fine to make a slight valley in the bad compound as you will be reapplying anyways and can fill these dips at the end.
On the other hand, if you need to remove all of the old self-leveling compound, use a hammer to try and break it up as much as you can. Then, use a paint scraper to collect any of the remaining pieces. If your particular project necessitates some more heavy-duty tools, respond accordingly. The goal is to remove as much of the bad compound as possible.
During the entire removal process, make sure that you are wearing the proper safety equipment and continuously spraying down the surface with water to limit dust.
Step 4: Preparing the New Self-Leveling Compound
When you’re mixing the compound, you should strictly follow the manufacturer’s guide. Most often, mistakes arise because the compound wasn’t mixed properly to begin with. For best results, use a drill to mix up the compound and as much water as the instructions specify.
Cold water is best as it will lengthen the overall drying time of the compound. The end result will appear like a thin milk substance. Self-leveling compound dries very fast so once it is mixed, you should be ready to apply immediately.
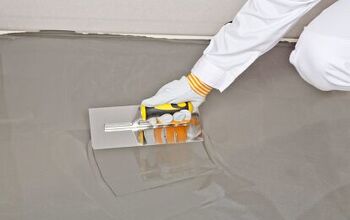
Step 5: Applying the Self-Leveling Compound
After you’ve finished mixing up the compound, do not allow for any downtime; start spreading the compound right away. Depending on your situation, apply it to the areas where you have valleys in the old self-leveling compound or to the entire area where the compound previously was.
Once you’ve applied the first application, wait a moment for it to thicken and then even it out using a drywall tool. It’s important to note that when the compound begins to thicken, do not attempt to slow down the process. Adding additional water or heating up the compound can spoil it or cause breakages.
The product will dry and be suitable to walk on in about four hours. However, you should wait an entire day for the compound to dry completely.
Step 6: The Last Resort
After you’ve allowed the necessary amount of time for the compound to dry, examine your work. If you are presented with another problem, this may indicate that the job is just too much to handle on your own. Do not be afraid to call in a professional as being aware of your own limitations is the biggest part of a DIY project.
Do You Need Concrete Foundation Repair Services?
Get free, zero-commitment quotes from pro contractors near you.
Tips for Working with Self-Leveling Compound
In order to ensure the proper installation of self-leveling compound, we’ve gathered the following tips.
- Clean your floor. Sweep and vacuum the floor prior to spreading the compound. You’ll be priming and you don’t want the primer to stick to dust and debris on the floor.
- Cover seams and holes. Seal all holes, cracks, and seams on the floor with caulk and cover with tape.
- Close the gap between the foundation and bottom wall plate. If necessary, install sill sealer and caulk around the edges to create a barrier that prevents the compound from spreading into other rooms.
- Place cardboard around vents and drains. Isolate large holes using shaped cardboard prior to pouring the compound.
- Install dams in doorways. Use strips of wood to dam up doorways and seal it to the floor with caulk.
- Prime the wood. If you’re applying the self-leveling compound to wood, you’ll want to prime first. This will help prevent expansion and contraction of the wood.
- Purchase more compound than you need. You don’t want to run out of compound in the middle of a project. By the time you go to the store and come back with more, it may already be dry.
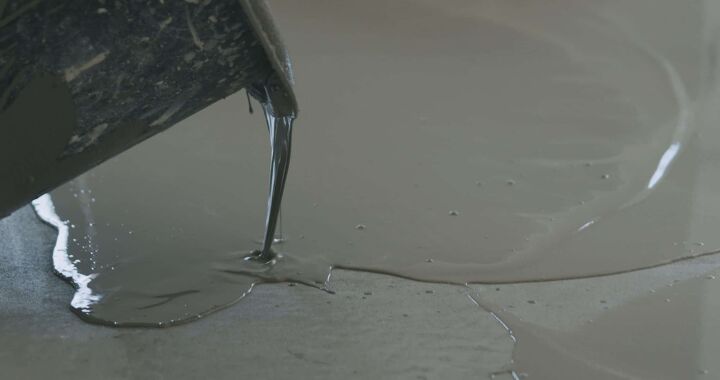
- Spread as you pour. Move your fill bucket along the floor as you pour and keep it low to the ground to minimize splashing.
- Level with a gauge rake. This tool isn’t completely necessary, but works great for spreading out the compound and helps you gauge the thickness of it.
For other common home improvement fixes, check out: “ How To Fix Bulging Drywall Seams” or “ How To Fix A Laminate Floor That Got Wet.”

Jessica considers herself a home improvement and design enthusiast. She grew up surrounded by constant home improvement projects and owes most of what she knows to helping her dad renovate her childhood home. Being a Los Angeles resident, Jessica spends a lot of her time looking for her next DIY project and sharing her love for home design.
More by Jessica Stone