


Cheaper Alternatives To Self Leveling Compound

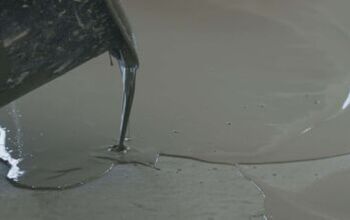
Whether you choose a carpet, tile, or wood cover, a self-leveling compound (SLC) offers a firm, flat base on which you can lay your flooring. However, this can be extremely expensive. So, what are some practical, less expensive alternatives to self-leveling compound?
One of the more affordable versions of a self-leveling material is the sand mix. Mixing sand and cement can create a sand mixture to level up unevenness in your floor. However, unlike the original product, sand mix won’t spread evenly on its own.
SLC is, without a doubt, the finest method for creating a flat surface. But the cost is more significant than what most of us are willing to pay. Fortunately, there are many more affordable alternatives that can precisely fit its role.
Yes, with little effort and understanding, you can obtain the surface you want without becoming bankrupt. Let’s dive into this a bit deeper!
What Is The Cheapest Way To Level A Concrete Floor?
Concrete floors can be rapidly and economically leveled using a sand mixture. Although it’s less expensive, the sand mix has the right consistency to deliver outcomes that are up to par with SLC requirements. However, as was already noted, leveling will take a little bit more time and effort because it doesn’t fall uniformly on its own.
With SLC, the playing field is leveled without the need for particular knowledge or skills. Anyone can do it as long as they follow the instructions on the container. The only disadvantage is that it could be expensive, especially for big projects.
Below are the steps to do this:
Step 1: Get The Floor Ready
Before you do anything, you must first set the floor. Comb over the floor and verify that it is free of grease, oil, and filth.
Any loose materials should be taken out. If you want to make absolutely sure the floor is prepared, you can take a pressure washer to it.
Step 2: Make Sure You Have The Right Sand Mixture
Before you begin pouring the concrete, make absolutely sure the sand mixture you’ll use is the right kind.
If not, leveling will be challenging and could not have the desired effects. A practical ratio is one part Portland cement to 3 parts sand. Additionally, you may always ask experts for advice.
Step 3: Apply The Mixture To The Floor
Once you have the right mixture, it’s time to spread the appropriate amount of sand mixture on the floor.
There are significant differences between the sand composition and SLC, so it won’t flow evenly. You’ll need to use a trowel or another flat tool to level it out as you go for the former.
Considerable effort will be involved, mainly if you’re covering a sizable area. But if you’re consistent and patient, you may achieve your goals and eventually save a significant amount of money.
Step 4: Wash Your Floor
Once spreading is finished, hauling in water becomes the next stage. Use a garden hose to spray water on the floor.
You should make every effort to approach it softly. If not, you’ll have to start over because too much effort will rinse the sand combination away. So make sure the hose is set to a gentle spray.
Step 5: Allow Your Floor To Dry
After wetting the surface, it is now time to let it dry. The length of time it takes will vary depending on the temperature and humidity of the area. On the other hand, ensure that the entire area is dry, not even just a few isolated areas.
You can instantly tell if it’s already dry by putting your hand on the ground. You can go on after allowing the area a day to soak. You must give the floor more time to dry if it is still wet. After a day, verify your findings again. Before proceeding to the following step, make sure the entire surface is dry.
Step 6: Get Rid Of Sand Particles
Once the sand has dried, the next step is removing any sand particles on the floor. To do this, use a bristles brush.
It will assist in the discharge of any contaminants that are still stuck to the surface. Handle this carefully to avoid scratching the floor.
Yet again, this step isn’t always required. Nothing needs to be taken out if there are no sand pieces once the floor has dried.
Can I Use Drywall Compound As A Floor Leveler?
Yes, you could level the floor using drywall compound, and drywall would be a perfect support for your tiles or other flooring.
However, using drywall compound has a number of disadvantages. So, weigh all your options carefully before deciding if this is the most appropriate course of action for you.
You know, there are several options accessible to you for leveling your floor, including drywall compound. Because it is substantially less expensive than other options, which is what homeowners on a tight budget typically search for, drywall compound is preferred by the majority of people.
Can Cement Be Used As Self-Leveling?
No, cement cannot act as a self-leveling surface on its own. If cement is used alone, it will dry out and break because it lacks the durability that sand provides.
As a result, leveling your ground with cement is not a good idea. Slurries can be made using it well, however, self-leveling is not possible.
We are all aware that strength is produced when concrete and water are joined. There’s no doubt that it’s not just water. To build a solid foundation, you need to mix cement and sand.
Can I Use Grout As A Floor Leveler?
No, you cannot level a floor with grout. Grout is frequently used to fill in the spaces or fractures between tiles. It’s not meant to be used as a self-leveling compound. Grout lacks the essential qualities for such tasks, making it unfit for leveling floors.
Grout is, first and foremost, a mixture of water, sand, and cement. It can’t be compared to mortar. Since grout is far thinner in texture than other types of fillers, it is typically used to fill joints.
What Are Some Cheaper Alternatives To Self-Leveling Compounds?
There are several ways to smooth a floor, but using a self-leveling compound is the best method for getting a smooth, level surface. Self-leveling chemicals are offered in powder and liquid form at most home improvement retailers.
However, they can be pricey, so if you’re searching for a less expensive choice, take a look at one of these possibilities:
1. Sand Mix
Using a high-quality sand mixture, you can make a smooth, flat surface. A flat surface can be produced using concrete and sand combined.
Spread the sand mixture after dumping it! Spread the mixture uniformly in between its folds using a flat surface device and the roller. Make sure there are no gaps by taking your time.
You can check the area once more to ensure no holes are left. Simply increase the amount of sand mixture and level it out as necessary.
2. Mixed Compound
Utilizing a leveling compound that incorporates Portland cement is one alternative. The floor can be leveled by spreading a slurry of this material and water over it. Although it will cost significantly less, it will take much longer to settle than a self-leveling compound.
3. Use Grinding Pads
Another choice is to manually level the floor using sandpaper or grinding pads. While it will take more time and work, it will be significantly less expensive than employing a self-leveling compound.
To avoid making any dips or troughs in the flooring, make sure to move slowly and evenly if you decide to take this approach.
What Is The Best Self-Leveling Compound?
The appropriate self-leveling compound for you may vary based on your needs, your budget, and the work that you require it to complete. There are several different kinds of self-leveling compounds available.
How Do You Prepare A Floor For Self-Leveling Compound?
An excellent technique to even out your surface and restore its new-looking appearance is to use the self-leveling compound. Self-leveling compound, however, might be pricey. A few options exist if you’re looking for a less expensive substitute for the self-leveling compound.
Make sure your floor is first spotless and clear of any dirt or trash. The self-leveling solution will not adhere well and will not smooth out your floor adequately if your floor is not clean.
The floor must then be roughened up in order for the self-leveling compound to be able to grab onto it. Sanding your flooring with coarse grit sandpaper will help you achieve this. Vacuum up any dust and debris after sanding the floor.
Finally, before you put the self-leveling product on your floor, you must apply a primer. The primer will aid in the appropriate adhesion of the self-leveling solution and will aid in establishing a boundary between your floor and the compound. You are now prepared to apply the self-leveling product after applying the primer.
What Should I Put Down Before SLC?
The approach you select depends depend on the state of your floors and your price. There are a few more different ways to prepare your floors before employing a self-leveling compound.
You can use a bonding agent first, then apply the self-leveling compound if your floors are in good shape and only require minor smoothing.
This will make it easier for the compound to stick to your flooring and provide an excellent, smooth surface for you.
Before spraying the self-leveling compound, you might need to use a balancing primer if your floors are in poor condition. Your floor will be smoothed out, and any gaps or cracks will be filled, making it easier for the compound to adhere.
Related Guides:

Heather is a passionate writer who loves anything DIY. Growing up, she learned everything from home repairs to design, and wants to share her tips with you. When she's not writing, she's usually hiking or searching for her next DIY project.
More by Heather Robbins


![10 Best Electric Pressure Washers – [2022 Reviews & Guide]](https://cdn-fastly.upgradedhome.com/media/2023/07/31/9070600/10-best-electric-pressure-washers-2022-reviews-guide.jpg?size=350x220)


![The 5 Best Angle Grinders – [2022 Reviews & Buyer's Guide]](https://cdn-fastly.upgradedhome.com/media/2023/07/31/9071326/the-5-best-angle-grinders-2022-reviews-buyer-s-guide.jpg?size=350x220)


![10 Most Dangerous Neighborhoods in Baltimore [Updated]](https://cdn-fastly.upgradedhome.com/media/2023/07/31/9075655/10-most-dangerous-neighborhoods-in-baltimore-updated.jpg?size=350x220)


