


Ceiling Fan Making a Grinding Noise? (Here's Why & How to Fix)
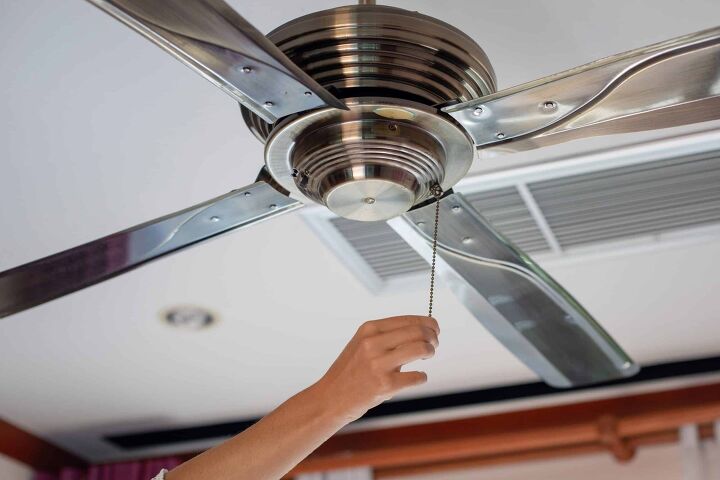
A ceiling fan can make for a great way to keep a room cool, particularly in the hot summer months. Moreover, it can also help to keep energy costs lower as it is cheaper to run a ceiling fan than it is an HVAC system. But sometimes you might hear the ceiling fan making a grinding noise.
If your ceiling fan is making a grinding noise, the most common problem is dry bearings in the motor. Blade brackets dragging across the motor housing can also cause your ceiling fan to make grinding noises. Possible solutions are to inspect and tighten the fan blades and use an oil like WD40 to lubricate the fan motor.
When that grinding noise becomes too great to ignore, it means having a quick fix. So, what can you do to stop that grinding noise and get your ceiling fan working in a convenient way once again? Follow these tips and you’ll be back to enjoying your ceiling fan as you used to.
Do You Need Ceiling Fan Repair Services?
Get free, zero-commitment quotes from pro contractors near you.

Start with the Motor Cover
More often than not, a grinding noise emanating from your ceiling fan is due to the blade brackets of the fan dragging over the motor house cover or shroud. The easiest way to remedy this issue is to loose the screws on the cover, adjust its positioning, and then tighten the screws back into place.
Make sure that all of the screws are properly secured and that the motor cover is properly placed, or the grinding issue can continue to persist. Not only that, make sure that you tighten the blade brackets properly so that they won’t end up rubbing against the fan cover.
Clean the Fan Blades
While grinding can be a real issue, there are other things that can cause your fan to not work properly or to create discrepancies that need to be fixed. Blades that are overly dirty can become imbalanced, leading to wobbling and shaking.
Before you attempt to clean your fan blades, turn the fan off. For safety reasons, you should never attempt to dust your fine while it’s still on. Once the fan is off, start by using a dust cloth or duster to clean off both sides of the blades of excess dust. After you’ve done that, you may need to use a wet cloth or paper towel to get any of the caked-on dust that simply cannot be brushed off.
Make sure to dry off both sides of the blades and be aware that the top side will often harbor much more dirt and grime than the bottom half. You want to dry the blades because a good deal of fan blades are constructed of particleboard or composite materials that can become damaged by water easily.
Inspect the Fan Blades
After you have cleaned the blades, make sure that there is on warping, damage, or that no single blade is hanging lower than another. This is to ensure that the blades are hanging straight. If one of the blades is hanging lower than the others, try tightening the blade.
Should tightening the blade not work, you may have to replace that blade. Ordering straight from the manufacturer is the best bet to getting an exact match. Any kind of warping or damage can cause the fan to wobble. This can be hard on the fan mount as well as the motor.
Tightening the Blades
There are several parts of the fan that can come loose and eventually make the entire thing a noisy mess. Check out the blades first. They will mount on brackets generally attached to a rotating assembly. This will all connect on the fan motor assembly.
Generally speaking, screws will be used to fasten the fan blades. There are times, however, where they can have keyholes that fit over top of pins as well as studs that fit over top of the bracket. Still, a good rule of thumb is that bolts or screws will be used; tighten them down where you see any looseness.
Keep in mind that if you are running into Phillips-head screws, they’re likely larger than the standard size. Using a #2 screwdriver on those #3 flatheads can result in stripping of the screw and you’ll have to replace them before running the fan again.
Tightening the Parts of the Light Fixture
Some ceiling fans come equipped with a light fixture. The unfortunate thing is that these are all additional components that can become damaged or broken and may need to be replaced in the long run.
There are shades, globes, bulbs, and other parts that you need to ensure are snug. If they are loose enough, they can create that grinding noise that can become cumbersome and can even become loose and wobbly.
Be Careful Not to Overtighten Light Fixture Parts
Because most light fixtures make use of glass parts, it can be all to easy to overtighten then. When this happens, it can crack or break the glass and then you’ll need to replace the piece entirely. Save yourself the hassle and use some caution.
If, after tightening, the fixtures are still somewhat loose and wobbly, try adding a rubbering band around the neck of the shade or globe before reinstalling the screws. This could help you get a tighter, more secure installation.
The Fan Motor Needs Lubrication
Another major cause for that squeaking and grinding noise emanating from your fan could be due to a lack of lubrication. Not only will that annoying sound happen, but the parts will wind up rubbing against one another, wearing them out far quicker.
To fix this, use something like WD-40 to lubricate the main shaft. This is located above the motor and it will let oil drip down over the bears. Keep in mind that you might have to remove some of the parts or even take the fan off entirely in order to properly lubricate it.
Allow time for the oil to soak in and properly lubricate the fan and its parts. Starting the fan before the oil has had a chance to set will negate the work that you’ve done and mean that you have to start all over again.
Bent Blades
Another major culprit of humming, clicking, ticking, and other weird sounds is that one of the fan blades has been bent upwards. This is more than a slight bend and it will ultimately hit the side of the housing of the ceiling fan.
If you can, try to gently bend the ceiling fan blade back into place. Not only do you want the blade to be as straight as it can be, you want to keep it from hitting the fan housing altogether. After you’ve turned the ceiling fan off, use your hands or a straightening tool to gently bend the blades back into place.
Check the Junction Box
This is the part of the fan that meets the ceiling. Sometimes, if the junction box hasn’t been properly mounted, it can make a ticking or clicking sound with every revolution that it makes. Make sure that the entire fan has not come loose due to an insecure screw and that the junction box is properly secured to the ceiling.
Though it is rare, a loose enough junction box can be a major issue and cause the fan to come crashing down. This is where too much stress is placed on the loose components of the junction box and it doesn’t have the tensile strength necessary to hold your fan up. It is rare, but it is something to definitely be aware of and remedy the moment that you notice it.
Loose Mounting Bracket
If you have a loose mounting bracket, this is something that should be corrected immediately to avoid any possible accidents. This problem may initially seem like the blades are the ones that are loose, so be sure to inspect the mount itself. If your fan also has a down rod, check this component as well.
To fully inspect these pieces, you’ll need to disassemble the motor, blades, and lighting. This can be done by simply using a screwdriver. However, if you discover significant damage to the mount or the rod, you may have to use a welding tool. At this point, if you are not confident in your abilities, consider calling a professional.
Do You Need Ceiling Fan Repair Services?
Get free, zero-commitment quotes from pro contractors near you.
When to Call a Professional
While most of the issues that cause a ceiling fan to make a grinding noise can be fixed by the average homeowner, there are instances when it’s best to consult a professional. If you fully inspected your fan and exhausted all the possible reasons to no avail, calling a professional to take a look is your best course of action.
Also, if your fan is too high up, or the issue is too technical for your skillset, a professional will be able tackle the necessary maintenance for you. The professional may be a licensed electrician or you can try contacting the manufacturer of your fan to send someone out. If they don’t have customer service, check with the store that you purchased the fan from.
Fortunately, some ceiling fans have warranties that are good for several years. This means that you may not have to spend a dime to have your fan fixed or even replaced.
Related Guides

Ryan Womeldorf has more than a decade of experience writing. He loves to blog about construction, plumbing, and other home topics. Ryan also loves hockey and a lifelong Buffalo sports fan.
More by Ryan Womeldorf


![10 Best Electric Lawn Mowers - [2022 Reviews & Top Rated Models]](https://cdn-fastly.upgradedhome.com/media/2023/07/31/9070486/10-best-electric-lawn-mowers-2022-reviews-top-rated-models.jpg?size=350x220)


![10 Most Dangerous Neighborhoods in Baltimore [Updated]](https://cdn-fastly.upgradedhome.com/media/2023/07/31/9075655/10-most-dangerous-neighborhoods-in-baltimore-updated.jpg?size=350x220)

![How To Reset A Whirlpool Cabrio Washer [In 5 Easy Steps!]](https://cdn-fastly.upgradedhome.com/media/2023/07/31/9076531/how-to-reset-a-whirlpool-cabrio-washer-in-5-easy-steps.jpg?size=350x220)
