


Will Removing Granite Countertops Ruin Cabinets? (Find Out Now!)
In an ideal world, all home renovation projects would be finished without causing any harm to existing surfaces, but mistakes can happen, and emergency repairs are occasionally necessary. Granite countertops are not only attractive and long-lasting, but they are also quite hard. Will they ruin your cabinets if you remove them?
You can remove your granite countertops without causing any damage to your cabinets, however, you have to do this carefully as the granite is heavy and will easily dent or scratch anything it accidentally hits. But if you remove the countertops carefully, you should steer clear of any resulting damage to the nearby structures.
Many homeowners prefer granite countertops because of their beauty and durability. Although granite is a strong material, it still requires maintenance. One prevalent concern is the risk of causing damage to cabinetry which we will speak more on in this article.
Do You Need Countertop Installers?
Get free, zero-commitment quotes from pro contractors near you.

Removing Granite Countertops
If you want to remove your old countertops and replace them with new ones, or if you only want to replace the tops, knowing how to remove the countertops is helpful.
How To Remove Granite Countertops Without Damaging Cabinets
Granite countertops are a lovely addition to any kitchen, but they aren’t as easy to remove as laminate worktops.
Granite worktops are typically put over drop-in or under-mount sinks, which means the granite is permanently affixed to the cabinets below.
If you take out the countertops, you might as well take out the cabinets, which might be expensive. There are a few things you can do to keep the cabinets from being damaged.
Gather The Tools Needed For The Job
With granite countertops becoming increasingly popular, many homeowners are confronted with the issue of removing their old worktops without destroying their cabinets.
While granite slabs usually arrive with thorough instructions on what tools you’ll need to do the project, some homeowners are unsure if such instruments are up to the task and are concerned about ruining their cabinets.
You’ll need to be prepared with the correct tools and follow a technique that works in your kitchen to remove granite countertops with the least amount of damage.
- Sturdy shoes
- Safety glasses
- Disposable mask
- Flashlight
- Rubber mallet
- Hammer
- Chisel
- Scraper
- Pry bar
- Wrench
- Utility Knife
- Screwdriver
- Plyers
- Caulk softener
Step 1: Prep The Area
It takes a lot of effort to remove a granite countertop from your kitchen or bathroom. Protect furniture, flooring, and appliances from chips and grime by covering them.
Then you must remove all faucets and sinks (and other fittings). Because they’ll be in the way, eliminating them now will make the rest of the task a lot easier.
Before removing the granite, check sure the water has been turned off and the pipes have been drained. Another issue with removing granite countertops is the use of caulk between the sink and the countertop to keep the sink in place.
Step 2: Break Up Caulk And Remove Screws
Using a knife, just break the caulk from the sink’s rim. You can lift the sink away with a rubber mallet once it’s entirely disconnected.
You’ll see that the granite is fastened to the cabinets, and there are screw holes on the underside of the granite that is easy to overlook. Remove the screws before attempting to remove the countertops.
Step 3: Remove The Countertop
Make sure your work area is tidy. Countertop accessories and appliances, such as toasters and blenders, require precise arrangement in order to provide the best functioning while remaining in keeping with the overall aesthetic.
Make sure you get rid of everything that’s installed above the counter. This will not only prevent you from hitting something with a hammer or drill while working on your countertop, but it will also safeguard your valuable electronics and other kitchen goods from harm.
Step 4: Remove The Plywood
Remove the plywood from the granite’s underside. The plywood is normally screwed firmly to the concrete structure with a special type of glue. Locate the screws on the plywood’s surface and remove them using the appropriate wrench.
The underlayment should now be visible once within the kitchen cabinets. Raise the granite off the tops of the cabinet supports, starting at the front and working your way back.
To wedge into the gap between the granite and the supports, use the pry bar. Working from the top to the front of the counter, loosen the granite.
Step 5: Check That You Are Doing It Correctly
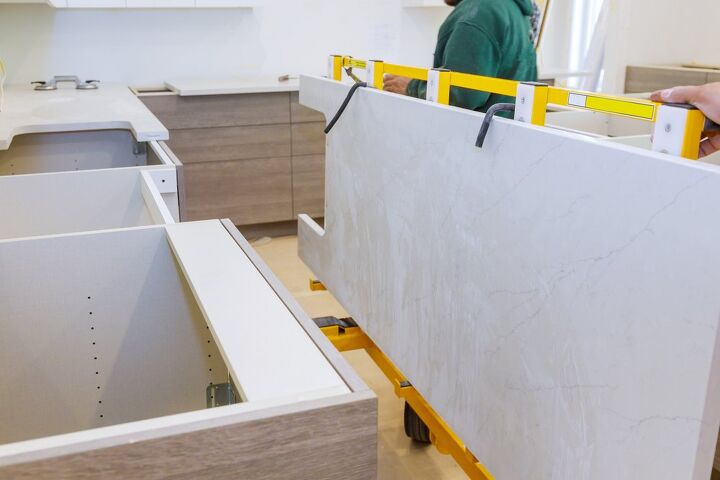
Remove the granite countertop from the kitchen in an upside-down position whenever possible. Make sure you don’t scratch the particleboard or the cabinet support.
When it comes to removing granite, you must proceed with caution. Remove the granite countertop from the kitchen in an upside-down position whenever possible.
The reverse side of the granite countertop should be turned first. You must protect the countertop by padding it with any form of padding or a blanket when turning it upside down. Place the granite on the floor rather than slide it across an open area.
Do You Need Countertop Installers?
Get free, zero-commitment quotes from pro contractors near you.
Consider Hiring A Professional
Removing granite countertops is a time-consuming DIY project, but it’s advisable to employ a professional if you don’t have the time or don’t feel comfortable doing the task yourself.
For labor and supplies, you may expect to pay anywhere from $1,000 to $2,500 when removing granite countertops. The cost will be determined by the counter’s size and the quantity of destruction required. It will also depend on the installation time as well as the cost of installing a new type of countertop.
Also, take into consideration anything that gets damaged in the process such as hardware, or nearby structures, and the cost to replace those as well. Some hardware will come with the cost of hiring a professional.
Always ask the contractor what is all included in the price so that you know what to expect. That way, you’re not surprised by any out-of-pocket fees or additional costs along the way. This helps cut back on the stress of an already stressful situation.

Heather is a passionate writer who loves anything DIY. Growing up, she learned everything from home repairs to design, and wants to share her tips with you. When she's not writing, she's usually hiking or searching for her next DIY project.
More by Heather Robbins


![Standard Dining Room Table Dimensions [for 4, 6, 8, 10 and 12 People]](https://cdn-fastly.upgradedhome.com/media/2023/07/31/9074335/standard-dining-room-table-dimensions-for-4-6-8-10-and-12-people.jpg?size=350x220)

