


What Causes A Water Heater Relief Valve To Open?
Water heaters are not as simple as many people believe. The controls and safety mechanisms built into modern water heaters prevent catastrophic accidents common in homes and businesses with older style water heaters. Many people wonder what causes a water heater relief valve to open.
The two most common reasons that your water relief valve would open are: If the water temperature in your water heater tank exceeds 210 degrees Fahrenheit. Also, if the internal pressure of the water heater exceeds 150psi. Several other issues could lead to the valve opening, but these are the most common.
Many issues can cause a relief valve to open. Some are related to failures in the other safety systems on the water heater. There can be issues with scale buildup inside the tank of the water heater. Of course, the relief valve may be faulty and need replacement.
Don't want to do it yourself?
Get free, zero-commitment quotes from pro contractors near you.

What’s Going on Inside the Water Heater
Understanding what is happening inside your water heater is key to the relief valve question. Part of the safety systems on your water heater is several sensors. One of these sensors checks the temperature of the water in the tank. When the temperature reaches a preset level, the sensor instructs the heating element to turn off.
As the water in the heater tank rises in temperature, the water expands. Rising heat causes a pressure rise in the tank. Water heater tanks easily resist this pressure rise to a point. If the pressure rises above a certain point, the tank can explode violently.
Temperature and Pressure – Hand in Hand
Temperature and pressure go hand in hand in a confined space like a tank. Raise the temperature and the pressure rises. Raise the pressure and the temperature rises. It’s all physics. The key is to control them.
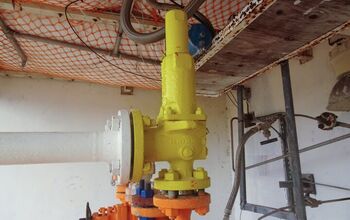
The Relief Valve – A Mechanical Backup
New water heaters have internal electronic controls to keep the temperature and pressure within a narrow range when operating. Unfortunately, everything is subject to failure at some point. Safety is why most plumbing codes require a relief valve installation on any water heater.
Inside the relief valve is a thermostatic element. At about 210 degrees Fahrenheit, the element opens the relief valve. There is also a spring element that will open the valve if the pressure exceeds about 150 psi.
So, What Could Be Wrong if the Relief Valve is Opening?
Several possible problems may cause a water heater relief valve to open. Each should be investigated thoroughly and fixed. If the relief valve is opening and closing, or if it leaks by, something is amiss with the control systems on the water heater or with the valve itself.
Check the Thermostat Settings
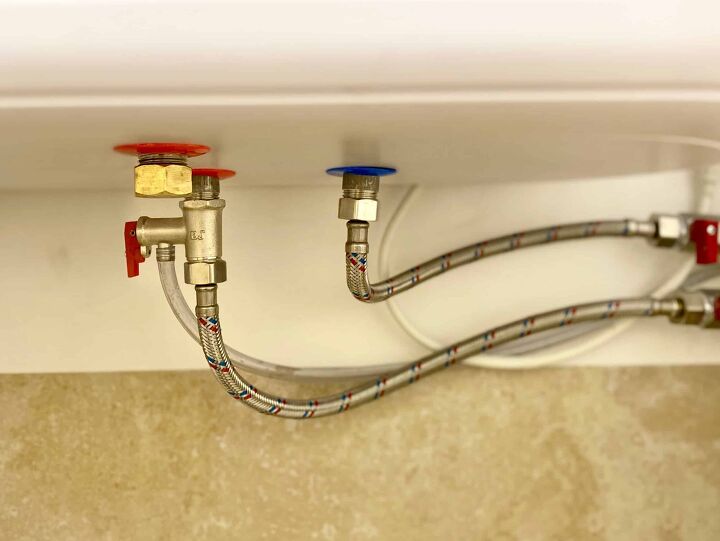
Your water heater has a thermostat, usually attached near the bottom of the water heater. If your water heater is electric, it will be part of the gas control valve. On electric water heaters, the thermostat is usually on a box by itself attached to the water heater.
Check to make sure that the thermostat is correctly set. A thermostat set too high can cause the water heater to raise the temperature above the rated limit and cause the relief valve to operate. Resetting the thermostat to a normal operating temperature often solves the relief valve problem.
Those Noises in the Water Heater Tank
If you notice strange noises in your water heater when the burners come on, you probably have scale or mineral buildup in your tank. While not dangerous, this condition can lead to long term problems. One of these problems is a pressure imbalance in the hot water system. This imbalance can lead to the relief valve opening.
The buildup of minerals in the tank affects your entire plumbing system. The mineral buildup can eventually lead to tank failure and massive leaks. A relief valve that opens occasionally is the least of the dangers if your water heater suffers from mineral buildup.
Checking your Relief Valve
Any mechanical device is subject to failure over time. A mechanical relief valve is no different. If your relief valve begins to open regularly and everything else is operating normally, you should suspect a bad valve.
Before you jump in and replace the valve, you should check the operation. Operating the relief valve may solve the problem by breaking up the scale built up in the valve. Manually checking the relief valve is not difficult
Step 1 – Get Prepared
Gather the things you will need to do the relief valve test.
- A bucket to catch the water when you open the relief valve
- Rags
Step 2 – Get Everything in Position
Place the bucket under the discharge tube on the relief valve. If the relief valve empties into a drain or outside, you don’t need the bucket. If the drain is next to the water heater, stuffing a few rags around the opening will help prevent splashing hot water when the valve opens.
Step 3 – Open the Valve – Carefully
Put on your gloves for safety. We also recommend that you wear eye protection as well at this step. Remember, you are dealing with hot water under pressure. Lift the handle on the valve until water begins to flow. Work the valve open and closed a few times to loosen and scale buildup.
Snap the valve fully closed and make sure that the water flow stops. If the water continues to trickle buy or the valve will not stay closed, it is faulty and needs replacing.
Replacing A Bad Relief Valve
Replacing a faulty water heater relief valve is well within the scope of most home DIY’ers. Following the proper steps can have your water heater up and operating normally with ease.
Step 1 – Do the Job Safely
Before you do anything, turn off the fuel or electricity to the water heater. Close the gas valve or open the breaker at the service panel. Turning things off prevents accidents that could injure you or damage your water heater.
Step 2 – Get the Parts and the Tools
You will need to assemble all the parts and the tools before you start. Having everything you need will make the job go much quicker and with less frustration.
- The replacement valve
- Parts to replace or repair the drain tube
- A crescent wrench
- Plumbers Teflon tape
- Gloves
- Eye Protection
Step 3 – Open the Relief Valve Carefully
Remember that the water in the tank may still be under pressure and can be hot. If your drain line doesn’t run to a drain or outside, put a bucket under the tube. Slowly open the relief valve and let it run until the water flow stops.
Step 4 – Remove the Drain Line
If your relief valve has a drain line, unscrew it from the relief valve. In some cases, this may require that you cut the drain line. You should be prepared with the proper fittings and materials to repair the drain line.
Step 5 – Remove the Relief Valve
Using the crescent wrench, carefully remove the relief valve from the water heater tank. If the relief valve has mineral buildup or corrosion, it may take some effort to get the valve to turn.
Step 6 – Clean the Threads on the Tank
A small wire brush is a useful tool for cleaning the threads on the opening where the relief valve enters the tank. There may be scale buildup, corrosion, or Teflon plumbers tape still in the threads. Make sure the threads are clean and free of debris.
Step 7 – Install the New Valve
Apply Teflon plumbers tape to the new valve threads. Apply the Teflon tape in the same direction as the threads. On most valves, this is clockwise.direction. Carefully thread the new valve into the opening on the tank. Use the crescent wrench to tighten the valve into position.
Step 8 – Replace the Drain Line
Repair or replace the drain line on the relief valve. Don’t forget to apply Teflon tape to any threaded joints. If you had to cut the drain line, make those repairs as needed.
Step 9 – Turn on the Water Supply
Turn on the cold water supply to the water heater. Give the water heater tank time to refill and check your work for leaks. If you spot leaks, go back, and redo the installation and make sure the Teflon tape is properly applied.
Step 10 – Return your Water Heater to Operation
If you don’t have any leaks, it is time to get things back to normal. With the cold water supply on, relight the pilot light if necessary. If your water heater has an ignitor, follow the directions on the water heater to reset the control valves. If the water heater is electric, turn the breaker on at the service panel.
Step 11- Wait and Check Again
Give the water heater time to bring the water in the tank back to the operating temperature. Make sure the thermostat is set properly at 120 degrees Fahrenheit. Once the water temperature is up, check the fittings for leaks. It is also a good idea to operate the relief valve a few times to ensure it is operating properly.
Don't want to do it yourself?
Get free, zero-commitment quotes from pro contractors near you.
When the Relief Valve Operates, Investigate
A relief valve that is operating on a water heater is a sign of something wrong. The water heater needs examination and the problem diagnosed. A quick repair or adjustment can prevent major problems further down the road. We hope that this article gives you the insight to diagnose and fix any problem with your water heater.

Dennis is a retired firefighter with an extensive background in construction, home improvement, and remodeling. He worked in the trades part-time while serving as an active firefighter. On his retirement, he started a remodeling and home repair business, which he ran for several years.
More by Dennis Howard


![How Much Weight Can a 4×4 Support Horizontally? [It Depends!]](https://cdn-fastly.upgradedhome.com/media/2023/07/31/9070333/how-much-weight-can-a-44-support-horizontally-it-depends.jpg?size=350x220)


