Radon Mitigation Cost [By System & Foundation Type]

Not everyone is aware that an invisible substance found in many homes can put us at risk of developing a disease. The invisible substance we’re talking about here is radon and the disease in question is none other than lung cancer. You must do what you can to keep your household safe from that potentially deadly substance.
So, what can you do to protect yourself and your family from the dangers of radon? Investing in a radon mitigation system that suits your home properly is an ideal step to take. Just be prepared because setting up your radon mitigation system at home can be a significant expense.
On average, installing a radon mitigation system inside your home will cost $1,100. Basement sealing is similarly critical to effective radon mitigation and professionals charge an average of $4,500 to perform that service. Sealing the basement yourself will cost $700. Regular radon testing is recommended after the mitigation system is installed and that costs an average of $180.
If you have radon in your home, you and your loved ones are constantly being exposed to danger. Do something about that by installing a radon mitigation system. Find out what radon mitigation system you need and how much it will cost by reading on.
Cost of Radon Mitigation by Foundation Type
The average cost of installing a new radon mitigation system is $1,100. However, that number will change significantly depending on the type of foundation your home uses.
Home foundations are classified into three different types. You have homes that come with a crawlspace in their foundation. Others have basements. The last type is the slab-on-grade design wherein the concrete is poured at ground level per the Environmental Protection Agency.
Notably, you can use the same radon mitigation systems for homes that feature either a basement or a slab-on-grade design. You have numerous options to choose from and we’ll get to them a bit later in this article.
If your home has a crawlspace, a different mitigation method may be required to generate the best results. You still can choose from different methods of mitigating the radon in your crawlspace, but one method is often recommended.
It’s also possible that your home features different foundation types. In that case, you must adjust and select a mitigation system that works with all of them. Otherwise, you may be unable to remove radon in certain parts of your home.
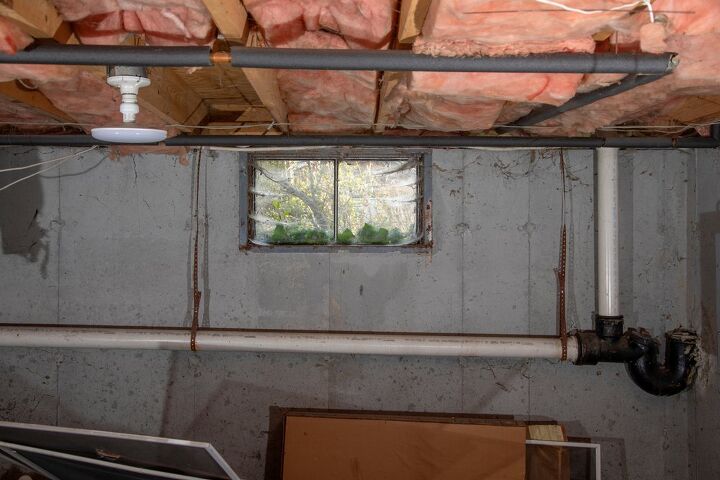
Cost of Sealing a Basement
| Method of Sealing the Basement | Cost |
| Professional Sealing | $4,500 |
| DIY Sealing | $700 |
Sealing your basement is important if you want to reduce the radon levels in your household. There are two ways to handle that aforementioned task. First off, you can get your basement professionally sealed for an average price of $4,500.
Professionally sealing a basement costs that much because there is some risk involved. On top of that, the project can take a lot of time to finish.
If you aren’t keen on spending that much to get your basement sealed, you can take on it as a DIY project. Going the DIY route lowers the average cost of basement sealing significantly.
To get enough of the product needed to seal your basement, you will only have to spend $700. We’re saying “only” because the alternative is so expensive.
Make sure you protect yourself adequately if you’re sealing the basement yourself. You may have to spend extra to get the pieces of safety equipment needed for this job.
Cost of Radon Mitigation Systems That Use Depressurization
| Depressurization System Type | Cost |
| Active Sub-Slab | $2,000 |
| Block Suction | $2,300 |
| Drain Tile Suction | $1,300 |
| Passive Soil Suction | $1,500 |
| Sealed Sump Pump Hole | $1,600 |
| Crawlspace Sub-Membrane | $1,900 |
Homeowners have a few options to choose from in terms of what radon mitigation system to install. Depressurization systems are the most common. They also cost an average of $1,800.
You will have quite a few options to choose from if you decide to install a depressurization system. They get the radon away from your home in different ways.
So, which type of depressurization system should you select? Come up with your answer to that question by reading up on the available options below.
Active Sub-Slab Depressurization System
First off, we have the active sub-slab depressurization systems. This type of system costs an average of $2,000.
An active sub-slab depressurization system relies on a continuously running radon fan. The job of the radon fan is to create a vacuum underneath the foundation of your home.
The vacuum is responsible for keeping the radon away from your home. A PVC pipe is also installed and it directs the radon away from your home and disperses it over an empty area.
Notably, an active sub-slab depressurization system can work for just about any type of home. It doesn’t matter if you have a crawlspace, basement, or a slab-on-grade foundation because this system will help you out.
Block Suction System
Next up, we have the block suction systems that remove radon gas from your home. They are the most expensive depressurization systems as they cost an average of $2,300.
A block suction system takes a unique approach to radon removal. This time around, the installers lay cinder blocks in the hopes of removing as much radon as possible. The blocks will be lined up in such a way that suction will exist between their walls.
You can expect some good results from a block suction system, but most homeowners avoid using it. Compared to other options, the block suction system is simply not that effective. Combine that with the high price tag and you can understand why homeowners opt for the alternatives.
Drain Tile Suction System
Installing a drain tile suction system is another way to remove radon from your home. It’s a relatively affordable option too as it costs an average of $1,300.
A drain tile system is not going to work for every home. That’s because they need to be paired with drain tiles to work properly.
This radon mitigation system connects with the drain tiles around your home and proceeds to create a suction field. The suction field will exist underneath the foundation of your home. Given how affordable it is, many homeowners do end up choosing the drain tile suction system.
Passive Soil Suction System
Another option for you to consider if you want to remove radon from your home is a passive soil suction system. This type of radon mitigation system costs an average of $1,500 to install.
Passive soil suction systems closely resemble the active sub-slab depressurization systems we discussed earlier. That’s because they both rely on PVC pipes to move the radon gas out of your home.
The difference this time around is that the passive system does not use any fans. Instead, it relies on your home’s ventilation system and the natural movement of air to remove the radon.
Passive systems do not work in homes that already contain plenty of radon. The passive system will struggle if it has to deal with too much of that gas.
Sealed Sump Pump Hole System
Do you have a sump pump protecting your basement from flooding? If so, you can also install a sealed sump pump hole system to get rid of radon. A new sealed sump pump hole system will cost $1,600.
Sealed sump pump hole systems work close to where the pump is to create the suction needed. The suction remains underneath the foundation and it effectively removes the radon gas.
The main issue with a sealed sump pump hole system is that it must work together with an existing sump pump. You should look at other options if you don’t have a sump pump already.
Crawlspace Sub-Membrane Depressurization System
Last up is an option reserved for homes with crawlspaces. It’s known as the crawlspace sub-membrane depressurization system and it costs an average of $1,900 to install.
The crawlspace sub-membrane depressurization system is similar to an active sub-slab system. Both systems rely on radon fans and pipes to remove the radon from your home.
The difference is that this system also involves the usage of a plastic vapor barrier. That plastic vapor barrier blocks potential entry points that the radon can pass through. Since there are no walls to serve as a barrier, you have to rely on that plastic covering instead.
Cost of Radon Mitigation Systems That Use Lower-Level Pressurization
Depressurization is not the only way to remove radon gas from your place of residence. You can also lean on a pressurization system to get the job done. The average cost of a new lower-level pressurization system that removes radon is $750.
The appeal of using a lower-level pressurization system is apparent immediately. After all, it’s cheaper than all the depressurization systems we already talked about.
A lower-level pressurization system works by blowing air into your basement. Blowing that air into the basement is supposed to prevent radon from entering your home.
The problem with a lower-level pressurization system is that it isn’t compatible with all types of homes. You must have an airtight basement if you want to use it. If you don’t have an airtight basement, this radon mitigation simply will not work.
Cost of Radon Fans
This last type of radon mitigation system is not meant for standalone. Rather, it’s something you install if you already have an existing radon mitigation system and you want to enhance it. To get a new radon fan added to your mitigation system, you will have to spend $200.
Just to be clear, you’re paying $200 for a single fan. If you need multiple fans, then you have to adjust your spending accordingly.
Buying a radon fan makes sense if you installed a passive suction initially. After discovering that the passive system is struggling, you can introduce a fan to the system to boost its performance. In essence, you’re turning your passive system into an active system.
Also, note that pairing a radon fan with a suction monitor is highly recommended. Doing so will help you assess how effectively the fan is working. A new suction monitor for a radon fan costs $15.
Cost of Radon Testing
| Radon Testing Method | Cost |
| Short-Term Testing Kits | $20 |
| Long-Term Testing Kits | $100 |
| Water Testing | $200 |
| Professional Radon Testing | $400 |
How can you tell that your chosen radon mitigation method is working? The best way to do that is to have your home’s radon levels tested regularly. Radon testing will cost an average of $180.
Similar to radon mitigation, there are also different ways to test for your home’s radon levels. The testing methods vary in terms of how they are carried out, how much they cost, and how effective they are. Choose your preferred radon testing method after reading through this section of the article.
Short-Term Testing Kits
Short-term testing kits are the most affordable options for testing your home’s radon levels. They only cost $20 each.
In addition to being affordable, short-term radon testing kits are also the most accessible. You should be able to find them in hardware stores and even the larger supermarkets usually have them in stock.
To use a short-term radon testing kit, you will have to leave it in the lowest part of your home. It has to stay there for at least two days.
Once enough time has passed, you can send the results of the test to the appropriate receiver. The results will then be sent over to you after a short while.
Short-term testing kits are appealing because of their affordability and accessibility, but their accuracy leaves a lot to be desired. If you want accurate results right from the start, you should consider using a different testing method.
Long-Term Testing Kits
Long-term radon testing kits are also available. These kits cost way more than their short-term counterparts. On average, you will be paying $100 for a long-term testing kit.
Two types of long-term radon testing kits are available. The first type is the passive testing kits.
The passive testing kit will use a plastic strip to gather samples for up to a year. You should know that some kits can already produce results after three months. Still, you will have to wait a while before you can find out what those results mean.
Your other option is an active testing kit. An active testing kit uses digital sensors to measure the radon levels in your household. Active testing kits can produce results immediately, but they also require frequent maintenance.
Generally speaking, active testing kits are more accurate than short-term testing kits. That accuracy is a big reason why many homeowners opt to use active testing kits right away.
Water Testing
Getting your water tested is another way to determine the radon levels inside your home. Expect to spend $200 if you want to get your household’s water tested for radon. That will include the kit you will need to purchase to initiate the testing process.
This testing process involves gathering some water using the kit you purchased. You can then send that kit to the appropriate laboratory to get analyzed.
Water testing consistently yields highly accurate results. That’s the main reason why homeowners are willing to deal with the cost and hassle associated with using it.
Professional Radon Testing
Finally, you also have the option of paying for professional radon testing. The aforementioned service costs an average of $400.
You may be wondering why anyone would pay the steep cost of professional radon testing. After all, there are alternative methods that only cost a fraction of professional testing’s price.
Homeowners are okay with paying that price because professional radon testing almost always includes radon inspection. You may already suspect that radon is leaking into your home, but you’re not 100 percent certain just yet. In that scenario, paying for professional radon testing makes a lot of sense.
The professionals can come over and test your property for radon. After they do that, they can inspect your home and search for the source of radon. $400 is a steep price for sure, but it can be worth it given the services provided.
Cost Factors for Radon Mitigation Systems
We’ve already talked at length about how much different radon mitigation systems cost. However, the type of mitigation system you’re getting is not the only factor that affects how much you’ll have to spend.
Detailed in this section are the other factors that affect price points for radon mitigation systems. Remember them as you shop for your new radon mitigation system.
Location of Your Home
Where you live will greatly affect the final price point for your radon mitigation system. This isn’t just about the cost of living and installation expenses either.
The climate in your area will determine which radon mitigation system will work best for your home. Because of the climate, the most affordable options may not be viable in your area.
Restrictions in your area may also limit the options available to you. Hopefully, you will be able to take your pick from all the available radon mitigation systems available. At the same time, you should be ready to pay more because your options are very limited.
Design of Your Home
We already touched on this earlier, but your home’s foundation will determine the type of mitigation system you must use. Homes with basements and slab-on-grade foundations are typically compatible with numerous radon mitigation systems. Options are not as plentiful for homes that have crawlspaces underneath.
Installing a radon mitigation system may prove even more expensive if your home has different foundation types. Accommodating your home’s different foundations may lead to your expenses doubling.
Permits
Before installing your new radon mitigation system, make sure that you already have the necessary permits in order. The last thing you want is to start the project only to find out later on that you’re being fined. The permits required for installing a radon mitigation system normally cost $90.
You should talk to the professionals about the issue of permits. Permits are not required in all parts of the country. See if you can save some money by clearing up the rules and regulations in your area first.
Electricity Costs
Operating a radon mitigation system year-round may cause your monthly expenses to spike. Your electric bills in particular are likely to increase due to the radon fans. Don’t be surprised if you’re paying $350 more per year on your electric bills after installing the radon mitigation system.
You can go with radon mitigation systems that don’t use fans to cut down on your energy consumption. However, you may need those fans to effectively remove the radon from your household.
How to Find Radon Mitigation Contractors
Installing a radon mitigation system is a specialized job. You cannot entrust it to just any contractor or electrician. This type of project must only be handled by radon mitigation contractors.
So, how do you find a radon mitigation contractor? You can start by contacting one of three agencies.
Go online and look for either The American Association of Radon Scientists and Technologists or the National Radon Safety Board. Both agencies should have listings that detail the certified radon mitigation contractors in your area.
You can also search for the radon program in your state. Check that resource for a list of radon mitigation contractors who operate near your home.
Related Questions
Should I Walk Away from a House with Radon?
Is the home you’re looking to purchase plagued by a radon problem? If it is, should you consider looking at a different property instead?The decision is ultimately up to you, but you should check with the seller first. Ask them what they intend to do about the radon problem. Will they remove the radon themselves or are they selling the property without addressing that issue?If a seller says they will deal with the radon issue, then moving forward with your purchase should be fine. Just get the property tested after the new mitigation system is installed to ensure that it’s working as intended.
Can Opening Windows Reduce Radon?
Yes, opening your windows can reduce radon levels in your home. You specifically want to open the windows in the part of your home that has the highest concentration of radon. That often means keeping the basement windows open.Still, opening the windows to reduce radon is nothing more than a temporary solution. Your basement will fill up with radon again if your windows are closed. Homeowners seeking a long-term solution to their radon-related problems should still look to install a mitigation system.
How Long Does It Take to Install a Radon Mitigation System?
Installing a radon mitigation system is a job that can be completed fairly quickly. The whole project usually only takes a day to complete. Contractors may need two to three days to finish the project if they have to install multiple mitigation systems.
Gary Evans is passionate about home improvement. He loves finding out how to make improvements in the easiest, most practical, and most affordable ways. Upgrading his home kitchen is one of his ongoing hobbies. Gary is also a long-time content creator and enjoys spending his free time tending to his hydroponic vegetable garden.
More by Gary Evans


![10 Best Scroll Saws for 2022 [Ultimate Reviews & Buyer's Guide]](https://cdn-fastly.upgradedhome.com/media/2023/07/31/9070684/10-best-scroll-saws-for-2022-ultimate-reviews-buyer-s-guide.jpg?size=350x220)