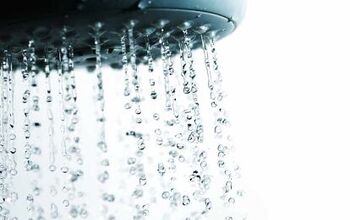
No Cold Water In The Shower? (We Have A Fix)

The only thing worse than a freezing cold shower is a scalding hot one. While many are familiar with the issues of no hot water in the shower, the opposite is also possible: no cold water. As summer approaches, you are going to want to enjoy a cool shower, especially if prefer not to run your air conditioning all day long.
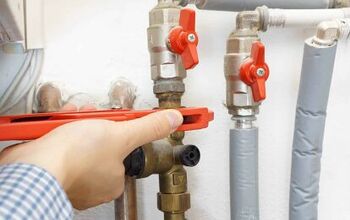
If you have a lack of cold water in your shower, you’ve come to the right place. To fix this issue, you will need to do some investigating in the inner workers of your shower system. No cold water in the shower is generally due to a faulty pressure-balancing valve in a shower cartridge. Located inside the shower faucet, this part can be replaced with the assistance of a few tools. Replacing the defective shower faucet should help restore cold water to your shower.
Do You Need to Hire a Plumber?
Get free, zero-commitment quotes from pro contractors near you.

No Cold Water In Shower?
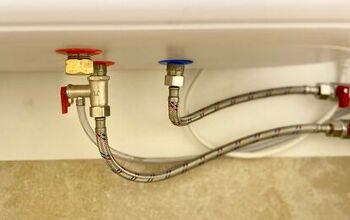
The first step in troubleshooting a shower with no cold water is to check all of the other faucets in your home. This will allow you to determine if the issue is happening in just one shower, or the entire house. If you discover that all of your other fixtures also don’t have cold water, it’s likely attributed to a shutoff valve in the main water supply being shut off. To correct this issue, simply turn the valve back on and proceed with your shower.
If this doesn’t correct the lack of cold water in your whole house, you may need to call in a professional. However, if the other faucets do have cold water and just the shower does not, it’s probably an issue with the pressure-balancing valve.
Pressure Balancing Valve Malfunction
The pressure-balancing valve in your shower’s faucet is designed to regulate water pressure and the ratio of cold and hot what the flows from the showerhead. Over time, mineral buildup and corrosion can devastate a shower cartridge. This is most often occurs in showers that aren’t used on a daily basis or if your water quality is low.
Put simply, if your shower isn’t turned on very often, corrosion buildup with clog the pressure-balancing valve in the cartridge. With a defective valve, there is no balance between hot and cold water, effectively preventing the cold water from coming out of your shower head.
Your best course of action is to replace the entire cartridge. To do this, you will need to acquire a special tool designed for this purpose: a cartridge puller. With this tool, you can replace the cartridge yourself. Or, if you don’t feel comfortable, you can call in a certified professional to perform the replacement for you.
How to Replace a Shower Cartridge
The first step in replacing a faulty shower cartridge is to purchase a new one at your local hardware center or from an online retailer. To ensure that you select the right replacement cartridge, consider bringing the old one along with you to the store. Although there are other alternatives, this job is performed easiest by using a cartridge puller, which can also be purchased from a hardware store.
All of the tools you’ll need to successfully replace your shower cartridge are as follows:
- Flathead and Phillips screwdriver
- Allen wrenches/ Hex keys
- Needle-nose pliers
- Plumber’s grease or silicone
- Locking pliers
- Cartridge puller
- New shower cartridge
11 Steps to Replacing Your Shower Cartridge
Once you’ve collected all of the necessary materials, you can proceed with the replacement. Follow these steps to successfully remove your old shower cartridge and install a new one. Use this procedure in conjunction with any recommendations from your cartridge puller or faucet manufacturer.
- Shut off the main water supply to the applicable shower faucet.
- Cover the shower drain to ensure that small components don’t fall down the drain and get trapped.
- Remove the shower handle and the metal cover under the faucet handle by unscrewing the screws holding them in place. This will reveal the valve stem extended out from the shower wall.
- Take a photo of the inside assembly of the faucet; this will be very helpful when it comes time to put everything back together.
- With a pair of needle-nose pliers, free the retainer clip from the top of the valve body.
- Pull on the valve stem to release it and set aside. By removing the valve stem you will expose a space inside of the valve body. The cartridge will now be visible lining the wall of this space.
- Using the cartridge puller, detach the cartridge from the faucet. But first, you’ll need to remove the pin that is holding the cartridge in place. If you don’t, the cartridge will never come out. There are different types of cartridge pullers and all will function in different ways. Follow the manufacturer’s instructions to ensure that you are using your particular model correctly.
- Before you proceed, use a cleaning solution and a small scrub brush to dissolve any corrosion or mineral deposits inside.
- Line both the new cartridge and the inside of the valve body with plumber’s grease to ensure that the new cartridge will fit easily into the valve body.
- Insert the new cartridge into the valve body and consult your reference photo to reinstall the parts of the faucet that were previously removed.
- Finish off by turning on the water supply and test to verify that you now have cold water!
Quick Tip: One common mistake that occurs during the replacement of a shower cartridge is that homeowners only pull out the stem. This is not the entire cartridge. After you successfully remove it, it will be a much larger and wider pipe-like device.
Replacing your shower cartridge can be a rather ambitious do-it-yourself project. If you discover that the hot and cold water have been switched after reinstalling the faucet, this is a good indication that the cartridge was placed into the faucet backward. To correct this, simply remove the cartridge, turn it in the appropriate direction and secure it back in the valve body. When in doubt, you can always call in a professional to perform the work for you. Regardless, after installing a new shower cartridge, you should have a balanced ratio of cold and hot water.
Alternative to Cartridge Puller
Don’t have a cartridge puller and don’t want to purchase one? Or, if your shower cartridge is really stuck in there, you have alternatives. You can actually perform the replacement using a tool called a tap and a bolt of the same size. Once you’ve removed the pin holding the cartridge in place, remove the stem of the cartridge. Then, you’ll need to tackle the rest of the device.
To remove the rest of the cartridge, use a tap to thread the inside of the cartridge. The tap must be larger than the inside of the cartridge so that it can cut into the metal inside. Insert the tap and twist clockwise and then counterclockwise to thread the cartridge. Some may be able to get the cartridge to spin while threading it. If it’s especially stubborn, you will need to continue with the bolt.
Remove the tap and attempt to screw the bolt into the threads you created inside the cartridge. Use a wrench to tighten the bolt inside. Continue tightening until the cartridge spins freely inside of the faucet. At this point, you can use a pair of pliers to grip onto the bolt and pull out the cartridge. Then, proceed with the replacement as described above.
Do You Need to Hire a Plumber?
Get free, zero-commitment quotes from pro contractors near you.
Related Questions
Why is there no hot water in my shower?
On the other end of the spectrum, you could be experiencing a lack of hot water in your shower. If you’re getting hot water everywhere else in your home except your shower, either the shower mixer valve is faulty or the anti-scald device is set too high. The anti-scald device, or hot limit stop, is a safety feature most likely located directly under your faucet head. If this is the problem, you can simply make small right turns to the device until the temperature is to your liking.Not all showers have this feature, though. In this case, your shower mixer valve may be defective and will prevent the hot water from mixing properly with the shower water. Sometimes these devices break down, wear out, or are positioned incorrectly. If this is the culprit, your best bet is to have the shower valve repaired or replaced by a professional.
How much does it cost to replace a shower cartridge?
When you handle the replacement of a shower cartridge yourself, you’ll only need to pay for the cartridge material alone. Depending on the amount of tools you already have on hand, need to buy, and the brand of the cartridge, this replacement will typically range anywhere from $30 to $100.However, if you elect to have a professional perform the job, the cost depends on a variety of factors with the average labor cost being between $100 and $250. In addition to labor, you will also have to pay for the cost of materials when you hire a professional.

Jessica considers herself a home improvement and design enthusiast. She grew up surrounded by constant home improvement projects and owes most of what she knows to helping her dad renovate her childhood home. Being a Los Angeles resident, Jessica spends a lot of her time looking for her next DIY project and sharing her love for home design.
More by Jessica Stone


![How To Reset A Whirlpool Cabrio Washer [In 5 Easy Steps!]](https://cdn-fastly.upgradedhome.com/media/2023/07/31/9076531/how-to-reset-a-whirlpool-cabrio-washer-in-5-easy-steps.jpg?size=350x220)