Low Water Pressure In The Kitchen Sink? (Common Causes & Fixes)

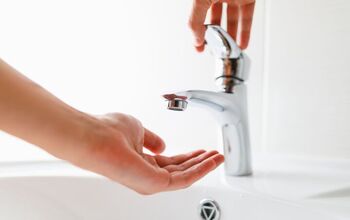
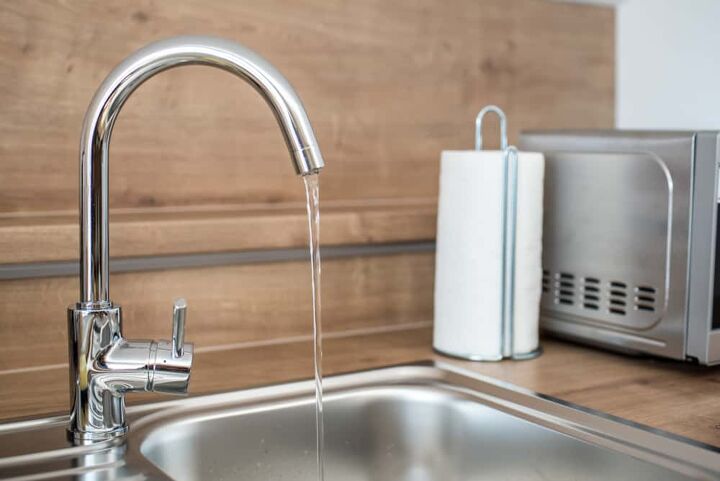
Finding low water pressure at the faucet in your kitchen is always a cause for concern. The problem could be a simple thing, like a closed valve or a blocked faucet. Or, something more serious could be at play, like a leak.
In most cases, low water pressure in a kitchen sink is caused by a clogged aerator or cartridge. To check the aerator, unscrew and remove it from the sink. If there is build-up, let it soak in vinegar overnight. If your cartridge has build-up, you can soak it in vinegar or replace it.
Do You Need to Hire Sink Installers?
Get free, zero-commitment quotes from pro contractors near you.

How Do I Check the Water Pressure?
The first step is to figure out if all of your faucets have low pressure. Look for specific faucets that have low water pressure. Check the obvious places like your kitchen and bathroom, but also the basement, laundry sink, and any faucets you might have outside (including your hose hookup).
You will want to test each area separately. First, run the water in each faucet as well as your shower or bathtub to determine if the problem is localized to just one faucet. This will help you determine the nature of the problem that you are facing.
Be sure to run the hot and the cold separately through each faucet you test. This will help you narrow down the cause of the problem because there is an entirely separate network of pipes for the hot water.
Common Causes of Low Water Pressure in Your Kitchen Sink
The first, and easiest, thing you’ll want to check, are the valves underneath the sink. Make sure they haven’t been bumped accidentally and turned down. This can happen, especially when storing items under the sink, and there’s really no need to do a bunch of diagnostic testing when all you need to do is turn them back up.
Aerator
The next most common cause of the water pressure being too low in your kitchen sink is a small piece called the aerator. This is a small fitting at the tip of the faucet, shaped like a small screen.
They are put there to add oxygen to the water by breaking it up as it flows through. They also catch small particles that make their way into the stream of water. Occasionally, they take this job a little too seriously.
Over time, aerators can build up with deposits of minerals, or become clogged from the particles they are designed to stop. This is one of the easiest problems to fix.
Cartridge
If checking the aerator doesn’t uncover the problem, the cartridge might be clogged. The cartridge is further inside the faucet. Most faucets installed today have a cartridge, and, just like the aerator, they have holes that the water flows through. Cartridges often get clogged after extended use.
Blockages
Following the aerator and the cartridge, the next thing you might want to check is whether the faucet or pipes have blockages.
If the faucet has been recently installed, and/or is brand new, it’s possible there is something stuck in the pipe from installation. If you have a faucet that has been there for an extended period of time, you may have a hard mineral build-up. If this is the case, you might want to flush the lines.
It also may be that you have blockages inside the actual pipes. There are tests below that help you determine if this is the case.
Hot Water Heater
You might find that you have low water pressure only when running the hot water. IF every faucet has low hot water pressure, you likely have a problem with the hot water heater.
If, however, the problem is localized to the hot water only in your kitchen, and you’ve flushed the lines and the problem persists, you may have a clogged hot water line in between the hot water heater and the kitchen faucet.
Troubleshooting
Now let’s figure out the best plan of attack, depending on where the problem is.
Single Faucet
If the problem occurs with a single faucet, the problem is likely the aerator or cartridge. It can also be a blockage or leak in the line leading up to the faucet.
Faucets Along The Same Wall
If you have multiple faucets along the same wall, and all are experiencing low pressure, it’s safe to assume it’s not an aerator or cartridge problem (unless you have notoriously hard water, then there’s a small chance).
There’s probably a problem with a blockage or leak somewhere along the pipe that supplies water to all of those faucets. If you know you have older pipes, the blockage could be rust in the pipes. If it’s hot water only and localized to only the faucets on that particular wall, there’s a good chance it’s a clogged hot water pipe between the hot water heater and the pipe that supplies the hot water to that wall.
All Faucets
When you notice that the low water pressure is affecting all the faucets in the home, and you’re getting low pressure from both the hot- and cold-water taps, the source of the problem could be a couple of things.
First, ask the houses nearby if they’re experiencing the same thing. If others report low-pressure issues, it might be the problem of the water department. Check this first, as knowing that it’s a broken water line will rescue you from the hassle of trying everything else.
If you are using a well, you might have an issue with the pump that regulates the pressure. Check the gauge on the pump, if you see a reading below 40 PSI and you know the pump is active, you’ll know you have a leak within the water lines or the pump.
Solutions For Low Water Pressure
If you are experiencing low water pressure in a single faucet, you should start by checking the aerator.
Fixing the Aerator
- Start by making sure the plug is in place inside the sink, just in case any small pieces fall out by mistake.
- With some faucets, the aerator can be unscrewed with your hands. If not, or if you have an aerator that is recessed, you will need a specialized tool to remove it. These are called channel lock pliers. You can find this at your local hardware store. You might also want to use tape or a rag to protect the finish on the faucet. Unscrew it by whatever means are required.
- Once it’s removed, have a look at the aerator. Does it have any mineral build-up or debris?
- Turn the faucet on and let it run. Did the pressure go back to normal? If yes, then you have found your problem.
- Soak the aerator in vinegar overnight. In the morning use a soft-bristled scrub brush to get rid of anything that remains, and then rinse the whole assembly with water.
- Put the aerator back in, and double-check the pressure.
If the aerator was not the source of the problem, check the cartridge.
Checking the Cartridge
- Under the sink, turn the water off. You’ll usually see two valves used to shut off hot and cold water separately. After turning the water valves off, turn on the water faucet and let it run until all the water is out.
- Locate the screw cap and the screw that are holding the faucet down. This will most likely need an Allen wrench.
- Remove the handle on the valve for shut-off.
- Lift the cartridge out, taking out retention clips or washers and nuts carefully. Be sure to keep everything in order so you put it back together the right way. Sometimes taking a picture helps to remember.
- Look at the cartridge. Does it appear damaged? Does it have mineral build-up?
- With the cartridge, it’s generally better to replace it than clean it, though it can be cleaned with vinegar if you’d prefer. If you choose to replace it, be sure to take the old one with you to the store to match the new one.
Assuming the aerator and the cartridge are good, OR if you’re dealing with low water pressure in more than one faucet on the same wall, it’s time to check for blockages in the line.
Checking for a Blockage in the Line
- First, turn the valve for the hot water off underneath the sink. It is usually located to the left. Make sure you put a bucket under it.
- Disconnect the waterline (flexible) from the hot water valve and direct it into the bucket.
- Keeping the temperature in the middle, turn the faucet on full. You should see the water from the line for the hot water flushing inside the bucket.
- Reconnect the flexible hose to the hot water valve and do the same for the line for the cold.
- If you notice the pressure is normal, you know there’s a blockage inside the faucet. If the pressure is still low, you might be able to backflush the pipes to clear the blockage.
If you’ve tried everything above and are still experiencing low water pressure, next you’ll want to check for a leak somewhere. This could occur whether it’s a single faucet, multiple faucets on one wall, or all faucets.
Checking for a Water Leak
- Start by checking all the toilets in the home. Toilets that leak or run are the most prevalent culprits of leaks in the home. Take the lid off the back of the toilet tank. Place some food coloring, or a tablet of dye in the tank. For at least one hour, don’t flush the toilet. If you see the color start to seep into the bowl, the toilet is leaking. This is an easy fix, typically the flapper or filler.
- Next, try checking the service meter to see if the service line is leaking. Find your meter. Write down the meter reading, and check whether or not the triangle-shaped disk or dial that indicates leaks is turning. If it is turning, you’ve found a leak. When it’s not, it doesn’t necessarily mean there is no leak present. A small or slow leak might not appear on the indicator. Do not let any water run for two hours, and then read the meter again. If you see the reading has gone up, water is being lost somewhere, indicating a leak. At this point, you’ll need to call a plumber who can find and repair it.
- You should also check your basement, or under the faucets, for any appearance of water. Listen for the sounds of dripping water. If you do see large spots in your basement that are wet, this could be a leak at the water main. Check the outside of your home as well, where the main pipe meets the city supply. Look around to see if the ground is wet near the path of the water main.
If you find there’s a water pressure problem with all faucets, there are a few steps you can take to check and see what the problem might be.
Checking the Pressure Reducing Valve and Master Valve
- First, check on the Pressure Reducing Valve and the valves for shutting the water off in your home. They are bell-shaped, and typically found on top of the water line where it comes into your house. Try to move the screw clockwise (to increase the pressure) or counterclockwise (to lower the pressure) and see whether it makes any change to your low water pressure. If it’s not doing anything, replace the valve.
- Next, you’ll want to check the valve at the water meter. Even with a small turn, it can really affect the water pressure inside your home. Almost all homes are equipped with a master valve for shut-off. You’ll find it by the Pressure Reducing Valve or in a box by itself close to the water meter. Once you locate it, turn it to open it completely. Test the water again on all the faucets in your home. If you find the pressure is restored, this was likely your problem. If the pressure is still low, this would indicate a probable leak.
Checking the Hot Water Valve
If you find the low-pressure problem is with the hot water only, the most likely culprit is the hot water heater valve for shut-off.
- Ensure the valve is open all the way. All water heaters have a valve to shut it off in the event of an emergency. If this valve is even just slightly shut, it will lower the pressure of your water.
- Check the water pressure of all your faucets again. If the pressure is restored, the valve was your problem.
If the problem with low pressure persists, you might have a problem with the water heater lines or the water heater unit itself. You will need to contact a plumber who can check for line blockages or to replace the hot water heater.
Do not attempt any further work with the water heater, as it is dangerous.
Avoiding Future Issues
There are a couple of ways you can help avoid water pressure problems in the future. If you have hard water, you can install a water softener system. This will help cut down or eliminate mineral deposits that build up on your aerator or cartridge.
Another way is to ensure your toilets do not run excessively or leak by periodically checking them.
When to Call a Pro
There are times when a professional plumber is required to do the job. You may want to call someone from the very beginning if trying to tackle the problem yourself isn’t something that you are up for.
If you determine there’s a problem with your hot water lines or hot water heater, you will definitely need to call a plumber. As mentioned above, working with a hot water heater is dangerous and plumbers know the proper safety protocols.
When you’ve been unable to clear a blockage by backflushing, or you can’t find the blockage, a plumber has special tools and is well-equipped for finding and removing problems efficiently.
Do You Need to Hire Sink Installers?
Get free, zero-commitment quotes from pro contractors near you.

Related Questions
How Do I Increase Water Pressure Without a Pump?
Sometimes your low water pressure has nothing to do with blocks, leaks, or valves. But there are ways to increase the low water pressure.
- Try raising the water tank height
- Locate the flow regulator inside the showerhead and remove it
- Replacing old pipes with larger diameter pipes
There are a few simple ways to increase the water pressure in your shower, besides the ones listed above.
- Remove your shower head and soak in vinegar or another cleaner that removes mineral deposits.
- Replace the old showerhead with a new one.
- Either install yourself or have a professional install a shower pump.
- Hire a professional to install a pressurized cylinder that is unvented.

Benjamin is a proud homeowner who loves to write about DIY projects and home improvement projects. Traveling, perfecting his home, and spending time with his family are just a few of the many things that keep him inspired.
More by Benjamin Wright




![10 Best Zero Turn Mowers – [2022 Reviews & Ultimate Buyer's Guide]](https://cdn-fastly.upgradedhome.com/media/2023/07/31/9070522/10-best-zero-turn-mowers-2022-reviews-ultimate-buyer-s-guide.jpg?size=350x220)
![The 5 Best Angle Grinders – [2022 Reviews & Buyer's Guide]](https://cdn-fastly.upgradedhome.com/media/2023/07/31/9071326/the-5-best-angle-grinders-2022-reviews-buyer-s-guide.jpg?size=350x220)
![How Much Weight Can a 4×4 Support Horizontally? [It Depends!]](https://cdn-fastly.upgradedhome.com/media/2023/07/31/9070333/how-much-weight-can-a-44-support-horizontally-it-depends.jpg?size=350x220)

