How To Install A Chamberlain 1/2 HP Chain Drive Garage Door Opener

Installing a garage door opener allows you to save valuable time whenever you have to leave for work in the morning. It’s a convenient addition that you’ll grow to appreciate greatly over time.
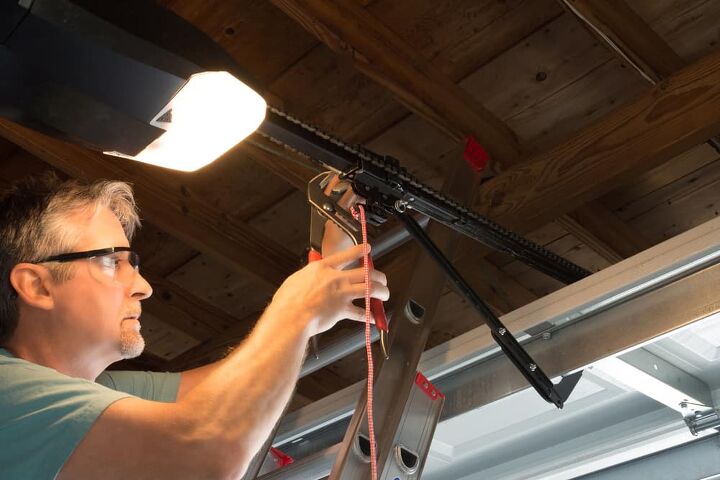
The 1/2 Horsepower Chain Drive Garage Door Opener from Chamberlain is one of the more popular options currently available. It will take time and a good amount of effort to install, but the added convenience and security are worth it.
Start the installation process by assembling the rail, attaching the trolley, and other components to the garage door opener. Once the assembly is complete, you can start mounting the opener onto your garage door using the provided hardware. Finish up by installing the sensors to the sides of the garage door and test them out too.
Garage door openers can be installed professionally, but it’s worth attempting the project yourself if you’re handy with tools. Check out the information in this article if you want to learn how to install a Chamberlain Garage Door Opener yourself.
Do You Need Garage Door Opener Installation or Replacement?
Get free, zero-commitment quotes from pro contractors near you.

Preparations for Installation
Before you proceed with installing the garage door opener, you should check a few things out first. To be more specific, you should check if your garage door is capable of supporting the new addition.
See if there are vertical and horizontal supports installed on your garage door. You need them there to help protect the garage door from potential damage. Consider installing those first if they aren’t on the garage door just yet.
You should also check how the garage door is working. The garage door opener won’t work as intended if the door itself is not balanced correctly. Make adjustments to the garage door as needed. Homeowners should also purchase some support brackets before beginning installation. They are not included in the package, but they will be needed to mount the garage door opener properly.
Assembling the Garage Door Opener
The installation process begins with assembling the garage door opener and its companion components. For this part of the process, you’ll need a screwdriver, some wrenches, and a hammer.
Step 1: Combine the Rails
Get the motor unit and set that down on the floor with some cardboard underneath to protect it. The motor unit should be about 10 feet away from your garage door. Next, retrieve the rail sections from the package and lay them between the garage door and motor unit.
The rail section with the window should be the closest to the garage door and the rail tab must be facing up. You can now start sliding the tapered ends of the rails into the larger corresponding slots. Pick up your screwdriver now and insert that into a hole found along the second rail segment.
Step 2: Mount the Trolley
Take the trolley and slide that into the rail from the motor unit’s side. Keep going until you hit the screwdriver. The release lever of the trolley should also be pointed towards the motor unit.
Step 3: Connect Hardware to the Motor Unit
Pick up the U bracket and insert that into the rail, again from the motor unit’s side. The flat side of the U bracket should be facing the ground. Use a hammer to ensure the U bracket reaches its designated stops inside the rail assembly.
You can now install the cover protection bolt using some wrenches. Use those same wrenches to remove the two bolts on top of the motor unit. Slide the U bracket into the spots the bolts previously occupied and use those same bolts to mount the bracket.
At this point, you can now install the chain spreader on to the motor unit. You can do that by using the provided screws.
Step 4: Install the Idler Pulley, Cables and Chains
Fetch the cable from the packaging and pass that through the window of the rail closest to the garage door. Let the cable hang out the other side of the window as you place the idler pulley in position. Secure the idler pulley using the provided bolts and your wrench. Lift the rail tab along the same rail portion using the screwdriver. After that, go back to the cable and connect that now to the trolley.
Pull the chain connected to the cable now and keep going until the trolley makes contact with the screwdriver from before. You should now secure the chain to the motor unit by wrapping it around the sprocket. You now have to connect the end of the chain to a threaded shaft using the included hardware.
Add a bolt to the threaded shaft and then slide it through the opening on the trolley. Place another bolt on the other side of the shaft but don’t thread it too tightly.
Step 5: Tighten the Chain
Remove the screwdriver now and turn your attention to the chain. Use your tape measure to see how it’s positioned relative to the rail. You need the chain to be a quarter of an inch above the base of the rail.
To tighten the chain, simply tighten the bolts along the threaded shaft inserted in the trolley. Keep adjusting until you get the right height and then lock the bolts in place.
Mount the Garage Door Opener
We can now move forward to the process of mounting the garage door opener. Consider asking a friend for assistance to make this task easier. You should also install the support brackets you purchased separately before mounting.
Step 1: Install the Header Bracket
Start raising your garage door and see how high it goes. From that highest point, go two inches higher and note that spot with a marker.
Get the header bracket now and position it in such a way that its bottom edge is above the mark. Use a drill to create holes where they need to be according to the header bracket. Lock the header bracket into place next by using the hardware provided.
Step 2: Connect the Garage Door Opener to the Header and Support Brackets
With ladders in position, you can now start connecting the garage door opener to the header bracket. Line up the rails with the bracket and connect them using the hardware included.
Support the motor unit by placing something solid between the fully open garage door and the rail. Take your tape measure and start measuring the distance between the support bracket and the motor unit.
Use the measurements to create a hanging bracket from a spare support bracket. You should now be able to connect the motor unit to the support bracket.
Step 3: Work on the Emergency Release Rope
Retrieve the emergency release rope from the packaging and thread that through the provided handle. Tie the rope off once it passes the handle. Tie the emergency release rope to the trolley via the release lever. Let it hang down at least six feet above the ground so it doesn’t touch any cars entering the garage.
Step 4: Install the Door Bracket
Get the door bracket and position it so it’s at least two inches below the top edge of the garage door. Install it over the vertical reinforcement using the hardware included in the packaging.
Step 5: Put the Door Arms in Position
Pull down on the emergency release of the trolley and slide it close to the garage door. Next, connect the straight door arm to the trolley using the hardware. You should also connect the curved door arm to the door bracket.
Line up the door arms properly so they are at the one or two o’clock position. Secure them together with the hardware once they are in the right position.
Connect the Garage Door Sensors
The last part of this project involves installing the garage door sensors. Know that working with wiring will be needed here so you will probably need to call a professional.
Step 1: Determine Where the Sensors Should Be Installed
Take your tape measure and measure six inches above the floor along the sides of the door. Note the six-inch mark on both door tracks.
Get the sensor brackets next and snap them on to the door tracks according to the marks. Slide the sensors into the bracket openings and then connect them using the hardware.
Step 2: Complete the Wiring of the Sensors
Working on how the sensors are wired on your own is risky. It’s safer to consult with a professional and have them help with properly wiring the garage door sensors.
Step 3: Test the Garage Door Opener
With everything in position, you can now test the garage door opener. Make sure to test the sensors as well by placing an object in the path of the garage door.
Do You Need Garage Door Opener Installation or Replacement?
Get free, zero-commitment quotes from pro contractors near you.
Related Questions
How Long Will It Take to Install the Chamberlain Chain Drive Garage Door Opener?
Most of the time, it will take about DIYers about four to six hours to install a new garage door opener. However, if you already have reinforcements installed and you’re familiar with this kind of hardware, you can finish in two hours.
Should I Install a Chain or Belt-Type Garage Door Opener?
Chain drive garage openers are typically stronger, making them compatible with more garage doors. They are also more affordable on average than their belt-type counterparts.The belt-type openers are more capable of working quietly. They’re also easier to maintain. There is no clearly superior option here. Just let your preferences dictate which type of garage door opener you get.
Gary Evans is passionate about home improvement. He loves finding out how to make improvements in the easiest, most practical, and most affordable ways. Upgrading his home kitchen is one of his ongoing hobbies. Gary is also a long-time content creator and enjoys spending his free time tending to his hydroponic vegetable garden.
More by Gary Evans


![How Much Weight Can a 4×4 Support Horizontally? [It Depends!]](https://cdn-fastly.upgradedhome.com/media/2023/07/31/9070333/how-much-weight-can-a-44-support-horizontally-it-depends.jpg?size=350x220)