


How To Replace A Mobile Home Bathroom Exhaust Fan
Every bathroom needs a functioning exhaust fan. For mobile homeowners, an exhaust fan is even more critical as mobile home bathrooms are usually smaller and require proper ventilation. Bathroom exhaust fans are crucial to keeping your bathroom free of damp, mold and mildew.
Bathroom exhaust fans last for around ten years. If you have noticed that your fan is not removing steam from your bathroom quickly or that it is making loud, mechanical noises, you may need a new fan.
Most mobile home bathroom fans can not easily be repaired. With a little know-how, you can easily replace the exhaust fan in the bathroom of your mobile home.
Do You Need an Exhaust Fan Installation Service?
Get free, zero-commitment quotes from pro contractors near you.

Why Do I Need a Bathroom Exhaust Fan?
The primary reason for installing an exhaust fan in your bathroom, whether you live in a mobile home or not, is to remove moisture. Here are some benefits that bathroom exhaust fans offer:
- Odor Elimination: Whether they’re installed in your bathroom or even your kitchen, exhaust fans work great for controlling odors. When unpleasant smells occur in your bathroom, they are drawn out quickly and easily with the help of an exhaust fan.
- Humidity Reduction: Limiting humidity in the bathroom is crucial for its preservation. Excess moisture will wreak havoc on bathroom walls, resulting in peeled paint, wallpaper, and, in extreme instances, warping doors. More importantly, less humidity means a lower risk of mold or mildew growth.
Although exhaust fans are not required, they are very useful to enhance the comfort and lifespan of your bathroom.
Material Needed
- Fan
- Aluminum Foil Backed Tape
- 1” Drywall Screws
- Screwdriver
- Romex connector or bushing sleeve
Things To Consider Before You Begin
Fan Size
It is easiest to replace an old bathroom fan with a new fan of the same size. Replacing your old fan with one in a similar size will prevent you from having to enlarge the ceiling hole. Using a similar sized fan also allows you to use the same wires, switch and ductwork.
A small bathroom fan should be sufficient for your mobile home. Small fans provide enough ventilation for bathrooms that are smaller than 79 square feet. Most mobile home bathrooms are less than 65 square feet.
Fan Location
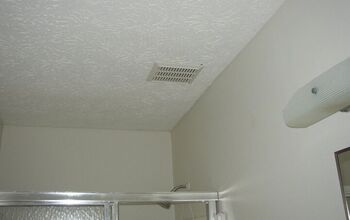
Bathroom exhaust fans work best when replaced above an area that doesn’t directly let off a lot of steam. For best results, position the fan above a toilet or cabinet rather than the shower or tub.
Fan Specifications
When looking to purchase a new fan, you should always consider the dimensions of the fan as well as the CFM rating. All exhaust fans have an airflow rating measured in cubic feet per minute (CFM).
A 50 CFM fan is sufficient for a bathroom that is less than 50 square feet. One CFM per square foot of floor space is recommended. For example, a 65 square foot bathroom would need a fan rated for 65 CFM.
Noise Level and Special Features
When looking for a bathroom ceiling fan, you may want to keep in mind that some fans can be very loud. Noise level is measured in sones. Choose a fan rated at two sones or less for something more on the quiet side.
Avoid replacing your fan with a model that turns on and off with the lighting. Run your fan for fifteen to twenty minutes after every shower or bath. A fan that turns off immediately after the bathroom is lefty empty won’t have adequately removed moisture from the room.
You may also want a fan that comes with heating or lighting options. These may require extra steps when it comes to installing them.
Steps For Replacing An Exhaust Fan in Mobile Home
Follow the steps outlined below to successfully remove and replace the exhaust fan in the bathroom of your mobile home:
Step One – Turn Off The Electricity
Before you begin, cover your work area so that cleanup is much easier after the replacement is done. Then, turn off the electricity for the bathroom to cut off the power to the old fan. In a mobile home, the circuit breaker panel box is usually located on an interior wall adjacent to where your home is connected to the outdoor power supply.
If you are unsure about how to turn the power off in your home, contact an electrician. They can complete the installation of your bathroom fan safely.
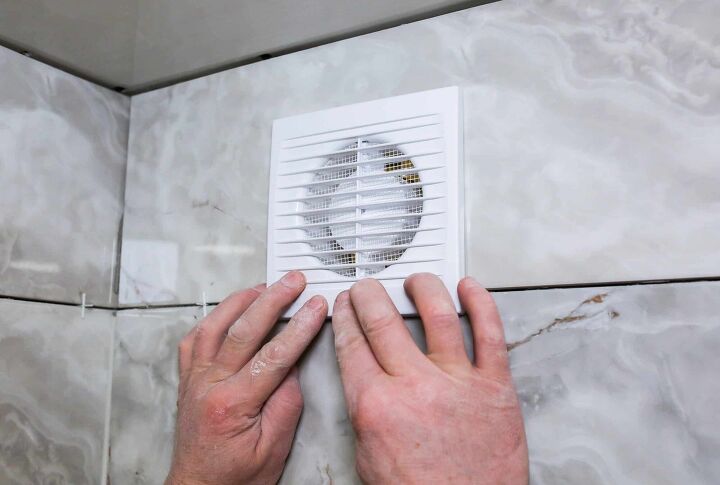
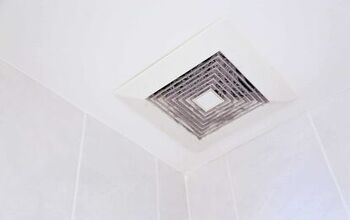
Step Two – Remove The Fan Cover
After you’ve turned off the electricity, you want to pop off the cover to verify that there is no power. When working with electricity, it’s always best to take every precaution. Remove the cover of the fan by grabbing the cover and pulling downwards. You may need a stepladder or chair to help you reach the ceiling comfortably.
If your existing fan is located above your shower, put a towel down on the floor before resting a ladder or chair on top of it for stability.
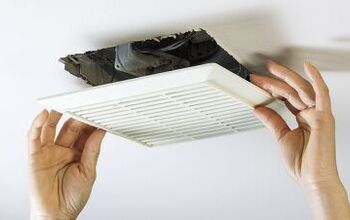
Step Three – Remove The Motor
With the cover off, remove the fan motor housing by unfastening the mounting screws with a screwdriver. This step should be rather simple, as there will be ample space for your hand to fit and use the appropriate tools. If the screws are different from each other, snap a photo of how they’re supposed to fit for easier reassembly later.
Then, unplug the motor from the unit and you should now be able to pull out the entire motor assembly.
Step Four – Disconnect The Wiring
Disconnect the current wiring by opening the electrical junction and separating the joined wires from one another.
Step Five – Remove The Ceiling Fan Box
Unscrew the ceiling fan box. Once unscrewed, push the entire box up into the ceiling space. Disconnect the vent pipe from the box by removing the duct tape connecting the two.
Unscrew the wires from the back of the box. You can now remove the ceiling fan box through the ceiling hole at an angle.
Step Six – Prepare The New Fan
At this point, you should have a hole in the wall and new exhaust fan ready to be put in place. Remove the new fan and motor housing from the new ceiling fan box unit. Your new ceiling fan box will have a half-inch hole on the top or side of the box.
Install a new Romex connector or bushing sleeve through this area. Attach the new vent flapper to the ceiling fan box.
Step Seven – Electrical Wiring
Slide the house wiring through your new Romex connector or bushing sleeve and tighten the connector securely.
Wire the new fan into your house wiring according to the manufacturing instructions. Secure the new wiring with wire nuts. Replace the cover on the electrical junction box with a screwdriver.
Step Eight – Install The Fan Box Into The Ceiling
Push your new ceiling fan box into the ceiling hole. Attach the vent pipe in your ceiling onto the vent flapper and secure with aluminum foil-backed tape.
Place your ceiling fan box back into the right position and use drywall screws to secure it into the wall.
Quick Tip: If you notice that the new fan is either too big or too small for the hole, you’ll have to do some finagling. If it’s too big, put the fan into the hole, make some marks, and then cut the excess drywall for a better fit.
On the other hand, if the hole is too small, you’ll need to patch up the ceiling. You can do this by attaching a wooden bar above the hole and installing a small extension that covers up the makes the hole smaller.
Step Nine – Plug In The New Fan
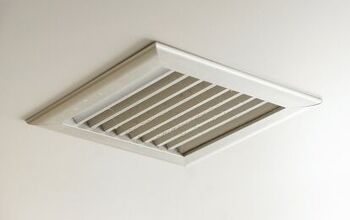
Plug the new fan into the ceiling box unit. Place the motor housing into the new ceiling box and secure with a screw. Place the fan cover back over the fan.
Step Ten – Run The Fan
Run your newly installed ceiling fan for twenty minutes. For best results, the ceiling fan should run for twenty minutes after every shower.
Do You Need an Exhaust Fan Installation Service?
Get free, zero-commitment quotes from pro contractors near you.
Related Questions
What Can I Use For Ventilation If I Don’t Have A Bathroom Fan?
When showering or bathing, you should always open a window to help aid in ventilation and allow excess steam to escape. For best results, leave the window open for at least fifteen minutes after exiting the bathroom. If your mobile home does not have an exhaust fan, it would be worth installing one.Even in a tiny space, an exhaust fan can be installed on the ceiling or the wall and will help keep your bathroom free of moisture, and ultimately free of possible mold or mildew growth.
How Can I Test That My Current Fan Is Working?
If your current fan is removing all traces of moisture and your bathroom is not damp after fifteen minutes of running the fan, it is doing its job. If your fan begins to make loud noises and make inconsistent mechanical sounds, it could be starting to wear out.Hold a piece of tissue paper up towards the fan while it is running. If the paper is held in place by the fan, it is sucking enough air in to ventilate your room correctly.

We are a team of passionate homeowners, home improvement pros, and DIY enthusiasts who enjoy sharing home improvement, housekeeping, decorating, and more with other homeowners! Whether you're looking for a step-by-step guide on fixing an appliance or the cost of installing a fence, we've here to help.
More by Upgraded Home Team


![Standard Dining Room Table Dimensions [for 4, 6, 8, 10 and 12 People]](https://cdn-fastly.upgradedhome.com/media/2023/07/31/9074335/standard-dining-room-table-dimensions-for-4-6-8-10-and-12-people.jpg?size=350x220)


