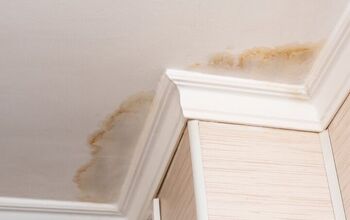
How To Remove Water Stains From A Popcorn Ceiling
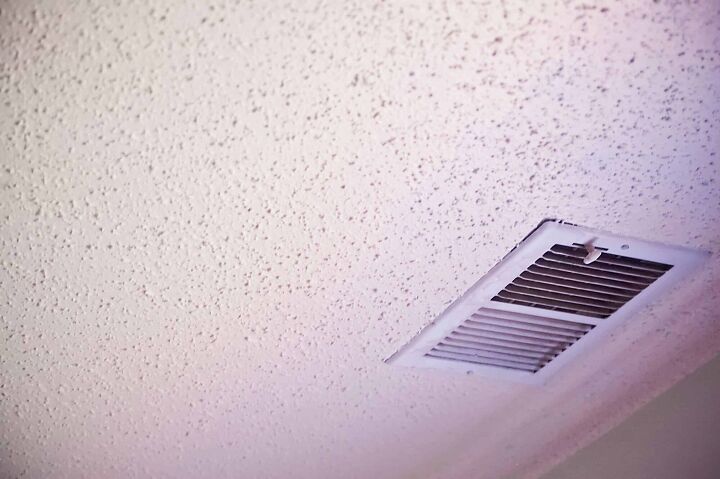
A lot of older homes have popcorn ceilings in just about every room. Homeowners are facing issues with how to fix things like water stains on these ceilings. Water stains on any ceiling are less than ideal.
To remove a water stain from a popcorn ceiling you need to patch it. First, prime the area where the stain is and then apply a popcorn ceiling patching kit. This method of removing the water stain is easy to do on your own, and it won’t take much time or money.
Below we’re going to dive into a step-by-step guide on how to get the job done. My goal is to help you get your ceiling back to looking flawless without breaking the bank. What are we waiting for? Let’s get into it.
Do You Need Popcorn Ceiling Repair or Removal?
Get free, zero-commitment quotes from pro contractors near you.

Quick Repair
If you have a really small spot on your popcorn ceiling, consider a quick repair. You’d be surprised at how much ceilings affect your home’s value when trying to sell. Here are the easy to follow steps that will help you get the job done.
Step 1: The first thing you want to do for a quick repair is to be sure to wear a protective breathing mask. If you want to go the extra mile, throw on a pair of goggles as well to keep your eyes safe from falling debris.
Step 2: Get a scraping tool and remove the stained popcorn material. Remove an extra inch on all sides around the stain to give you room to work with.
Step 3: Keep scraping the surface off until you have just flat drywall visible. You’ll likely notice that the drywall has a water stain as well. The water has to soak through the drywall in order to appear through the ceiling.
Step 4: Pick up a product called “KILZ” that’s designed to paint over the water stain on the drywall. Assuming the source of the water is fixed, apply the popcorn ceiling patching material.
Step 5: Make sure you apply this product by matching the thickness and texture of the rest of the ceiling. Once it’s all dried, you’ll be able to paint it to perfectly blend in with the existing area.
Fixing a Small Area
Suppose you have a small area that’s going to take a bit more time to fix, no worries. Below you’ll find simple directions that will help you get the job done in no time. This is a bit more thorough than the quick fix method but still teaches you how to remove water stains from a popcorn ceiling.
Step 1: Place down a plastic sheet on the floor under the area you’ll be working on. This makes cleanup way easier, especially if you’re working in a room that has carpet.
Step 2: Just like the method above, be sure to wear a protective breathing mask and eye gear. Doing so helps protect you from harmful dust and fumes.
Step 3: Using a sturdy ladder, climb up to access the area of the ceiling that needs replacement.
Step 4: Use a scraper to take off all of the water damaged popcorn material. Do this until it’s completely removed, and the stain in the ceiling is visible.
Step 5: Vacuum or dust the ceiling to get rid of any leftover debris or material.
Step 6: Using a paintbrush, prime the water damaged area with KILZ ceiling paint. This is the only product on the market that is known to seal the stain and prevent it from showing through in the future.
Step 7: Take any tub of already mixed popcorn ceiling patch, but avoid the spray type. The tub is a lot less messy and doesn’t get in unnecessary spots. Apply the patching product using a wide putty knife or paintbrush.
Step 8: Be sure to follow the tub’s directions to ensure that the patch will look as natural as possible. Allow it to dry for the time written on the packaging before moving on to step nine.
Step 9: Once that area is dry, paint the patched section to match the rest of your ceiling. If possible, use a paint spray to do this as a paintbrush can pull on the popcorn texture. Using a paint sprayer also makes it much easier to paint on an awkward location, such as a ceiling.
Something to note:
It can be hard to get the texture matched perfectly. When you’re trying, it’s important to just do your best and ask someone else how closely the patch matches to the existing ceiling. Your best bet for getting an even look is to finish using a paint sprayer and to make sure you applied the patching thick enough.
Removing Water Stains From a Large Area
Sometimes we have to deal with a larger water stain on the ceiling. Don’t let this get you down as the steps are basically the same. There are a few important differences to note when working on a bigger area.
Step 1: Just like the other methods, make sure the floor is protected. Have on your safety gear and get ready to start scraping.
Step 2: Take off all of the popcorn texture in the damaged area by using a scraper.
Step 3: Prime the entire area and allow the primer to dry completely.
Step 4: Rent a ceiling texture sprayer and use it to apple the popcorn texture all over the ceiling. The sprayer makes it easier to blend in a larger area and helps it to match more evenly. You can adjust the pressure as well.
Step 5: Allow this to dry before adding a ceiling paint that matches the unaffected area.
Something to note:
If you’re working on a ceiling that has never been painted before, you have to prime using an oil-based product. If you use a water-based primer, it will cause the popcorn texture to fall off. It has to be sealed before it gets painted to ensure that it stays intact.
Do You Need Popcorn Ceiling Repair or Removal?
Get free, zero-commitment quotes from pro contractors near you.
Related Questions
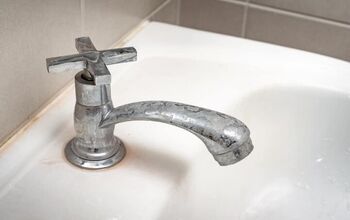
Why are there wet spots on my ceiling?
There is a myriad of reasons why there could be wet spots on your ceiling. They generally appear when the water has seeped through the drywall and other materials. If water is visible to you, it’s been in the area for a while. If it’s on the first floor of your home, it could be a sign an appliance or pipe is leaking in the level above. This is especially true for rooms that are directly under bathrooms or kitchens.
How long does it take for a water stain to appear on a ceiling?
Like you read above, water tames time to appear through a ceiling. What happens when the water has been sitting for a long time? Bacteria begins to form. This can take as little as two days and can be fast-tracked by things like high humidity. If you live somewhere with warm temperatures and spot a water stain on your ceiling, it could have mold on it.
Does a water stain ceiling mean mold?
Speaking of mold, it’s not uncommon for mold to form from ceiling stains. Many homeowners will write off a water stain for mold if it doesn’t look “bad enough.” Don’t let this be you. Even if your ceiling doesn’t look like there could be mold growth, it’s something to look for. It’s one of those situations where you’d rather be safe than sorry. Nobody wants mold growing in their ceilings.

Kirstin is a passionate writer who loves helping people learn new things when it comes to home improvement. When she's not behind a keyboard, she enjoys DIY projects, crafts, spending time with her pets, and making videos. She hopes that with all she writes, someone is finding a solution to their home improvement needs.
More by Kirstin Harrington