How To Mount Cube Storage To Wall (Quickly & Easily!)

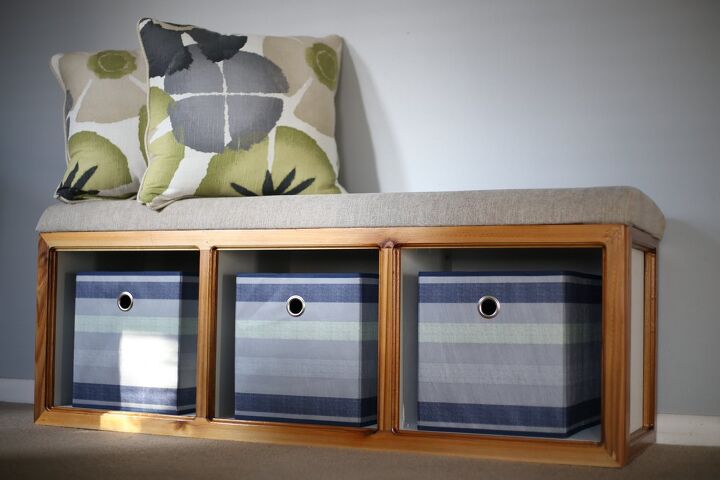
Cube storage units are one of the trendiest things to add to a bedroom, an office, or a living room. The nice geometric look of a storage cube gives a place a more structured appearance. However, adding them to your wall isn’t exactly the easiest thing to do—at least, not if you want them to look seamless. Are you ready to learn how to make it happen? We did a bit of research to find out the easiest way to do it.
To mount a storage cube to your wall, you will need to buy mounting brackets that offer a floating appearance for shelving. From there, you will have to mount the brackets on wall studs in order to ensure the walls will be able to carry the weight of the cube.
Putting together a cube storage setup can be intimidating, but there’s no reason why you can’t do this on your own. After all, you have all the instructions you need right here.
Do You Need Handyman Services?
Get free, zero-commitment quotes from pro contractors near you.

Before You Begin: Getting The Supplies
Even the simplest of mounting projects will require you to have some supplies on hand. For this project, we suggest you run out to your nearest home improvement store and grab the following items:
- A Stud Finder
- A Level
- Wood Screws (OR Two L-Brackets)
- A Tape Measure
- A Screwdriver
- A Storage Cube (Duh!)
- Drywall Anchors
- A Countersink Bit
- Wood Putty
- Paint That Matches Your Cube
- A Drill
- A Pencil
- Sandpaper
- A Paintbrush
Mounting Your New Storage Cube With Brackets
Now that you’ve had a massive shopping spree, it’s time to figure out how to actually mount that cube. Here’s the step-by-step scoop on how to use decorative L-brackets to mount your cube:
- First, figure out the general location that you want to place the cube. Grab your stud finder and find where the nearest studs are. Mark that area off, since you will need to have at least one side of the cube supported by the stud.
- Find the bottom of the storage cube and mount an L-bracket on either side of the cube. You can use screws that are slightly smaller than the thickness of the wood to do this. You can use a measuring tape to figure out how thick your cube is.
- Grab a pencil and mark off where you want to add the cube. Use the level to ensure that the cube is actually going to be straight. Place an X on the screw holes at the bottom of each bracket.
- Drill holes into the wall where the “X’s” are. If the point is not on a wall stud, then you can just push the drywall anchors through. Insert the anchors fully.
- Install the storage cube. Use screws to pin the L-brackets to the wall. Fasten the cube and give it a gentle tug to make sure it’s good to go.
Mounting Your New Storage Cube With Screws
Don’t want to mount with decorative brackets? Not a problem. It’s possible to get your cube up with screws, too. While it’s possible, we want to point out that bracket mounting is the more secure option. Heavier weights might not handle screws well. Even so, here’s what you need to do…
- Figure out where you want to put your cube. Put a level at the top of the cube, and hold the cube up to the place where you want to place it. Have a friend use a stud finder to find the nearest stud. You will need to place not one, but two screws in the stud. Mark off the place where you want your cube to float.
- Get your friends to hold the cube in place, then drill four holes through the cube. You will need to drill through the cube and also drill out a small area around each hole. The holes should be placed on the inside of the cube, about an inch from each corner.
- Add a countersink bit to each hole. This will help keep your cube in place. For all the holes that are not placed in a stud, add drywall anchors. The two holes that are in a stud don’t need that extra support.
- Use wood screws to screw the cube into place. The screws’ length should be twice the thickness of the cube’s wood.
- Once the cube is installed, add wood putty to cover up the drill holes. Use sandpaper to get rid of extra bumps, then cover the area with a light coat of paint. Once it’s dry, it’s fully installed.
Note: This method only works if the storage cube in question has a wooden back. If your cube is a “backless” type, you will need to use L-brackets to install it.
Preventing Cube Mishaps
Though there are a bunch of awesome ways to use a storage cube, the truth is that mounting shelves of any type can lead to collapses and falls. If you want to make sure that your storage cube gets used safely, you should know what to expect before you start loading up your unit. These tips below can help you make the most:
- Remember that each storage cube has a maximum weight they can hold. While you can always check the manufacturer’s notes to find out the maximum storage capacity, the truth is that it’s often a shade of grey. A good rule of thumb is that you should expect most cubes to hold a max of 10 pounds.
- If you live in an area that is prone to earthquakes, consider adding extra reinforcements. Since shaking can loosen things up, it’s good to make sure your storage cube is really tightly secured. On a similar note, you might want to store smaller knickknacks in a fabric cube that’s stored inside your wall-mounted wooden cube.
- Don’t install storage cubes in an area that could cause a head injury. Running into a storage cube or having the corner of the cube hit your face is not fun. Besides, it could be considered a child safety hazard. If you aren’t sure whether or not the cube is safe at the level you want to install it at, place it a bit higher…and away from the bed area.
- Choose storage cubes that are made from high-quality materials. Just like with most other types of wood furniture, storage cubes are a “you get what you pay for” type of deal. If at all possible, opt for teak or bamboo. They’re both excellent, sturdy materials. Particleboard cubes, on the other hand, are a no-go.
How Much Should A Storage Cube Cost?
Being in the market for a new type of storage can be intimidating, especially if you don’t know how much you should expect to spend. The good news is that this is one trend that is both easy to install and cheap to get. A typical storage cube will cost between $20 to $30 for a typical store-bought cube.
If you’re a fan of recycling, it’s important to remember that you can get a cube in other ways. You can make your own by using salvaged wood to make a cube. People who are able to find milk crates at curb alerts might also be able to reinforce them, giving them a second chance at life in your home.
Do You Need Handyman Services?
Get free, zero-commitment quotes from pro contractors near you.

Related Questions
What are the IKEA storage cubes called?
IKEA’s storage cubes are the stuff of legends. To a point, many actually believe that this Swedish-born furniture company was the one to actually kick off the storage cube trend that’s going so strong today. If you want to get some of the cubes that sparked the trend, then you will have to go to IKEA and ask for KALLAX cubes.Just be forewarned, KALLAX isn’t just a cube. It’s a full shelving unit and it comes in a wide range of different sizes and shapes. So you might need to be a little more specific than you were expecting to be.
Can you paint storage cubes?
There is no reason why you can’t paint the storage cubes you bought in a store. The only thing you really have to keep in mind is that you have to match the painting method to the material used in the cube. When choosing a paint, make sure to get a primer and to remove any paint that may be left on wooden cubes.If you are painting particle board or MDF plywood, then you may need to use a spraypaint. Should you be unsure of what to use, check with the paint guy at your local hardware store.
Can you wash fabric storage cubes?
You can, but it has to be done carefully. Gentle wipedowns with a wet rag dipped in soapy water is usually the best way to make it happen. If you aren’t sure whether or not you can wash your particular cubes, refer to the tag on the corner. If it doesn’t have a tag, try to steam clean the cubes instead. It will be a lot gentler on the fabrics.

Ossiana Tepfenhart is an expert writer, focusing on interior design and general home tips. Writing is her life, and it's what she does best. Her interests include art and real estate investments.
More by Ossiana Tepfenhart


