


How To Install Chain Link Fence Without Concrete

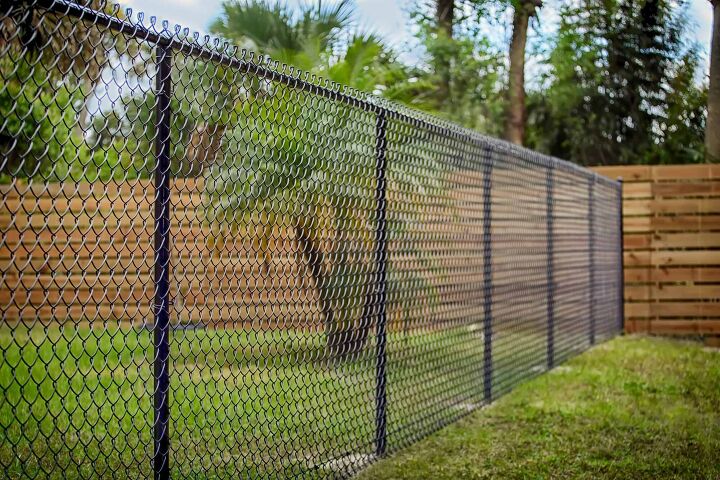
If you want to install a chain-link fence, concrete is an easy way to ensure that your wall will stay there forever. However, you may want to avoid putting your fence in concrete, as it takes a great deal of time and money. It begs the question: do you need to use concrete to install a chain-link fence?
To install a chain link fence without concrete, bury 1/3 of your posts in the ground– they should be two feet deep and 1/8 inch in diameter. Fill the hole with gravel or polymer before placing the poles. Remember to replace the dirt as much as possible for the best support.
We will be going through a step-by-step process on how to install your chain link fence without concrete. You can also apply these steps if you have chain link fences with concrete.
Do You Need Fence Installation or Repair Services?
Get free, zero-commitment quotes from pro contractors near you.

Installing Chain Link Fences Without Concrete – A Step-By-Step Guide
- Ensure you have the supplies you need.
- Check the soil
- Dig holes that are anywhere from two feet to 1/3rd of the post’s length into the ground. Please make sure they are eight inches (minimum) apart.
- Attach tension bands on the corner posts.
- Place the caps and top rail.
- Run tension wire through chain link mesh.
- Pick up and stretch the mesh
- Tie fence to top rails and run tension wire along the bottom.
Throughout this process, you will need to be aware of the most convenient location for the gate and your property line. The gate needs to be in a place where it is easy to reach for you. Also, neighbors don’t typically like things being on their property.
To avoid this potential heartache, you may begin the process by confirming the property line with your neighbor. If they are not helpful, the local records office at your courthouse can help you.
Step One: Make Sure You Have Everything You Need
Installing a fence can be a pretty time-consuming process. Make sure you have everything on this list:
- Pliers
- Rubber mallet
- A friend
- Work gloves
- Power puller
- Posthole digger
- Safety goggles
- Gravel or polymer
- Ratchet set
- Chain link mesh, poles, and caps
- Tension bars
- Metal tie wire
- Tension wire
Step Two: Check The Soil
Before you consider installing a fence post without concrete, you need to check the dirt. You can’t install a chain-link fence without a secure location.
For example, some soils will expand and contract when they have water in them. It is also impossible to install chain link fences in sandy locations.
Check with other people who have installed chain link fences in the area. You also may get a sign from looking at the soil when you dig it up. Also, you cannot pound these poles down, as you risk bending the tops. It is especially true in more rocky soils.
Step Three: Dig Holes That Are Eight Inches Apart And Two Feet Deep
The bare minimum that you need for a sturdy chain-link fence is to bury them eight-inches apart and two-feet deep. If your chain-link fence is above six feet tall, you will have to bury it deeper to ensure it doesn’t weaken faster.
While you can use a shovel, this process is far more comfortable with a posthole digger. These are specifically for installing fences and other types of poles.
Before placing these poles, try and put some polymer or gravel to secure the fence posts further. This material is your concrete substitute should something go wrong in the soil.
Step Four: Attach Tension Bands To The Corner Posts
Tension bands are the circular, metal objects you see wrapped around chain-link fences. It would be best if you had them to secure the chain-link border to the poles.
You can also take this opportunity to install the hinges and latches for your door. You typically need three on each fence pole. If your fence is taller than five feet, expect to add another one.
Step Five: Attach The Caps And Top Rail
Your next step involves taking that rubber mallet and using them to secure the caps on the top of your fence poles. You will want to be sure that they aren’t easy to remove by potential vandals.
The caps you install on the non-corner areas should have loops on the top. You will siphon the top rail through those looped caps to ensure each pole secures them. You may need to adjust the height on the caps, but you will want to be sure they are all at the same level.
Step Six: Run Tension Wire Along Each End
You will want to loop a tension bar on each end of the chain-linked mesh. It should go through one end and then the other end with each one.
If done correctly, it will ensure that each end of the fence remains solid so that you can stretch them later. Be sure that the tension bars stay in the same general location as you pick them up.
Step Seven: Pick Up And Stretch The Mesh
Using your power (fence puller) puller, you will stretch the mesh until it reaches each corner piece. You want to be sure that the chain-link fence is taut as it gets the corner pieces. If it is not, you are going to need to tighten it further. If the chain-link fence bends as you stretch it, you should be able to it until it’s the location it needs to be.
Once it is to a comfortable point, use a tension bar to keep it in place. Attach the bar to the bands mentioned in the first step utilizing another tension bar.
There should be bolts you can use your socket wrench on with the tension bands. Tight them until the tension bar is firmly in place. You will likely need a second set of hands for this part, which can be pretty tricky.
Step Eight: Tie The Fence To The Top And Run A Tension Wire On The Bottom
The last step is to use the aluminum wire you purchased to tie each section of the fence to the top. It is usual for the top to have the first half of the top diamond hang over it.
Once you have them tied to the top, you will do one final act of stretching as you run a tension wire along the bottom. It ensures that it will not fly off of the posts at any level.
Do You Need Fence Installation or Repair Services?
Get free, zero-commitment quotes from pro contractors near you.
Conclusion
When installing a chain-link fence without concrete, the essential step you need to remember is the depth, the soil content, and the diameter of your poles. All of this in tandem will determine whether or not your project is successful.
When it comes to soil, that is the real determiner about whether or not you can get away with not using concrete. Some soils expand and contract depending on the level of moisture on the earth.
With this guide, you do have a good starting point at where to go. It is a big project, so try not to get overwhelmed by the massive to-do list. Take it one step at a time, and within a reasonable amount of time, you will be the proud owner of a new fence.
I'm a guy who becomes the expert of whatever I stumble upon, writing-wise. I've written tons about cool home products, home improvement, and smart technology in the home. I'm also the proud father of a kiddo born on new years, making my holidays very busy.
More by Eli Smith


![Standard Dining Room Table Dimensions [for 4, 6, 8, 10 and 12 People]](https://cdn-fastly.upgradedhome.com/media/2023/07/31/9074335/standard-dining-room-table-dimensions-for-4-6-8-10-and-12-people.jpg?size=350x220)