How To Install A Through-The-Wall Air Conditioner Sleeve
When it comes to time to install an air conditioner that goes through the wall of your home or office, it is quite common to feel both excitement and apprehension. After all, cutting an air conditioner-sized hole in your wall is no small task. Luckily, it is not as hard as it may seem. Here’s an easy way to do it.
Installing a through the wall air conditioner sleeve requires that you cut a hole through your wall, create substantial support for the unit within the wall, and then secure the sleeve to that support.
Do You Need Ductless Mini Split A/C Installation or Replacement?
Get free, zero-commitment quotes from pro contractors near you.

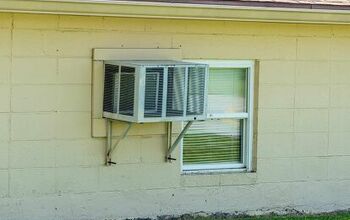
Why Install an Air Conditioner in a Wall?
There are many reasons that people have for installing air conditioning units into a wall instead of a window.
One reason for choosing a wall as an installation point is that doing so leaves all the windows free for use as intended. Window air conditioners are a difficult sell for many people when they realize that they will permanently lose access to one of their windows.
Another aspect of air conditioning units installed in walls is that they are often sturdier. The fact that they are drilled into the framing of a house makes the wall method more attractive for many. Air conditioning units, whether for windows or walls, also require space on the exterior side. Finding the necessary space is often easier when installing in a wall.
Step 1: Cutting the Drywall
The first that you will need to do is cut the drywall to the correct size. You may be tempted to cut the drywall to the exact dimensions of the air conditioning sleeve.
Keep in mind, however, that the hole in the drywall should be large enough to reveal the 2x4s and internal wall structure. The hole should also be large enough to accommodate the header and footer which is an additional 4-6 inches above and below the sleeve hole.
Before making any cuts into the drywall, draw a line on the wall as a guide. When making your guidelines, use a level to keep your cutout straight.
Step 2: Removing the Insulation
Behind most sheetrock walls lies insulation and it needs to be removed. Use a box cutter or another type of sharp cutting tool to get the job done.
Be mindful of the dangers that many insulation products pose – especially in older homes. You should wear eye protection, a mask, and gloves. It is also advisable not to let the insulation come into contact with your skin while handling it.
Step 3: Framing
Unless the wall that you are installing the air conditioning sleeve into is made from cement, you will need to provide proper framing support for the air conditioning unit. Using the right combination of studs, headers, and footers will provide the necessary support.
To create the most secure frame for your new install, it is a good idea to use 2x6s joined together for both the header and footers, with additional 2x4s on the sides to tie them together.
Step 4: Complete the Exterior Cut
With the framing complete, it is time to cut all the way through the wall. The easiest way to get started is to use a drill on the interior side and punch four holes through the wall. Each hole should be placed at the four corners of the sleeve hole. This will create a guide when you begin your cut from outside.
From outside, locate the four holes that you drilled through the wall. Using a level, draw level guidelines between each hole.
Then, make your cut. There are numerous ways that you can cut through the exterior layer. The method that you choose will depend on the material and thickness that you are cutting. In most cases, you can use a circular saw set at ½ inch depth at first to make your primary cut.
Using a skill saw is a good option as it is easier than some other methods to maintain a straight line. The blade you select can also be tailored to the material that you will be cutting.
Step 5: Install the Sleeve
The next step is to install the sleeve. Insert the air conditioner sleeve into the space you have created and push the sleeve all the way back. The sleeve should be flush with the interior wall. This will make the finished installation look much better.
Before securing the sleeve into the framing, make sure that the sleeve has a slight downward slope towards the outside. This is important because the slope will ensure that water condensation (if any) leaks towards the outside. A small torpedo level may be used to be sure that the correct slope has been achieved.
When everything is lined up, screw the sides of the sleeve into the framing. Do not put any screws into the bottom of the sleeve as this will just create opportunities for water to seep into the framing of the house.
Step 6: Install the Air Conditioner Unit
Once the wall sleeve for the air conditioner unit is fully installed, it is time to slide the air conditioner into the sleeve. This part of the process is usually the simplest as the sleeve is made to house the air conditioner perfectly.
Once all the necessary connections are in place and the unit has been powered up, you can now conduct a test run to ensure that everything is functioning as it should be. If all is well, turn everything back off and unplug the unit.
Step 7: Creating a Seal
One of the final steps in the installation process is also one of the most important. From outside, you will need to run a thick bead of exterior sealant along the seam connecting the air conditioner and the wall.
As you have just cut a large hole through your wall, you must now take the necessary steps to protect your home from the elements.
Step 8: Interior Repairs
After installation is complete, there is usually considerable work to be done on the interior wall. You may need to rebuild portions of the drywall, or perhaps a combination of patching and painting is all your project requires. In any case, now is the best time to get your interior wall looking like new once again.
Step 9: Finishing Touch
Many people install a subtle trim around the air conditioner unit to help with the aesthetics. Although trim may seem insignificant to some, it goes a long way in making the project feel whole.
As per usual with finishing work, you will then need to seal the corners and seams with painter’s caulk before painting the wall and the trim.
Do You Need Ductless Mini Split A/C Installation or Replacement?
Get free, zero-commitment quotes from pro contractors near you.
Related Questions
Do through the wall air conditioners need a sleeve?
Wall air conditioners do need a sleeve. The weight of an air conditioner unit, along with the heat and moisture output, requires the added support that sleeves provide. With a sleeve for your wall air conditioner unit, many costly complications could quickly arise.
Can a window air conditioner be installed in a wall sleeve?
Yes, in most cases an air conditioner unit that is designed for installation in a window can be installed into a wall via the wall sleeve. In fact, many air conditioners come with fitting for both installation types. And for those that do not, it is often possible to find the necessary hardware and fittings from the manufacturer.

Benjamin is a proud homeowner who loves to write about DIY projects and home improvement projects. Traveling, perfecting his home, and spending time with his family are just a few of the many things that keep him inspired.
More by Benjamin Wright