How To Install A Dishwasher Where There Was None
Unless you genuinely enjoy washing dishes by hand, there’s no reason why you shouldn’t install a dishwasher. And yes, you can install it yourself and avoid the installation costs!
To install a dishwasher where there was none, the first step is to know the under-counter dimensions space and the dimensions of the opening of the cabinet. Prepare the hot water line with enough water pressure and temperature specifications, along with the drain outlet. Install the new dishwasher.
But let’s go deeper into the process. Below is a detailed process of how to install a dishwasher in your kitchen.
Do You Need Appliance Installation or Replacement?
Get free, zero-commitment quotes from pro contractors near you.

Step-by-Step Process of Installing a Dishwasher for the First Time
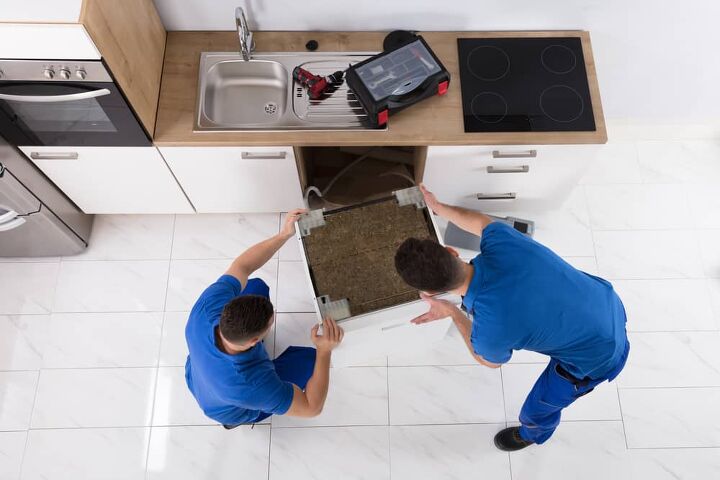
Step 1: Prepare the Area Where It’ll Be Installed
The opening space has to be 24” wide x 24” deep x 34 ½” high – this is the standard size for dishwasher’s space. You have to make sure that the back wall doesn’t have any pipes or wires on it.
The lines that will supply water and power will come into the cabinet in the 4″ x 4″ area through a 1 ½” hole located at the bottom rear of the cabinet. The floor must be level and space must be perfectly squared.
Step 2: Set Up a Drain
Depending on where you live, your locality might require an air gap. If the drain tee is less than 18” from the floor, then air gap is usually needed. If it’s higher than 18”, then you don’t need an air gap and you can go for the loop method.
If the dishwasher is too far from an existing trap, then you’ll need to make a dedicated outlet. This is a vertical pipe with the water trap below, which you’ll have to connect to your existing foul water system. The system is similar to the drainage used for sinks and toilets.
If you’re placing the dishwasher next to the garbage disposal, the process should be less complicated. (See the tips below to learn more.)
Step 3: Set Up the Wiring
Check if the wiring is a 120V, 60Hz dedicated circuit with a 15 or 20-amp breaker, or time-delay fuse. The wiring needs to 2-wire with the ground and be rated for 176°F.
The wiring may come into the cabinet from the rear bottom. The hole shouldn’t be bigger than 1 ½” – the same hole can be used for the waterline as well as the drain hose.
If you’re using a flexible cord, then there should be a separate hole. The hardwiring cable will come up to the right side along the bottom.
Step 4: Set Up the Water Supply
The power supply, as mentioned in the previous step, goes through the 1 ½” hole at the bottom of the cabinet. Turn the water off to set up a hand shut-off valve under the sink.
The water connection is located on the left side of the dishwasher. You may use a 3/8” O.D. copper line if you need to extend a minimum of 19” from the rear wall. The water heater must be set between 120°F and 150°F. The pressure, on the other hand, must be between 20-120 PSI.
Step 5: Prepare the Dishwasher
To prepare the dishwasher, you must check the door balance. If needed, adjust the spring tension. If you need to attach the legs, make sure you do it close to where you’re going to install it.
Step 6: Connect the Drain Hose
If it didn’t come pre-installed, the next step is to connect the drain hose. Position the electric wiring and water supply lines to where the bottom of the dishwasher will not catch them.
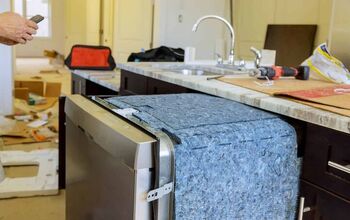
Carefully push the dishwasher in front of the opening. Feed the drain hose through the hole you made earlier.
Step 7: Put it in Place
Slowly push the dishwasher into space as you feed the drain hose through the hole. Stop with a few inches left and check if anything is pinched or kinked.
If everything is in its proper order, continue pushing the dishwasher all the way in. Make sure that the edges of the door are at the back of the cabinet frame. At this point, don’t forget to test if the door opens and closes smoothly.
Adjust the leveling legs to level all sides of the dishwasher.
Step 8: Secure the Position
Align the brackets to secure the position of the dishwasher. Check the manufacturer’s instructions to perform this step.
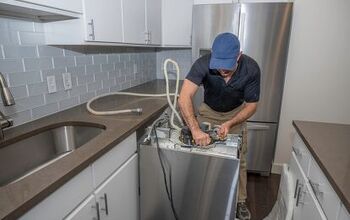
Step 9: Connect the Power and Water Supply
Your dishwasher needs a supply of hot water to properly clean your dishes throughout the wash cycle. To set up a dishwasher where one has never been before, you should find a way to connect the dishwasher to the existing hot waterline.
Connect the power and water supply through the access panel. Connect the drain hose located under the sink. Instead of tearing out the floor or wall to install a different hot water line for your dishwasher, go ahead and install a dual outlet/dual shutoff valve to the existing line.
If this process is quite complicated for you, don’t hesitate to get help from a professional plumber.
Step 10: Test the Dishwasher
When you think everything is all set, it’s time to test it. Do the wet test by putting the knob on the “rinse only” setting. There shouldn’t be any leaks and the water should drain properly.
Important Tips for Installing a Dishwasher for the First Time
Pick the Best Position
Because your kitchen never had a dishwasher before, it’s important to pay attention to the space you’re putting it in. The dishwasher has to be as close to the sink as possible. Placing it further from the sink will make the process more complicated for you.
Plan the Dishwasher Drain Placement
Just like when choosing a place for your dishwasher, you must also plan where you are going to place the drain before starting the installation. This will help you plan out better how you’ll go about with the whole process, especially if you need an air gap.
Be Careful with the Wiring
Unsurprisingly, wiring can be complicated and dangerous. Make sure to read the manual carefully and make sure you understand every step.
If you’re hesitant in doing this part, then it might be better to ask help from a professional. This might cost you some money, but it’s not worth it to risk your safety.
Connect a Dishwasher Drain Outlet to Garbage Disposal
You’re lucky if you already have a garbage disposal installed as it will make the process easier. If you haven’t noticed already, there’s a plug on the side of the garbage disposal. That’s your dishwasher drain outlet right there.
Find the outlet on the garbage disposal and force the hole to pop out the rubber plug using a screwdriver. Place the pipe in there, tighten, and you’re done.
Do You Need Appliance Installation or Replacement?
Get free, zero-commitment quotes from pro contractors near you.
How to Remove and Replace Your Old Dishwasher
If you already have a dishwasher installed, then you no longer need to drill any holes. However, it’s still required for you to check the plumbing and wiring. This is for you to make sure that the empty space can accommodate the new unit. When that’s established, you’re ready to begin the installation.
To prepare the process, make sure that you turn the main power source switch off as well as the main water line. Removing the old dishwasher without turning off the power and water sources poses a huge risk to your safety.
Remove the drain hose from the garbage disposal or drainpipe located below the sink. If the dishwasher uses a power cord, then make sure to unplug it. On the other hand, if the dishwasher is hardwired, open the access panel and the electrical junction box. Take the wire nuts off and disconnect the black and white wires.
Next, take off the ground screw in order to disconnect the green ground wire. Make sure to use a catch pan while dividing the water supply line. After disconnecting all of these lines and wires, you can then take out the screws and brackets that secure the dishwasher in its place.
Carefully pull out the old dishwasher and replace it with the new one. Follow the same step-by-step process above.
Related Guides

Coming from a family of woodcarvers, Cyril has always been fascinated with wooden interiors and home decorating. While she followed the path of writing as her career, her interests in home improvements still remain.
More by Cyril Balahadia


![Cost To Drill A Well [Pricing Per Foot & Cost By State]](https://cdn-fastly.upgradedhome.com/media/2023/07/31/9074980/cost-to-drill-a-well-pricing-per-foot-cost-by-state.jpg?size=350x220)