How To Hardwire An Orbit Sprinkler Timer

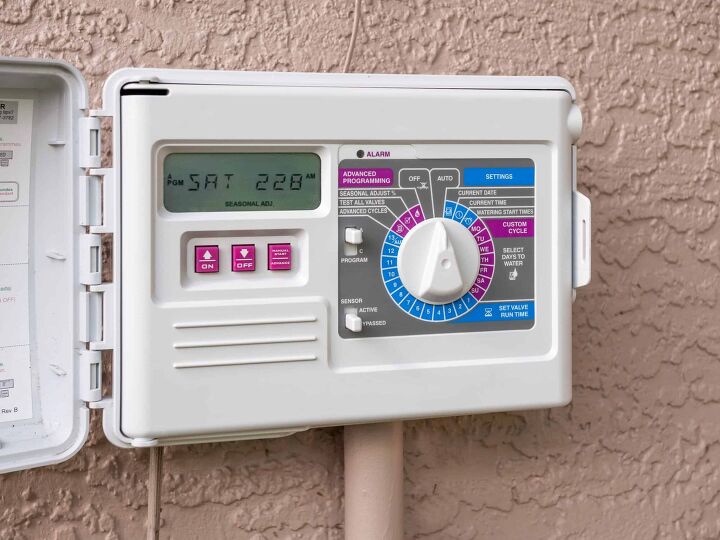
If you already have a sprinkler system in place, it is definitely time that you think about hooking up the sprinkler timer into the system itself. The timer has many benefits over the long run that will make it more than worth the time.
To hardwire the Orbit sprinkler timer, it helps to have a basic knowledge of electrical wiring, including on the Orbit sprinkler timer itself. Following this step-by-step guide, you can skip hiring an electrician. That means a ton of time and money saved as well.
Do You Need to Hire a Sprinkler System Contractor?
Get free, zero-commitment quotes from pro contractors near you.

What You’ll Need
Before getting started, it is important to have the necessary equipment to do the job well. Have an electric drill, a metal center punch, some drill bits (or masonry bits for concrete and brick), wood type drill bits, a hammer, a level, a marker, some screws, and a couple of screwdrivers.
Anything that you don’t have on hand already can be picked up at a local hardware store. Having these items is not only important for this job but can prove to be versatile for tasks of all kinds going forward, too.
Step-by-Step Guide to Harwide An Orbit Sprinkler Timer
Step 1: Pick Your Spot and Check the Power
The very first step is to pick out your location. This is where you’ll be setting up the sprinkler timer for future use. Make sure to check out the power supply and be sure if you will be using the timer as an indoor model or an outdoor one.
If you go for an outdoor model, you will need to implement hard wiring. If you go indoor, you can simply plug the timer into an outlet. For this exercise, we are working with an outdoor timer that will require hard wiring.
Step 2: Scope Out the Packaging
You should have already purchased your sprinkler timer; now is the time to unbox it. This is an important step because, for the wiring and installation, you’ll need to check out any accompanying documents.
Do not skip this step. Looking through documentation may not be a fun part of the process, but it is a necessary one. When dealing with electrical wiring of any kind, it is important to exercise patience and safety every step of the way.
Step 3: Removing the Face
Next, it is time to take the face of the timer off. It should come off pretty easily since there should be plastic tabs or clips that are located on the front of the unit. If you don’t find them there, make sure to check the sides of the timer.
Also, make certain to detach the ribbon connector. Lastly, you can take the cabinet door out if you want, but it is not mandatory. To do this, take the steel pin out; this is what connects the door itself to the rest of the cabinet.
Step 4: Drilling Extra Mounting Holes
In order to be safer than sorry, you will want to drill a few extra mounting holes on the backside of the cabinet. Generally speaking, sprinkler timers will normally come with pre-drilled holes or maybe some form of mounting hardware.
If you purchased a system that comes pre-drilled, go ahead and skip this step. Drilling extra holes are meant to provide safety and stability for the timer.
Step 5: Cut the Power
For the outdoor units, this is where we begin the process of hardwiring. As always, make sure that you begin by cutting the power. Electricity is extremely dangerous and if you leave the power on you are running a great risk.
When you’ve cut the power, turn the breaker that is directed to those wires off as well. Make sure to check the wires for an existing charge using a voltmeter. Even when the power source has been cut, there can be residual power leftover in the wires.
If the meter creates an alarm, that means that there is an electrical current still running through the wires. Not only is this dangerous to you, but it can also damage the timer as well. Allow for enough time to pass to drain what is left of the residual current and then check it again with your voltmeter. Only proceed forward when you are 100% confident that there is no current left in the wires.
Step 6: Mounting the Cabinet
When you’re certain there is power going into the wires you’ll be using, it is time to mount the cabinet at eye level. Remember, you want this cabinet to be accessible in such a way that it is comfortable to use. Make sure to check that it is level and start marking your holes to ensure precision.
You will then use the center punch and gently tap it with a hammer to create small dimples in the wall. This is to ensure that your bits are both stable and properly centered throughout the process of drilling. When you’re certain that they are square and center, drill completely.
Here, it is time to use the plastic inserts that came with the mount and place them into the holes. Use your hammer to make sure that they sit snugly and securely into the wall.
Step 7: Mount and Re-Mount
When you’ve successfully drilled into the wall, it is time to mount the timer cabinet using screws that either came with the unit or that you picked up at the hardware store. Connect the station wires and make sure that you pay attention to the purpose of each of the wires; this will come in handy for the sprinkler system as a whole.
This is perhaps the most important part of the installation. Re-mount the face of the timer, re-attaching the connector portion to the board. This ensures that the power flow is safe, and you can feel confident turning the power back on. Make sure to double-check this part and do not turn the power back on until it has been completed.
This is the final step and the timer is ready for use.
Connecting the Wires to the Valves
Read the instructions that come with your timer. This will have a general overview of the different colors of wire and what they are meant to do (white is common wire, etc.). It is essential that you do not skip over reading through what each of the colors do.
When the power supply to the sprinkler is off, you can begin wiring. Use the guide to locate the different colors and their associated connections. Look for the “C” terminal and connect your white or general wire onto that specific terminal.
Important note: if the valves are underground, you will need to run the wire in some kind of PVC slope that runs towards the valve. And as always, ensure that your electrical connections are waterproof. Not only does that improve safety, it prevents the wires from becoming damaged or burning out and possibly damaging the sprinkler system.
When you’ve finished properly wiring everything, turn the power back on in order to test the Orbit sprinkler. If you’ve done everything properly, it should work with no issue. When there are problems, turn the power back off and troubleshoot the issue once again using the guide provided with the unit.
Wrapping It Up
As indicated above, hardwiring an Orbit sprinkler timer isn’t a particularly complicated process. So long as you have the proper tools, knowledge, and a bit of patience, you can avoid the need to call in a professional, saving you both time and money.
With the help of your Orbit sprinkler timer, you’ll be able to effortlessly control timing and adjust it to turn your system on and off at your convenience. By following the steps outlined above, your beloved lawn can be watered automatically without any physical effort on your end. Who doesn’t love the idea of that?
Do You Need to Hire a Sprinkler System Contractor?
Get free, zero-commitment quotes from pro contractors near you.

Related Questions
Why is my sprinkler timer not working?
If your sprinkler timer isn’t functioning as you programmed it, it can be incredibly frustrating to determine the reason. Troubleshooting starts by examining what the timer is doing wrong. For instance, if you have zones that aren’t being watered at all, you want to double check that your zone settings are correct. It’s not uncommon for these settings to be changed because of human error or a temporary electricity disconnection.Other possible reasons for your sprinkler timer not working could be blown fuse, malfunctioning antenna, closed external valve, or simple incorrect settings.
How much does it cost to replace a sprinkler timer?
The cost to replace your sprinkler system’s timer ranges from $40 to $450, plus labor. In some cases, your contractor may need to simply rewire or reprogram the timer, as opposed to replacing it. The going rate for a professional is roughly $50 to $100 an hour. Whereas, the cost to put in new working for a sprinkler system is between $0.50 to $1.50 per foot, plus labor charges.Although your plumber should be able to perform the repair or replacement, sometimes you may need an electrician. It will cost you between $50 and $100 per hour to hire an electrician.

Ryan Womeldorf has more than a decade of experience writing. He loves to blog about construction, plumbing, and other home topics. Ryan also loves hockey and a lifelong Buffalo sports fan.
More by Ryan Womeldorf


