How Do You Know If You Have A Bad Thermocouple?
If you have gas-fired appliances such as a water heater, space heater, or cookstove, these appliances may have one or more thermocouples. If you begin to experience problems with the pilot lights on these appliances staying lit, you probably have a bad thermocouple. But, how do you know if you have a bad thermocouple?
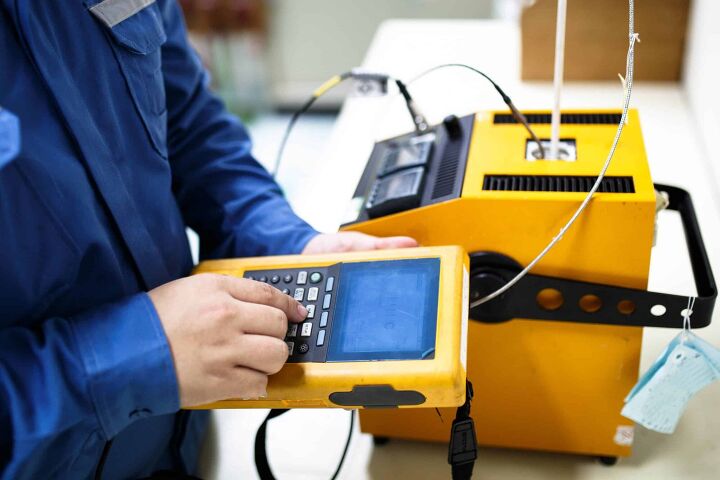
To know if you have a bad thermocouple, set a multimeter to read millivolts and test the thermocouple. Unscrew the thermocouple from the gas valve and have a helper hold the gas control knob to keep the pilot burning. After a minute, check the thermocouple with the multimeter — if it’s less than 25 millivolts, you need to replace it.
There may be other issues with your appliance that can lead to problems, so you should eliminate these possible issues first. Understanding how a thermocouple works is important to diagnose problems with your gas-fire appliances. A few quick steps can have your gas appliance back in operation.
Do You Need to Hire an Electrician?
Get free, zero-commitment quotes from pro contractors near you.

What Is A Thermocouple?
A thermocouple is a device that produces a small electric current when it is heated. The thermocouple has two dissimilar metals that form an electrical circuit. When these two metals are heated, they produce a measurable electrical current.
Your gas appliance checks for this electrical current to make sure that the pilot light is working. If there is no current from the thermocouple, the appliance will not let the gas valve open.
Finding The Thermocouple On Your Appliance
The thermocouple on your appliance is with the pilot light. Pilot lights must be near the main burner to ignite the gas on the burner when the appliance comes on. The thermocouple will sit so that the tip of the thermocouple is directly in the pilot light’s flame.
Testing For A Bad Thermocouple — Check The Position And Cleanliness
The thermocouple needs the full heat of the pilot light to create enough electrical current. Several things can cause the thermocouple to fail to operate properly.
Performing a few simple inspections and maintenance may solve your thermocouple problem without the need to install a new thermocouple.
Make Sure The Thermocouple Is In The Fire
Most appliances hold the thermocouples in place with a spring clamp. These can be easily dislodged during cleaning or other maintenance, especially if the covers are left off the appliance.
Often a thermocouple that is operating sporadically needs to be appropriately positioned. Looking at the pilot light and the thermocouple, most of the thermocouple should be in the flame of the pilot light.
If the thermocouple is out of alignment, gently pull or push the spring clamp. Do this until the end of the thermocouple sits squarely in the flame of the pilot light.
Safety Tips When Checking For A Bad Thermocouple
Remember that you are working around open flames. The clamp that holds the thermocouple may be hot. Using a small pair of needle-nose pliers is a safe way to adjust the thermocouple clamp.
You should also turn the appliance off before working around the pilot light and burner. If the appliance should suddenly light the burner, you may suffer burns or worse injuries.
Better to be safe than sorry. Turn the appliance off.
How Do You Know If You Have A Bad Thermocouple?
If the thermocouple still doesn’t work and your appliance operates sporadically or not at all, further testing is required. This procedure is a bit more involved and requires a voltage meter. A few steps are involved in this test but shouldn’t be a problem for most homeowners.
Step 1: Turn Off The Appliance
The first step is to make sure that the appliance is off. Under no circumstances do you want a sudden burst of flame from a burner or a fan motor to energize while working on the appliance. Find the controls on the gas valve and turn the valve to the off position.
Step 2: Remove The Thermocouple From The Gas Valve
The thermocouple doesn’t have wires. In most cases, the thermocouple attaches to the gas valve with a thin copper tube.
Carefully remove the thermocouple from the gas valve by loosening the copper connector. Separate the thermocouple connector from the gas valve.
Step 3: Connect The Voltage Meter To The Thermocouple And Appliance
Your voltage meter has two probes, one red and one black. Set your voltage meter to read voltage (V) in millivolts.
Attach the red probe to the thermocouple and the black probe to the body of the gas valve. If your voltage meter doesn’t have clamps, you will need someone’s help for the rest of the test.
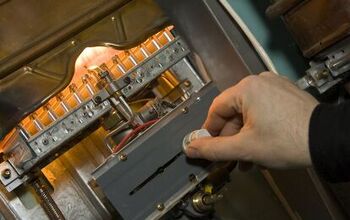
Step 4: Heat The Thermocouple
To test the thermocouple, it must be hot. Turn the gas valve on the appliance to the “Light Pilot” setting.
On some gas valves opening the pilot valve may require turning and holding the gas valve control to the left or right. Others require that you push the gas valve in to open the valve to the pilot light.
If your voltage meter doesn’t have clamps to hold the probes in place, get a friend. A second set of hands is helpful for this step to keep the pilot burning.
Step 5: Check The Voltage
Light the pilot light and wait while you watch the voltage meter. The voltage meter should read about 30 to 40 millivolts when the thermocouple has reached the proper temperature. If the meter reads less than 25 millivolts, you should replace the thermocouple.
What If It Isn’t A Bad Thermocouple?
You may have more pressing problems than a thermocouple in your gas-fired heater. Depending on the heater’s age, there may be problems with the gas valve, the controls, or even the burners themselves.
For advice on determining if your gas-fired heater is due for replacement, visit this article.
I Can’t Find A Pilot Light Or A Thermocouple
Your appliance may not have a pilot light or a thermocouple. Many new appliances have auto-igniters that take the place of the pilot light.
Auto-igniters tend to be more efficient than pilot lights. Since no flame is required to burn all the time, auto-igniters are less expensive to operate.
Auto-igniters are quite simple. A small electric current goes to the auto-igniter when the gas valve signals the gas to turn on. The auto-igniter then creates an electric arc to the burner, igniting the gas.
What If The Auto-Igniter Isn’t Working?
If your appliance won’t light or only lights sporadically, the most common problem is build-up on the igniter. A few simple maintenance steps could have your igniter up and running again quickly.
Step 1: Turn Off The Gas
Never work on a gas appliance, especially around the burners, igniters, or pilot lights with the gas turned on. Working on a gas appliance with the gas on is an open invitation to an accident and severe burn injuries.
Step 2: Locate The Igniter
The igniter is usually immediately adjacent to or at the edge of the burner. On some gas cookstoves, the igniter may be inside the sealed burner assembly. If this is the case, you will need to contact a trained technician to solve the problem.
Step 3: Clean The Igniter Surface
An old toothbrush is a perfect tool for this job. Gently rub the toothbrush over and around the igniter head. Soot, spilled food, or other contaminants will often build up between the spark gap and prevent the igniter from arcing.
Step 4: Clean The Pilot Hole And Igniter
Your igniter may or may not have a pilot hole. If the igniter has a pilot hole, move a sewing needle carefully around inside the hole to loosen any trapped material.
Use a soft rag to wipe any residue from the igniter. Look around the igniter as well and make sure there is no build-up on the burner or near the igniter.
Step 5: Turn On The Gas And Fire It Up
Turn the gas back on and try the appliance. You should hear a clicking sound as the igniter fires, and then the burner should light.
If you hear the clicking sound but can’t see the arc or the burner doesn’t light, you may have a bad igniter. Contact an appliance repair service to check the igniters.
If you suspect other problems with your gas appliance, visit this article for more advice.
Do You Need to Hire an Electrician?
Get free, zero-commitment quotes from pro contractors near you.
Getting The Fire Back On
If you suspect a bad thermocouple, diagnosing the problem may not be all that difficult. Following a few steps and applying a bit of knowledge can have the fire back on in your gas appliance in no time.
We hope that you found this information helpful. Remember to be safe when doing repairs around your home.
Related Questions
How long does a thermocouple typically last?
If you properly maintain your appliance and thermocouple, the thermocouple can last about 10 years. However, many people change them out about every four years. Therefore, it’s always wise to practice proper maintenance and upkeep of your appliances.
How much does it cost to replace a thermocouple?
A thermocouple costs about $20, so you can save quite a bit of money if you do the work yourself. However, if you need a professional to do the job, you can pay $120 to $150.

Dennis is a retired firefighter with an extensive background in construction, home improvement, and remodeling. He worked in the trades part-time while serving as an active firefighter. On his retirement, he started a remodeling and home repair business, which he ran for several years.
More by Dennis Howard


![Cost To Drill A Well [Pricing Per Foot & Cost By State]](https://cdn-fastly.upgradedhome.com/media/2023/07/31/9074980/cost-to-drill-a-well-pricing-per-foot-cost-by-state.jpg?size=350x220)