How Do I Calibrate A Nest Thermostat? (Find Out Now!)
Nest thermostats are one of the famous brands of modern technology in the HVAC business. There may be a difference in the home’s temperatures to the thermostat temperature that can rack up your electric bill. The temperature on the thermostat may say 70 degrees, while the actual temperature is 74.
When the temperatures are different, it is time to recalibrate the nest thermostat. There could be factors that may cause this, or a simple reset will do the trick. So how do I calibrate a Nest thermostat?
You can calibrate a Nest thermostat in a few different ways. Restarting the system or the entire setup process may have to be redone by starting from the factory default settings. If not, it will have to take an HVAC technician for wiring issues inside the system.
Related Content: Nest Thermostat Keeps Restarting | How To Set A Nest Thermostat To Hold The Temperature
Do You Need Your Thermostat Repaired or Reprogrammed?
Get free, zero-commitment quotes from pro contractors near you.

Factors That May Cause the Difference in Temperatures
Different factors may cause an inaccurate reading on the thermostat. Some are easy to fix and can be done yourself. Others dealing with the electrical and computer system will need an HVAC Technician.
These are the things you need to look into before calibrating the thermostat.
1. The Direct Sunlight Will Give Inaccurate Readings
Most thermostats are in the hallway of a home. Sometimes the sunlight may be shining directly on the thermostat during certain seasons. If this is happening, it will give a false reading of the actual temperature in your home.
If it is summer, the AC will constantly run due to the sunlight heating the thermostat. This can rack up a utility bill in a hurry. If it is wintertime, the heater may not run long enough to warm up the home and shut down prematurely.
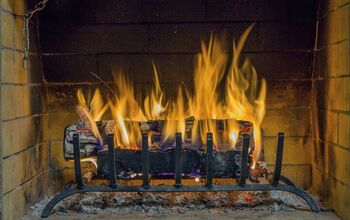
2. Appliances Are Heat Sources That Will Mess Up the Temperature
Fireplaces, dryers, and ovens are all heat sources that will cause inaccurate readings with a thermostat. If nearby, they will put off heat to raise the temperature higher than in the home. These items will also increase the price of the electric bill.
3. The Location of the Thermostat Makes a Difference
For many, the thermostat is in the hallway. The rest of the home may not get enough comfort and feel warmer or colder than it should be. A thermostat should be closest to the living quarters of the house where people gather.
No one gathers in the hallway unless they are looking at pictures hanging on the wall. There is also a restriction of airflow, so the readings may not be up to par. Another bad place to have a thermostat is near the kitchen for obvious reasons.
4. A Thermostat Placed Near a Vent Will Cause a Problem in Temperature
If there is a draft coming from a nearby vent, it can trigger an inaccurate reading on the thermostat. When the thermostat is placed near a window, door, or air vent, a temperature change will occur. The rest of the home will not be as cool as next to the thermostat.
5. Dust or Dirt Can Alter the Temperature Reading
If the thermostat is in an area where dust builds up in the home, it may need to be cleaned. Dust or dirt can build up on the sensors that read the temperature. Taking off the cover to the thermostat and carefully cleaning it should resolve this issue.
6. If the Thermostat Is Going Out, It Will Give a False Reading
There may be a problem with the thermostat itself that only an HVAC can fix. If it is under warranty and relatively new, the manufacturer can send a new one at no charge. All the new technology is meant to monitor usage and help save on the energy bill.
If You Are Thinking About Getting a Nest Thermostat
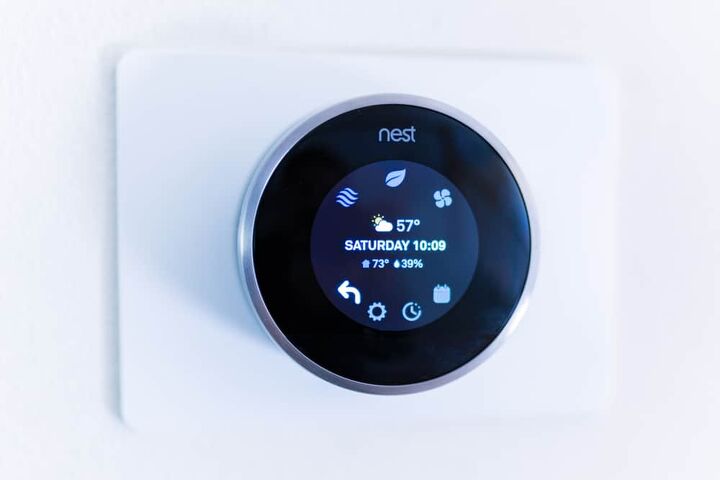
Today’s technology has all kinds of fancy options that make our lives easier. A Nest Thermostat is like a smartphone of a central unit. In fact, your smartphone has an app you can install to work the unit.
The Nest Thermostat will learn your habits in cooling and heating. Over time, the thermostat will automatically do it for you once all settings are in place. For example, adjusting the temperature between night and day, it will do it for you once it knows your habits.
It is a device you do not have to program manually. The thermostat can tell when you are home or away through your phone’s app. There is also a built-in motion sensor, and if you choose, the option is there for manual settings.
Video: How to Use Your Nest Thermostat
Can a Nest Thermostat Be Used in Any Home?
It may seem like you can put any thermostat in your home, but not so for the Nest Thermostat. The Nest Thermostat only works with a low-voltage system. If the house is rigged with a high-voltage or line voltage, it will not work.
The two ways to tell are contacting an electrician friend or looking at the wiring inside the thermostat. If you notice there are small wires of different colors, it is a low-voltage system. However, if there are only two to four wires connected with wire nuts, it is a high-voltage system.
The only way around installing a Nest Thermostat is to call a professional and have the system converted to low-voltage. If you have a low-voltage system, you can follow these steps to install, set up, and calibrate.
Step 1: Remove the Old Thermostat
Here is a list of things to do under this step:
- Turn off the thermostat and remove any backup batteries.
- Cut the power for the furnace and AC at the breaker box. Some furnaces may have a breaker next to the unit.
- Look for a third breaker for the thermostat by cutting the power off to the room it is located.
- The thermostat is clipped to the wall, so tug at it and remove it.
- Take a voltage tester to make 100 percent there is no power going to the thermostat. If there is, you may need to cut off more breakers.
- Take a picture of how the wires are in place. You will need this to put the wires on the new thermostat.
- Remove the wires by unscrewing the screws. If there are jumper cables, discard them. You will not need them for the Nest Thermostat.
- Remove the wall plate from the wall by unscrewing it.
Step 2: Installing the Nest Thermostat
This is the list to follow to put the Nest Thermostat in its place:
- Put the base plate on the wall and use a level and a pencil to mark the holes for the screws. There is one on top, and the other one is on the bottom. Predrill the holes and screw the base on the wall.
- Take a pair of needle-nose pliers and straighten the wires. Plug the wires into the base plate. You will need to push the button down and push the wire all the way, then release the button.
- Push the wires inside the hole, so they are not coming out of the base plate.
- Take the new thermostat and push it into place until it clicks. The Nest logo should be on top. Remove the plastic protective cover once it is in place.
Do You Need Your Thermostat Repaired or Reprogrammed?
Get free, zero-commitment quotes from pro contractors near you.
Step 3: Set Up the Thermostat
Here is where you will follow the instructions from the thermostat to set it up. After setup, you may need to calibrate it if the temperature is not accurate.
- Turn the power back on and begin with the language set up. To make your selections spin the silver dial and push the unit to select.
- Set up the unit to your Wi-Fi by choosing the network. You will also enter the password afterward. Once the confirmation screen comes up, press the unit to continue.
- Answer the next set of questions it will ask you.
- Next is the setup for the cooling and heating. It will ask you to confirm the wiring. If it is good, press continue.
- Go through and answer your request options, then test everything and add the app to your smartphone. Continue to follow the given instructions.
Step 4: Calibrating the Thermostat
This step is only as needed if the temperature does not match up. Here is the list of how to calibrate the Nest Thermostat:
- Check the voltage.
- Restart the Nest in the settings. Go to reset and restart.
- Go to the factory reset or default.
- Follow the setup process in Step 3.
Related Guides

We are a team of passionate homeowners, home improvement pros, and DIY enthusiasts who enjoy sharing home improvement, housekeeping, decorating, and more with other homeowners! Whether you're looking for a step-by-step guide on fixing an appliance or the cost of installing a fence, we've here to help.
More by Upgraded Home Team