Why Does My Nest Thermostat Say "In 2+ Hours"? (Find Out Now!)
Smart thermostats are a great way to help homeowners get a longer life out of their HVAC systems. Moreover, they help maximize efficiency in an HVAC system, lowering energy usage and utility bills at the same time.
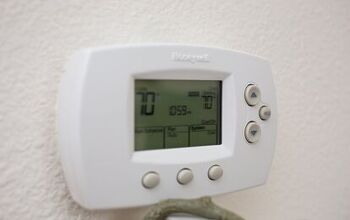
The Google Nest is one of the most popular options on the market for smart thermostats. From time to time, there may be a message saying, “delayed until”. This issue is typically a short one and the system will kick on in a matter of moments.
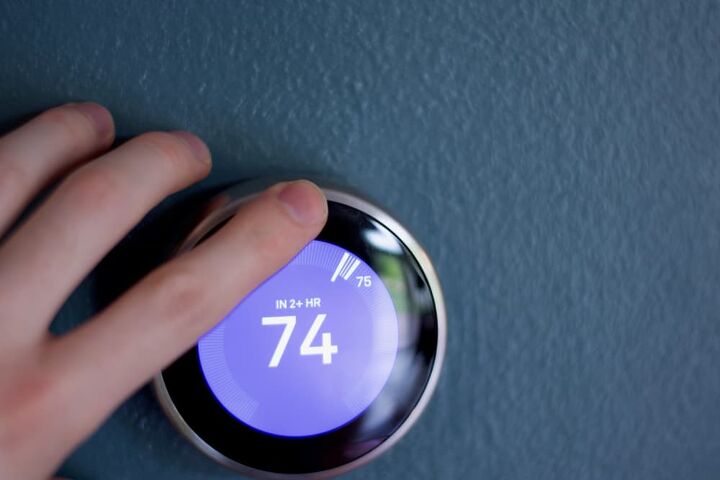
If your Nest thermostat says “in 2+ hours” this usually means that your thermostat is guessing how long it will take for the system to cool down or warm-up. However, sometimes this could be an indication that your thermostat is not getting the necessary power to use the cache of the smart functions.
Do You Need Your Thermostat Repaired or Reprogrammed?
Get free, zero-commitment quotes from pro contractors near you.

It May Not Really Be That Long
The most likely explanation for that message is that it’s just a “guess” by the thermostat. Even smart thermostats take time to warm up/cool down to the right temperature. As much as we would love instantaneous temperature settings, that is not how HVAC systems work.
Most of the time, when you see the “in 2+ hours” setting, it just the Nest guessing how long it will take to achieve that newly set temperature. The reason for the delay is to ensure that components like the compressor don’t become overwhelmed and wear down quicker.
It may also simply be that the thermostat has not caught up to back-to-back changes to the settings. When it throws up the “delayed” or “in ___” message, it may simply be trying to go through the changes that have been implemented. Give your thermostat a little bit to catch up or for the HVAC system to get up to speed. That will typically resolve the “in 2+ hour” problem without much of an effort from you.
Low Power
Nest thermostats are wireless in nearly every way possible. That said, it needs to send out the proper voltage levels in order to execute the various settings included. The motion sensors even the Wi-Fi connectivity all require a certain level of voltage to get them going.
The Nest has an integrated rechargeable battery inside. Whereas older thermostats are hard-wired, the Nest gets its charge whenever the HVAC system kicks on. The longer the HVAC runs, the more sustained a charge the Nest gets.
But the battery does drain quicker with all of these smart functions. If you notice a “delayed until” message in general, it is most likely due to a lack of power from the Nest. There are a few possible fixes for this issue, ranging from “quick and simple” to “complicated.”
The C-Wire
For most Nest thermostats, there is no C-wire hooked to the unit. The C-wire on traditional thermostats are what give the unit the constant charge needed in order to power its functions. With wireless options like the Nest, there may not even be a C-wire included.
For the most part, the Nest is built to handle charging effectively but it is not a perfect piece of equipment. The “delayed” message is a great indication of that. If you are experiencing frequent “delayed” messages, then it may be time to install a C-wire.
Different C-Wire Installations
The good news is that there are more than a few options when it comes to providing a consistent charge to your Nest thermostat. In some cases, you can simply “boost” your Nest to get rid of the “delayed” message.
That said, there are three ways to solve the problem: use a C-Wire adapter, hardwire a C-wire, or repurpose the G-wire. There are benefits and downsides to each of these options, so consider them carefully.
C-Wire Adapters
The easiest choice is to pick up a C-wire adapter. There is no real “installation” needed and you can use it as you see fit. There are adaptors out there like the Venstar or Fyve adapter.
To use a C-wire adapter, you simply need to have an outlet nearby. Plug the adapter into the outlet and then connect it to the Nest thermostat. In most instances, the instant connection should be enough to remove the “delayed” message. But it is always better to let the Nest charge a bit.
The downside to using an adapter is that the wire can be seen. If you wanted to keep the adapter plugged in, you would have to find a way to disguise the wire or simply deal with it. Still, it is the quickest and simplest way to address the issue at hand.
Hardwire the C-Wire
When experiencing reoccurring issues with the “delayed” message, you may decide that your Nest thermostat needs a permanent C-wire. That’s not a bad idea, either, as it provides a constant source of charging, not just when the HVAC system kicks on.
The principle of connecting the C-wire is simple, but there is one major caveat. Basically, the C-wire needs to connect at both ends. One end goes to the Nest while the other goes to your HVAC system, preferably the furnace.
The downside here is that hardwiring the C-wire means getting in behind the walls. Reaching the thermostat may be a tough endeavor and is usually better left to a professional. When in doubt, you can use a sender and receiver. The Fast-STAT is a great alternative to getting in behind the walls.
Using the G-Wire
Let’s say that you don’t have access to a G-wire and you aren’t too keen on buying an adapter. The last option would be to take the G-wire and repurpose it into a C-wire. The G-wire is green and gives you manual control over the blower fan. A lot of people confuse this with the ground wire; it is not the same thing.
The process is straightforward but also involves getting in behind the walls. You simply move the G-wire from its terminal into the C-wire’s place. The other downside is that you will also lose control over the ventilation fan while it is in the C-wire’s place.
There are a couple of things worth considering before using the G-wire. The first is that the fan should not be connected to another piece of equipment already. That makes using the G-wire quite a bit more complicated. Secondly, if you have a zone panel, you will not be able to use the G-wire. Lastly, there may be a need for a jumper cable, which would connect in the now-empty G-terminal and into the Y-terminal as well.
Losing control over the fan is generally not something you want to do, but it all depends on your personal preferences. It is advised that you find a more permanent solution instead. Using the G-wire is a short-term solution.
Do You Need Your Thermostat Repaired or Reprogrammed?
Get free, zero-commitment quotes from pro contractors near you.
Related Questions
The Google Nest thermostat is an advanced piece of smart home equipment. There are a wide range of things that it can do, depending on the model that you pick. Learning more about the Nest can take time as well. Here are some of the most commonly asked questions by users of the various Nest products.
How Do I Use My Nest Thermostat Manually?Depending on the model of Nest thermostat that you have, there may be automatic scheduling functionality. Even on the older or more basic models, there is still scheduling functionality available.
That said, users may have a desire to make manual changes to the temperature. The reasons are up to the user, but the most common instances would be on a particularly hot day where the scheduled temperature just isn’t cutting it.
Accessing the manual function is simple. On the Nest itself (or through your smartphone app), find the schedule screen. On the Nest E and Nest Learning Thermostat, you would press the ring and select “schedule” from there instead.
Next, toggle off the schedule setting. You can also set or create temperature points to your specific liking. It is a great way to create a temperature schedule that works better for your needs at that moment in time.
How Do I Reset My Nest Thermostat Schedule?There are two variations of the Nest that have the advanced auto-schedule feature: the Nest E and the Learning Thermostat. Through the auto-schedule function, the Nest picks up on the heating and cooling patterns that you follow, creating an auto-schedule so you don’t have to constantly change things.
That said, the auto-schedule feature is not perfect. Over time, it may not be quite what you had hoped. That leaves you with the need to stop the auto-schedule feature going forward. You can still use other scheduling features in place of the auto-schedule.
The process is pretty simple, simply open the Nest app on your smartphone or tablet. Find the settings and select “auto-schedule.” From there, it is as simple as toggling the switch off. That’s all there is to it. As a matter of fact, the scheduling can be controlled in a similar manner no matter which version of the Nest that you have.
Related Guides

Ryan Womeldorf has more than a decade of experience writing. He loves to blog about construction, plumbing, and other home topics. Ryan also loves hockey and a lifelong Buffalo sports fan.
More by Ryan Womeldorf