


Cleaning Checklist For Moving Out


Moving out is stressful, especially when you remember all the cleaning that comes along with it. Stressful as it is, it's necessary to make your house look great for the next resident. Luckily, we put together a cleaning checklist for moving out to help you get your deposit back.
Go room by room, wipe the walls, and patch holes from nails and rack hooks with spackle when moving out. Wash each mirror and window, then clean the countertops in your bathroom and kitchen. Next, make sure to dust the ceilings, vacuum, mop the floors, and deep clean the kitchen, bathroom, and bedrooms.
You can do these tasks in any order that makes your move-out process easier. Follow along as we explore our cleaning checklist for moving out.
What Should You Clean When You Move Out?
The simple answer is that you should clean everything when you move out, but it’s more complicated than that. We’ve put together a cleaning checklist for moving out that isn’t meant to be done in any specific order. Instead, you can use this checklist as a guideline to clean up and get your deposit back at your pace, depending on your move-out schedule.
1. Wipe The Walls
It’s no secret that walls get just as dirty as floors and even countertops, but they’re easy to neglect. That said, it’s something your landlord or the buyer will notice when they inspect your old home. Not only does cleaning the walls help you get your deposit back, but it also lets you check for other problems.
For example, you may notice cracked paint and peeling wallpaper during the process. Luckily, all it takes to clean walls is an eraser foam sponge and a mix of warm water and dish soap. Be careful not to soak the walls, or else you may cause water damage.
Repeat the process throughout the house and work room by room. You must wait to clean some sections of the wall until the furniture is gone, so you may have to save this step until your moving day.
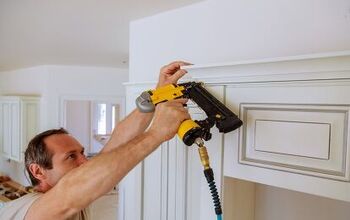
2. Patch Holes In The Walls
You most likely have some holes in the wall if you’ve lived at your home for several years. This is normal, especially if you hang shelves and pictures on the wall. That said, your landlord and the next resident may not appreciate that, so you must patch the holes.
All it takes is a little spackle to patch most small holes. Keep in mind that you must match the color of the paint on the wall. In that case, you may have to look for a special product, so the patch doesn’t contrast with the wall too much.
Simply sand the spackle when you’re done so it’s flush with the wall. You can also use plastic wood filler to patch holes in your baseboards and walls.
3. Wash Your Windows And Mirrors
Windows and mirrors hold smudges that often look grosser than they are. Luckily, they’re easy to clean, but it can take a while depending on how many you have at home. Go room by room and thoroughly clean each window and mirror with a glass cleaner product.
Use a washcloth and paper towels to clean the mirrors and windows until all the smudges are gone.
4. Clean The Countertops
The kitchen is the heart of a home, so every detail should be flawless when the next resident moves in. That includes the countertops, as nobody wants to move into a home with dirty counters. All you need is a rag, spray bottle, dish soap, and water for this process.
Fill a spray bottle with 10%-15% mild dish soap and 85%-90% water so it isn’t too soapy. Spray each section of the countertop and clean with one-by-one consistent motions. For example, stick with a straight pattern or circular pattern throughout so the wiping pattern looks consistent.
5. Dust The Ceilings
Many people forget to dust their ceilings before moving out, and that’s a mistake. Ceilings may not appear as obviously dirty as floors, but they can get quite dusty. Pet hair can even accumulate on ceilings when the AC turns on and blows it around the house.
Luckily, it’s easy to dust the ceiling if you have a long duster to reach them. Dust and pet hair may fall to the floor, so get ready to sweep them up afterwards.
6. Refresh Your Appliances
If you’re a renter, there’s a chance your home was furnished with some appliances. Many rentals come with refrigerators and washing machines that tenants are responsible for. In that case, you must clean them before you move out.
Start with the fridge and carefully clean each shelf and drawer. All it takes is some warm water and dish soap, just try not to soak the fridge. Pat the shelves and drawers with a dry paper towel to soak up any leftover water.
Next, take a sponge or rag and wipe down the outside of the fridge. You may need to pull it away from the wall slightly to get the sides. Repeat this process with your washing machine and dryer as well. Make sure to check for pet hair on the sides of your appliances.
7. Deep Clean The Bathroom
Nobody loves to clean a bathroom, but it’s essential when moving out. Luckily, you can find many bathroom cleaners that make it easy to clean nearly every part of the room. Start with the sink and counter in your bathroom, then move onto the mirror if you haven’t cleaned it yet.
Keep in mind that you must use a separate glass cleaner for your bathroom mirror instead of a bathroom cleaner. Next, you must thoroughly clean both the inside and outside of the toilet. Make sure to check behind the toilet and mop the ground in front of it.
You can use a bathroom cleaner for the tub and shower, but household items like vinegar work as well. Simply mix a 1:3 vinegar and water solution in a spray bottle or bucket. Soak a rag or sponge in the solution and thoroughly scrub your tub and shower. The acidity of the vinegar should help remove stubborn soap scum.
8. Tidy Up The Outside Areas
It’s easy to forget about outside areas when you focus on cleaning up inside. That said, porches, decks, patios, and other outdoor spaces can get quite dirty as well. This is easier than cleaning inside, however, as it typically entails sweeping dirt and pulling weeds.
You may need to power wash the ground if you’ve lived there for years and it’s quite dirty. Otherwise, you can hire a service to do that. You can also ask your landlord if that’s necessary to see if it would affect you getting your deposit back.
9. Make Your Kitchen Look As Good As New
By this point, you’ve likely already cleaned the countertops in your kitchen. Now, it’s time to focus on the sink and cabinets. You can use a homemade mixture to clean the sinks, but it helps to use a special cabinet cleaner for the cabinets.
Carefully clean the cabinets inside and out, and make sure to leave the shelves spotless. Clean the hinges as well if they are rusty and dirty. Next, simply clean the sink and faucet with a 1:3 dish soap and water mixture. Otherwise, you can use a mixture of white vinegar and water.
Make sure to check the oven and stove as well. Clean the burner caps on your stove and make sure the oven doesn’t have any food remnants.
10. Mop And Vacuum The Floors
Before you can call it a day, you must mop and vacuum the floors. This cleaning checklist is meant to be done in any order, but it’s a great idea to save the floors as one of the last sections you clean. After all, you’ll likely track footprints throughout the house during the cleaning and move-out process.
You can save yourself trouble if you clean the floors at least once a week before moving out. That way, it won’t take as long to clean them when you move out. Vacuum carpeted rooms and mop rooms with wood, tile, and marble floors.
Summing It Up
Wipe the walls, patch holes, and scrub your windows and mirrors when moving out. Carefully clean the countertops in your bathroom and kitchen as well. Mop and vacuum the floors, dust the ceilings, and scrub your tub and shower before you move out. Check each room to see if you missed anything before you leave.
Related Guides:
Nick Durante is a professional writer with a primary focus on home improvement. When he is not writing about home improvement or taking on projects around the house, he likes to read and create art. He is always looking towards the newest trends in home improvement.
More by Nick Durante


![How To Reset A Whirlpool Cabrio Washer [In 5 Easy Steps!]](https://cdn-fastly.upgradedhome.com/media/2023/07/31/9076531/how-to-reset-a-whirlpool-cabrio-washer-in-5-easy-steps.jpg?size=350x220)

