Can You Put Sheetrock Over Paneling? (Find Out Now!)
Wood paneling was a popular option for homes in the 1970s and 1980s, but today is a dated look. Many homeowners prefer the appearance of smooth drywall compared to wood grain paneling. Updating your interior space can not only make you happier at home, but it can increase the value of your home. Unfortunately, removing wood paneling can be extremely time-consuming and expensive.
It is possible to install sheetrock directly over wood paneling, pending the paneling is in good condition. Adding drywall to your wood paneling can not only give you an updated look, but it is cheap and relatively quick to complete. A homeowner can add sheetrock to wood paneling in just a weekend with limited and essential tools.
Of course, adding drywall to your existing wood paneling will increase the thickness of your walls, which means additional accommodations are needed for the fixtures and electrical components. Not only will you have to re-measure and cut your molding and trim, but you’ll also need to upgrade your outlet boxes and light switches to an extended box design.
Luckily, these accommodations are easy to do, and many big-box home improvement stores carry the necessary supplies for you to complete your project.
Do You Need to Hire Drywall Installers?
Get free, zero-commitment quotes from pro contractors near you.

What Are the Benefits of Hanging Sheetrock Over Paneling?
Hanging sheetrock over paneling is a wonderful idea to help update your room. Removing wood paneling can be extremely labor and time-intensive and can take even longer if your wood paneling is held in place with glue and nails. Plus, removing and disposing of wood paneling is costly and can be a messy process. Adding sheetrock directly over your wood paneling can help save you time and money. Plus, adding the sheetrock over your paneling can give you the bonus of some additional insulation and soundproofing in your room.
How Can I Tell If My Wood Paneling Is in Good Shape?
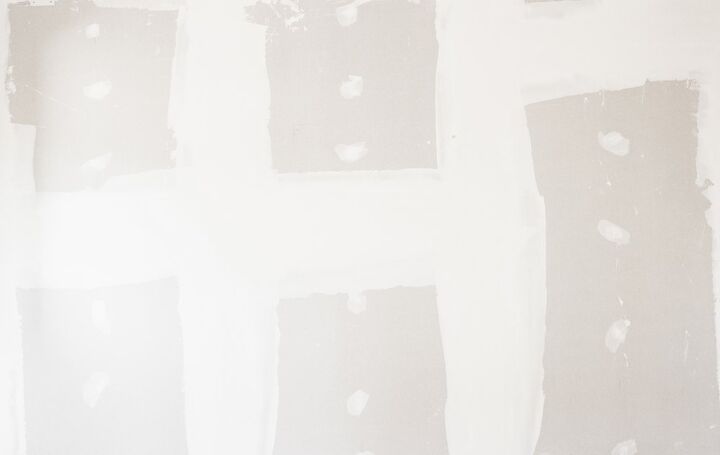
It is possible to sheetrock over wood paneling, pending your paneling is in good shape. You want to ensure that your sheetrock has something substantial to adhere to and that the paneling is not deteriorating. Ensure that the structure of the wood paneling is in good condition.
If you notice cracking, chipping, or flaking, your paneling may not be in the best condition. Further, if your paneling shows any signs of mold or mildew, do not sheetrock over the paneling. Adding sheetrock to the molded paneling will trap mold and mildew in a dark area, allowing it to spread further. Eventually, mold and mildew will penetrate and destroy your new sheetrock.
How Much Does New Sheetrock Cost?
Adding sheetrock to your wood paneling can help give you an updated look with smooth walls, but sheetrock is a heavy expense. Plan on spending about $2 per square foot to install the drywall. After you calculate the labor and material, this cost comes out to about $70 per panel. In a standard size room that is 12 x 12, you can expect to use about 18 sheetrock panels, which will cost about $1,300.
Some conditions within your home may cause the price to fluctuate. Be sure to also account for the cost of:
- Moving and transporting materials
- Labor set up, and travel time
- Clean up and debris removal
- Preparing existing structures
- Specialty materials such as extended outlet boxes (see below) to finish the room
- Possible additional decorative molding or baseboards
How Do I Navigate Outlets and Switches?
Applying new drywall over existing wood paneling will add thickness to your walls, making it impossible to use the old electrical outlets and switches. You’ll find with the added sheetrock that your junction boxes are now about ¼ inch too short. You will need to buy extension boxes for your outlets. These boxes are readily available from most large hardware or home improvement stores. Adding an extension box will ensure your electrical outlets and light switches will fit flat against the finished wall.
What Tools Do I Need to Hang Sheetrock Over Paneling?
To install sheetrock over paneling, you will only need a few basic tools. You should, at a minimum, have:
- Screw gun or screwdriver
- Measuring Tape
- Putty Knife and Trough (optional)
- Drywall tape, drywall mud
- Sandpaper
- Stud finder (optional)
- Drywall Saw
Installing sheetrock requires only essential tools, but you will need plenty of supplies to complete this project. Make sure you have enough drywall, drywall tape, and drywall mud to complete your wooden paneling makeover.
How Do I Hang Sheetrock Over Paneling?
It is a relatively easy process to hang sheetrock over paneling, and most homeowners can complete this project on their own. Allow yourself a full weekend to complete this project, and having additional help can allow you to manage large and heavy pieces of drywall better. To hang sheetrock over paneling, you must:
Step 1: Locate Studs
Locate the studs with an electronic stud finder and mark their location on both the wall and the ceiling. You will eventually cover your marks on the wall, so having spots on the ceiling will better help you center your drywall along a stud.
Step 2: Remove Moldings
Remove any existing floorboards and moldings from the floor, ceiling, and around windows and doors. Be sure to remove the molding gently since you will reuse the molding on your finished sheetrock. Put the removed trim in a safe place.
Step 3: Measure and Cut
Measure and cut your sheetrock to the appropriate size, accommodating for windows, outlets, or light switches. Using a drywall saw will help you make easy and accurate cuts.
Step 4: Install
Starting at the bottom, install the sheetrock over the paneling, using drywall screws that are screwed into the studs to hold the drywall in place. Be sure to use several screws down the length of the drywall.
Step 5: Reinstall Molding and Trim
Because you have changed the inner dimension of the room slightly, you will have to recut some of your floorboards and potentially your crown molding. Measure, cut, and reinstall your floorboards, molding, and trim.
Step 6: Finishing Seams
Add finished seams using drywall tape between the individual pieces of the installed drywall. You will need to apply a thin layer of mud over the tape to keep the seams along the transitions smooth.
Step 7: Dry and Repeat
Let the drywall mud dry overnight. Sand the high spots and add another layer of drywall mud. Repeat as necessary until you have a smooth finished product that hides the individual seams.
Step 8: Paint and Finish
Add a fresh coat of paint and allow it to dry. Reinstall your outlet covers and light switches with extended boxes for a finished and complete room.
Do You Need to Hire Drywall Installers?
Get free, zero-commitment quotes from pro contractors near you.
Related Questions
What cheaper options do I have to cover my wood paneling?
Wood paneling was once a popular option for people, but today is not the most desirable look to have in your house. Installing drywall over wood paneling can be expensive and very labor-intensive. Luckily, alternative options can still give you an updated look with much less time and effort.Many people choose to paint over wood paneling. Simply remove dust and dirt before painting. The ridges in the paneling can give the paint a fun texture and sometimes even look like wallpaper!
What is an easy way to find studs without a stud finder?
When hanging drywall, you must find the studs inside the wall to ensure you properly secure the sheetrock to a stud. However, buying a stud finder can be expensive, and not everyone is willing to make the investment in a new specialty tool. Studs can be easy to find, especially if you can see the original nail holes through the wood paneling.Because you will soon cover the wood paneling, mark the ceiling where at least one nail line falls, indicating a stud. Usually, studs are spaced every 16 inches, so with a quick measurement across your wall, you will be able to locate where the studs are without an expensive stud finder.
Related Articles

We are a team of passionate homeowners, home improvement pros, and DIY enthusiasts who enjoy sharing home improvement, housekeeping, decorating, and more with other homeowners! Whether you're looking for a step-by-step guide on fixing an appliance or the cost of installing a fence, we've here to help.
More by Upgraded Home Team


![How To Reset A Whirlpool Cabrio Washer [In 5 Easy Steps!]](https://cdn-fastly.upgradedhome.com/media/2023/07/31/9076531/how-to-reset-a-whirlpool-cabrio-washer-in-5-easy-steps.jpg?size=350x220)