


Can You Install Vinyl Plank Flooring Over Linoleum?
Nothing screams 1960s design quite like linoleum floors — and not in a good way. Adding new floors is likely on your list of top to-dos if you’re updating your home. And luckily for you, you might be able to install vinyl plank flooring over linoleum without a lot of hassle.
You can install vinyl plank flooring over linoleum as long as the linoleum is in good condition. If the floor has a lot of texture or indentations, use an embossing leveler to even things out first. However, if the linoleum is in rough shape, you need to remove it. If the floor itself has major bumps or dips, you’ll need to address sub-floor issues.
Installing vinyl plank flooring in your home provides a durable option that offers the look of hardwood floors at a fraction of the cost. If you’re trying to bid farewell to your old, outdated linoleum floors, installing vinyl planks on top can keep things simple.
Installing Vinyl Plank Floors Over Linoleum
The most important part of laying plank vinyl over linoleum is to prep the linoleum floors. Failure to do so will result in poor installation, such as the vinyl not sticking well or an uneven surface.
Check out your existing linoleum floors. If they’re in good condition and level, then you can proceed with the process. However, if you notice a few uneven spots or the floor has many indentations, you’ll need to do some extra work. (More on this below.)
But first, here’s what you need to know for installing vinyl plank flooring on top of linoleum floors.
1. Prep And Clean The Linoleum Before Installing Vinyl Plank Floors
Remove any baseboards or trim and clear the room. Now it’s time to prep the floors.
If you attempt to lay vinyl planks over dirty linoleum, the adhesive on the back of the planks likely won’t stick well. Even if you can’t see it, your linoleum floors might have grease spots, a wax coating, and similar substances.
Put on some eye protection, gloves, and a mask (safety first). Use a heavy-duty TSP cleaner (trisodium phosphate) to scrub the floors and eliminate any build-up of oils and other unpleasantries. Give the floors a good rinse and let them dry completely.
TIP: Vinyl floors need roughly 48 hours to acclimate to the room before you install them. Otherwise, they could expand or contract after installation. Store the planks in the room where you plan to install them for 48 hours before installation. (This gives your linoleum more than enough time to dry completely).
2. Mark Where Your Floors Will Go
Give yourself some guidelines to follow when laying your new floors. Start in the center of the room. Use a straight-edge ruler and pencil to mark lines for where your planks should go.
Alternatively, you can use a chalk line to pop straight lines across your room (much easier). It’s essential to ensure the lines are straight, as the slightest deviance will throw off your entire project.
3. Decide Where To Start Laying Vinyl Planks
Check the manufacturer’s installation instructions about where to lay the first plank. This position can vary from floor to floor and between manufacturers. However, typically, you begin in the center of the room and work toward the walls.
The direction to lay vinyl plank floors is up to you and your design preferences. It’s wise to lay out the flooring before installing it. This step gives you a visual to check your design before you make things permanent.
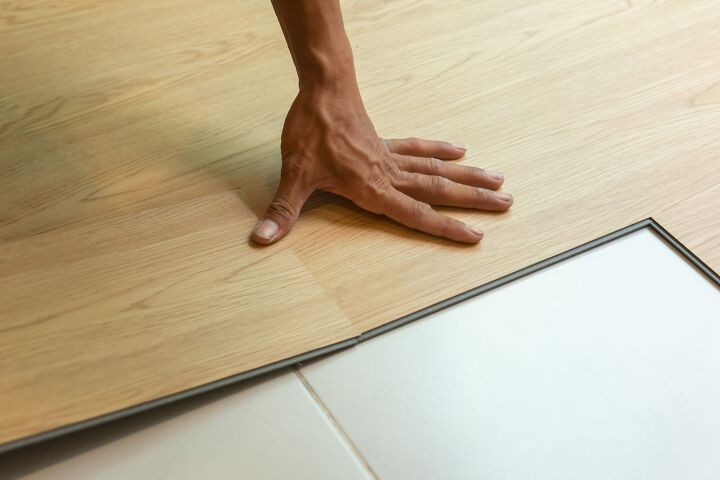
4. Install The New Floors
Follow the installation instructions to install your new flooring. Use a sharp utility knife to make cuts, and wear rubber gloves to protect your hands from the adhesive. A floor roller helps the adhesive take hold, so planks stay put. You can rent one from a home improvement store.
But a heavy-duty rolling pin also does the trick if you’re working in a small space. (As long as you don’t mind rolling the floor while you’re on your hands and knees — wear knee pads!)
5. Finishing Touches
After installing your new floors, use denatured alcohol to remove any adhesive that might have gotten on the tops of the planks. Then, give your floors a good pass with a soft mop. Let the floors set for at least 24 hours before you start reinstalling trim or moving furniture back into the space.
Since the floors are brand new, they should have a great sheen and look perfect. However, you can easily make your vinyl plank floors shine with a few simple steps. Frequent dust mopping to remove debris goes a long way. And household products like vinegar, baking soda, or rubbing alcohol can help bring back that original shine.
What If My Linoleum Floors Have Some Uneven Spots?
If your linoleum floor is in good shape but has a couple of small uneven spots, don’t fear. You can still likely lay vinyl plank floors on top. You’ll just need to perform an extra step before you install your new floors.
Use an embossing leveler to even out all the low spots and create a level surface for your new floors. Apply the leveling compound with a straight-edge trowel according to the manufacturer’s instructions.
When Is It Not A Good Idea To Put Vinyl Floors Over Linoleum?
Unfortunately, there are some exceptions to when you can lay vinyl plank floors directly over linoleum.
- If your linoleum floors are in poor condition, loose, coming up from the floor, or otherwise damaged, you’ll need to remove them. Keep in mind, depending on when the floors were originally installed, they may contain asbestos. If you’re unsure, it’s best to call pros to take over this part of the project. Or at least test the floors for asbestos before you start ripping them out of your space.
- If several layers of linoleum flooring are already in place, you might need to remove them. Otherwise, adding vinyl planks could make your floor too high for trim work, appliances, etc.
- If the floor has weak spots or is uneven, causing the linoleum to crack or loosen, you’ll need to address the issue. It’s essential to have a solid, flat surface for installing your new floors. You’ll want to remove the linoleum to address any underlying issues and determine if you need a new sub-floor.
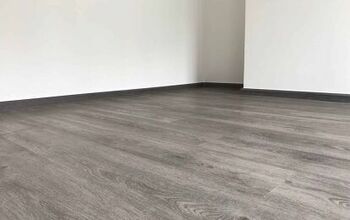
Goodbye Linoleum, Hello Vinyl Plank Flooring
To make a significant impact in your home, say farewell to outdated linoleum by covering it with vinyl plank flooring. As long as the linoleum is in good shape and you have a flat surface to work with, you need little prep work. Simply clean your floors, remove any wax or oil build-up using a TSP cleaner, and let the floors dry.
Install your new floors according to the manufacturer’s instructions, and you’ll be staring at them with a dropped jaw for days to come. You can use an embossing leveler to even things out if there are just a few uneven dips or spots. However, if the linoleum is in poor shape, loose, or peeling up, it’s best to remove it first.
Once you remove it, you can sand the concrete to remove any glue and even the surface. Vacuum up the dust and debris, then lay your vinyl plank flooring directly onto the concrete (Unless you want to add an under-layer for noise reduction purposes, etc.)
Overall, installing vinyl plank flooring is a relatively easy DIY project requiring some know-how, patience, and elbow grease. (And maybe a couple of friends and pizzas, too.)
Related Guides:

Stacy Randall is a wife, mother, and freelance writer from NOLA that has always had a love for DIY projects, home organization, and making spaces beautiful. Together with her husband, she has been spending the last several years lovingly renovating her grandparent's former home, making it their own and learning a lot about life along the way.
More by Stacy Randall


![10 Most Dangerous Neighborhoods in Baltimore [Updated]](https://cdn-fastly.upgradedhome.com/media/2023/07/31/9075655/10-most-dangerous-neighborhoods-in-baltimore-updated.jpg?size=350x220)


