Can You Install Kitchen Cabinets On A Floating Floor?
Installing kitchen cabinets is one of the bigger home improvement jobs homeowners face. Something that needs to be considered before installation begins is what type of flooring you’re working with. Yes, flooring is a big deal when installing kitchen cabinets.
Technically, you can install kitchen cabinets on a floating floor. However, that does not mean that you should. Floating floors are not designed to handle the extra weight of cabinets, because the floor cannot expand and contract as it needs to. This is why it’s best to steer clear of the idea altogether.
Don’t let this discourage you. Today we’re going to dive into the topic of flooring and how it affects cabinets. The detailed step-by-step cabinet installation section will have your kitchen looking incredible in no time.
Do You Need to Hire Cabinet Installers?
Get free, zero-commitment quotes from pro contractors near you.

Floating Floors Are Not For Everyone
Installing floating floors can be fantastic for many homeowners. You can install them over existing flooring and will save you money on adhesive. There are a few reasons where floating floors aren’t the best option available.
Any area in your home that will have heavy things on the floor isn’t an excellent place for a floating floor. Also, any room where things will be bolted down is a no-go for this type of flooring. I like to use floating floors for things like entryways, hallways, and dining rooms.
Alternative Flooring Types for Kitchens
There’s no denying that your kitchen is one of the rooms in your house that is used daily. It’s essential to find the proper flooring before installing any cabinets. This can be quite a challenge, so I’ve found the best options available.
Cork Flooring
Cork flooring is harvested from tree bark and is becoming more and more popular. It’s incredibly easy to clean and relatively simple to install.
Pros:
- It is highly sustainable and eco-friendly.
- Cork is designed with a moisture-resistant cellular structure.
- It is soft to walk on.
- Cork flooring is slip-resistant.
Cons:
- It must be sealed every three to four years.
- It can become discolored when exposed to excessive sunlight.
- Heavy furniture can cause indentations.
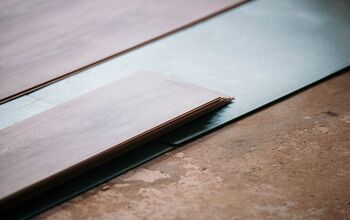
Engineered Hardwood Flooring
Hardwood flooring is one of the more classic options available. It can be incredibly expensive and harmful for the environment, but thankfully there’s now engineered hardwood flooring. This style of flooring makes any room look more elegant and can add value to your home.
Unlike natural hardwood flooring, engineered won’t warp or expand due to the heat of your oven. There’s no concern for the moisture in your kitchen affecting the floor.
Pros:
- It can handle heavy use and daily traffic.
- Engineered hardwood is moisture-resistant.
- Hardwood flooring increases your home value.
- It transitions flawlessly in open-concept homes.
Cons:
- Engineered hardwood is the most costly.
- If a single plank is damaged, it’s difficult to replace it.
- It’s made with adhesives and resin.
Vinyl Flooring
Easily one of the most significant selling points of vinyl flooring is that there are endless options available. Some planks look exactly like real wood and a myriad of tile designs. You can even buy vinyl flooring that looks like natural stones.
Pros:
- It’s a cost-efficient option for those on a tight budget.
- Vinyl is highly water-resistant, and some options are even waterproof.
- You can find a wide assortment of colors and styles.
- It is easy to clean and maintain.
Cons:
- It won’t add any value to your home.
- It’s not the most eco-friendly or sustainable option.
- Vinyl is susceptible to scratches and gouges.
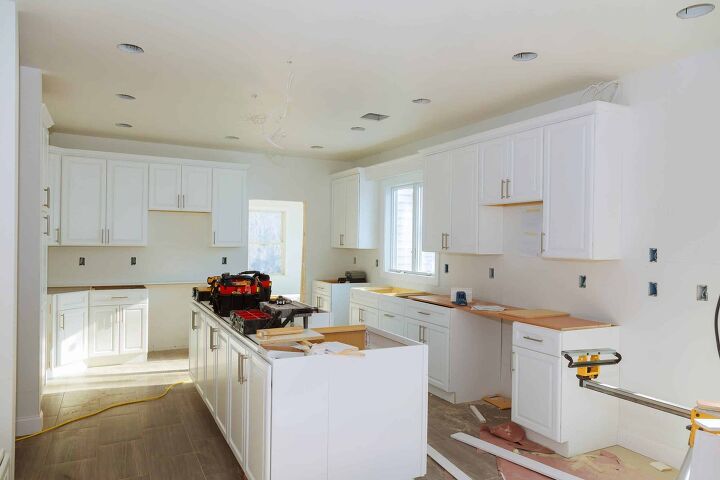
How to Install Kitchen Cabinets
It can seem intimidating to install your own kitchen cabinets. If you don’t feel comfortable completing the task yourself, you can always hire a licensed professional. If you’re up to the challenge, you’re in the right place.
No matter what type of flooring you’re installing on top of, putting in cabinets is essentially screwing wood into the wall. Making sure everything is level and adequately measured is vital. Let’s get into the step-by-step installation guide.
Preparing the Space
Before you start installing cabinets into your kitchen, there are a handful of things you’ll need to do. For example, you’ll want to ensure that the walls and corners are plumb, square, and straight.
You’ll want to take note of any dips, bubbles, or angles that require alterations. If you’re starting from scratch, installing electrical lines for appliances should be done before putting in the cabinets.
Find all of the receptacles that will be above the countertop backsplash. These should be every four feet or so, depending on where you plan on placing portable appliances. Don’t forget to rough in cabinet lights and any wall-mounted switches, supply, and drain lines.
Step 1: Mark the Reference Lines and High Point Layout Line
Using a level, mark off a line on the walls around 48 inches off the ground. Take a piece of chalk and place a line at these marks all around the kitchen. Also, make a mark where the shortest measurement is, as well as the highest point.
Under the mark for the high point, make a spot for where your base cabinets will reach. This is usually around 34 inches above the flooring. Then, extend a layout line that goes along every wall, ensuring that it’s level.
Don’t forget to mark the locations for studs and drill a small hole to remember the location. Also, make notes of where any appliances will be going and if you need any wiggle room for them.
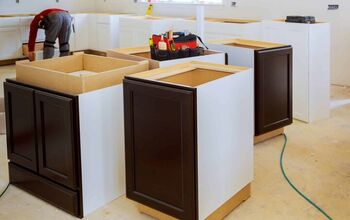
Step 2: Install the Corner Base Cabinet
Next, take one of the corner cabinets and put it into position until the back edge meets the layout line. If there is plumbing, mark the locations on the back panel before installing. Drill holes through the back of the cabinet.
Take a level and ensure that the face of the cabinet is plumb. Add shims underneath if you need to. Drive two ½-inch deck screws through the back of the cabinet into the studs.
Then, counterbore and fasten the wood to the floor by using deck screws. Be sure to take off the washers when doing this. It should be done at all of the shim locations to ensure maximum stability.
Step 3: Install the Remaining Base Cabinets
For the third step, you’ll be installing the rest of the base cabinets. Follow the same directions as above, making sure the top levels are even with the layout lines. Align each cabinet individually, so the face is flush with the cabinet next to it.
Clamp them together and the counterbore through the edge of the face frame. Take a two-inch screw and fasten both of the cabinets together. Then use deck screws with the washers on and drive them through the back of the cabinet.
If you have any leftover shims that are protruding, you can use a utility knife to take them off or cut them down. It’s almost time to insert the drawers and finish up the installation.
Step 4: Install the Doors and Toekick
For the final step, you apply the door hinges and apply any knobs to the drawers. Then, using a one-inch brad, fasten the trim to the base of the cabinet. You can cover any nails with wood putty or wax stick that matches the surface.
Install the drawer tracks and slide in the drawers. Finish by screwing the doors on, ensuring there’s enough room to swing them open. You’ve successfully installed kitchen cabinets!
Do You Need to Hire Cabinet Installers?
Get free, zero-commitment quotes from pro contractors near you.
Related Questions
Do you put a floating floor under appliances?
Floating floors are available in a variety of different materials. Not all of them are suitable for kitchen flooring due to the weight of appliances. They can stress or even break the tongue-and-groove fasteners. For this reason, it’s best to use snap-together flooring for your kitchen. This will ensure that not only is your floor sturdy, but it’s also durable. If you’re working with a larger kitchen, this is a must.
Can you glue down a floating floor?
Yes, you can glue down a floating floor. You also have the option to staple it down if you’re looking for some extra security. If you’re working with a click-together floor, gluing it down can be a bit more difficult.
Do kitchen cabinets sit on the subfloor?
Because cabinets often come before flooring, they can temporarily sit on the subfloor. Once the flooring is installed, the cabinets will no longer be in contact with the subfloor. For homeowners that aren’t installing flooring and leaving it all-natural, the cabinets will permanently be sitting on the subflooring.
Related Guide

Kirstin is a passionate writer who loves helping people learn new things when it comes to home improvement. When she's not behind a keyboard, she enjoys DIY projects, crafts, spending time with her pets, and making videos. She hopes that with all she writes, someone is finding a solution to their home improvement needs.
More by Kirstin Harrington