Can You Install A Farmhouse Sink In Existing Countertop?

There are many options homeowners have when it comes to decorating, designing, and creating their homes. And one area that offers those expressive and decorative opportunities is in the kitchen. Rustic, traditional, and country-themed decorums are also some of the more popular Kitchen ideas decorating kitchens everywhere. In many cases, remodeling those kitchens might mean replacing existing fixtures. That has also led to questions like, can you install a farmhouse sink in an existing countertop?
A farmhouse sink can be installed in an existing countertop, although it will typically require some alterations. Additionally, some plumbing fixtures may require special fittings or connectors to make them work properly. Those with basic handyman skills should be able to install a farmhouse sink in an existing countertop too.
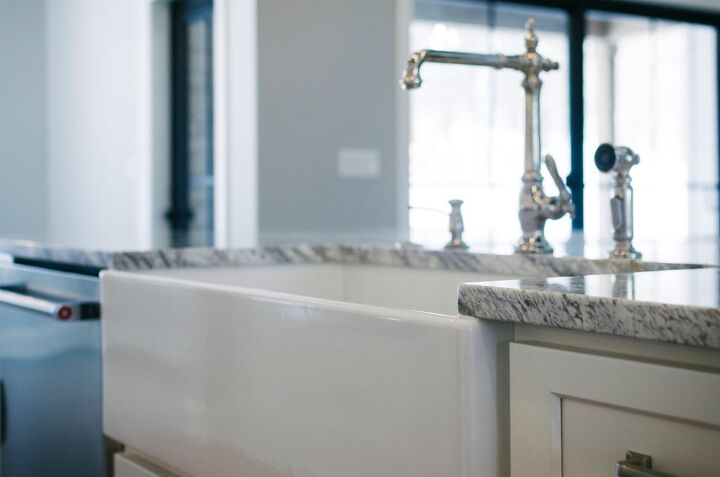
Not only can a typical or standard sink be replaced with a farmhouse sink, but it can also be installed in virtually any type of countertop, including granite. Installing a farmhouse sink also will require little or no additional reinforcement. It is also simple to mount a farmhouse sink as these sinks have mounting options akin to standard sinks. There are also a wide range of farmhouse-style sinks to choose from and a range of price options too.
Do You Need to Hire Sink Installers?
Get free, zero-commitment quotes from pro contractors near you.

Installing a Farmhouse Sink
Once you have removed the old sink, then it is time to install the farmhouse sink. Here are the steps to install a farmhouse sink in an existing countertop and a few things you will want to know.
What you will need:
Installing any sink and the installation of most fixtures will require some tools and a little bit of work. Having the right tools for the job will also make that work easier. Here is a list of items you should have ready:
- Circular/cement/tile saw (depending on the type of countertop)
- Silicone removal tool or small knife
- Measuring tape
- Glasses or goggles
- Silicone
- Wet-dry vacuum
- Face mask
Any or all of these items may be needed at some point, and it is always important to wear personal protective gear during the installation process. Before we can begin, however, there is the issue of removing the old or existing sink.
How to Remove Sink From Countertop
Before you can install a farmhouse sink in the existing countertop, the old sink needs to be taken out. The primary tools here will be a silicone knife and manpower. Be sure that the water has been shut off to the sink and that the connections and pipes have been disconnected from beneath the sink.
Use the knife to remove and loosen any silicone from around the edge of the sink. It is suggested to have one or two able-bodied helpers when it is time to lift the sink up and out of the countertop. Once the sink is removed, it is time to install the farmhouse sink.
Install Farmhouse Sink in Existing Countertop
The steps to install a farmhouse sink are straightforward and easy to follow. It is advised that you ensure that you have the proper tools for the specific type of countertop. Granite countertops, for example, will require a special blade.
Depending on the weight of the farmhouse sink and how well it can be handled, an additional helper or two may be advisable when setting the sink. Here are the steps to install a farmhouse sink in an existing countertop.
Step 1: Measure the Farmhouse Sink
Having the proper measurements will save time, headaches, and make the job much easier. Since farmhouse sinks are typically longer than standard sinks (30″), more room for the new sink will need to be cut out. The size of farmhouse sinks, often measuring more than 40″ in length and deeper depth, make them popular choices.
Step 2: Cut the New Sink Dimensions
Next, using the saw, it is time to cut out the extra space for the farmhouse sink. Although it is important to be accurate with your cuts, they don’t have to be perfect, as the sink lip will mask any slight imperfections.
The actual cutting of the countertop is also one of the most important times to don your safety gear. Protecting your eyes from flying chips and particles with safety glasses, and avoiding breathing in particles using a mask.
Step 3: Preparing to Place the Farmhouse Sink
Before going any further, it will be necessary to clean up the dust, granite particles, and whatever type of mess is left, following the cutting of the existing countertop.
Do You Need to Hire Sink Installers?
Get free, zero-commitment quotes from pro contractors near you.

Step 4: Reinforcing the Existing Countertop
Farmhouse sinks, as to be expected, are heavier than traditional sinks and can weigh as much as 200 pounds. Using 2 x 4’s and ½” to ¾” plywood, braces should be inserted to help support the new farmhouse sink.
A simple way to do this is to use the 2 x 4’s to form a U shape beneath the sink, then add a plywood shelf above the 2 x 4’s. Depending on the plumbing setup and water connection locations on the new sink, holes may need to be drilled in the support shelf to allow access.
Step 5: Install the Sink and Plumbing
With the assistance of your helpers, it is time to carefully set the farmhouse sink into the existing countertop. Once the new farmhouse sink is seated on the countertop, proceed to connect the plumbing. Next, attach the water connections.
Once the farmhouse sink is sitting on the support shelf securely and is properly seated on the countertop, and after the plumbing and water are attached, connected, and turned on, it is time to test the sink.
If the sink is operating correctly, then it is time to secure the sink. A basic sealant or kitchen caulking can be used to create a solid bond between the countertop and the sink. Allow the sealing process at least 12 hours to sit before using the sink normally, and enjoy your new farmhouse sink.
Related Guides

We are a team of passionate homeowners, home improvement pros, and DIY enthusiasts who enjoy sharing home improvement, housekeeping, decorating, and more with other homeowners! Whether you're looking for a step-by-step guide on fixing an appliance or the cost of installing a fence, we've here to help.
More by Upgraded Home Team


