Can You Hook Up A LP Tank To A Natural Gas Water Heater?
For the uninitiated, knowing the difference between propane and natural gas may be confusing. There are different units that can use different types of gas and mixing the two needs to be understood before implementation.
With liquid petroleum (LP) tanks, they can be hooked up to water heaters that are meant for propane. They cannot be hooked up to natural gas water heaters, however. Providing this hookup can be quite dangerous and can even potentially lead to a fire in your home.
Do You Need Water Heater Installation or Replacement?
Get free, zero-commitment quotes from pro Appliance Repair near you.

Why You Shouldn’t Hook Up an LP Gas Tank to a Natural Gas Water Heater
While you can hook up an LP gas tank to a water heater that uses propane, it is definitely not recommended that you hook one up to a water heater that uses natural gas. Doing this is a major fire hazard and fire is nothing to play with.
It is also important that you never have used fittings when you are performing a new installation. The used fittings may have holes in them, and the propane can escape. This can wind up costing you a lot of money in the long run if the problem isn’t addressed sooner rather than later.
How to Hook Up an LP Gas Tank to Your Water Heater
Again, it cannot be emphasized enough that you should not be hooking up an LP tank to a water heater that uses natural gas. It is very, very dangerous and will create a very real fire hazard in your home.
You can connect your LP tank to just about any household water heater so long as you meet the three major safety conditions. You will need to ensure that you install a regulator between the water heater and the tank, maintain the proper distance between your tank and water heater, and be 100% certain that the water heater is equipped for propane instead of natural gas.
Another thing to keep in mind is that some of the fittings might vary depending on your water heater’s control box. Some appliances will come with kits that have the right fittings included. Make sure that you make things easier by having the hardware store not only cut but thread your pipes as well.
Step 1: Set Up the LP Tank
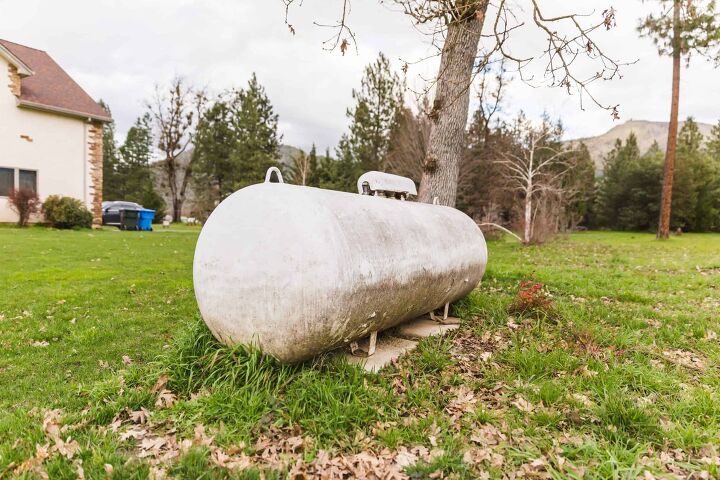
Begin by setting up your propane tank. It will need to sit on a flat, low platform that is made of something like cinder blocks or bricks; it just has to be level and stable. The tank has to be at least 10 feet away from your water heater as well. There are some municipalities that will require a larger distance; check with your local ordinances before you proceed any further.
Lastly, your propane tank should not be under any kind of shelter, including awnings, that could potentially retain the gas that is vented from your propane tank. Remember, safety is the most important thing here.
Step 2: Dig a Trench
The next step is to dig a trench that is at least a foot deep. This trench will sit between the propane tank and the water heater. As is the case with the distance between the water tank and the propane tank, make sure to check with your municipality first. There may be specifications about how deep the trench has to be. It is better to be safe than sorry when determining these depths and distances.
Step 3: Connecting the Pipe Elbows
With the trench dugout, you can start to connect your pipes. Start out by smearing a little bit of plumber’s paste onto the threading at both ends of your 10-foot piece of pipe before screwing the elbows onto one another.
Make sure that the elbows face the same direction when you have screwed them together. Start out by hand tightening them and then use a pipe wrench to tighten them one more turn on each side of the union.
Step 4: Connecting the Other End
Again use the plumber’s paste on the threading, this time on the 20-inch piece of ½-inch piping, and then screw it into one of the aforementioned elbows. Hand tighten once again and then use the pipe wrench to provide the additional turn. Repeat this step at the other end of your 10-foot pipe.
Next, place your assembly into the trench. Make sure that the pipes at either end of your assembly are pointed upwards and then place a piece of tape over the openings to make sure that no debris or dirt gets into the pipes while you complete the installation.
Step 5: Shutoff Valve
Take the threaded pipe that is closest to the water heater and apply plumber’s paste, screwing the shutoff valve onto this portion of the pipe. Again, hand tighten the valve and finish it off with a pipe wrench to ensure that the valve is properly tightened.
Now you can put plumber’s paste on the threaded side of your pipe-to-flare adaptor. When it is has been properly covered, screw that into your gas valve on top. Hand tighten and use the wrench to secure it properly.
Step 6: The Control Box
Apply your plumber’s paste to the ½-inch nipple and screw it into the side of the control box. Make sure that you smear the other end on the female pipe-to-flare adaptor, tightening by hand, and finishing it off with your pipe wrench to ensure that everything is properly tightened.
Then, screw an end of the flare-to-flare gas piping into your adaptor with the other end going into the top portion of your shutoff valve. Put paste on both of the fittings before screwing them into place and ultimately securing them with your pipe wrench.
Step 7: More Connectors
With the connections into your control box in place, you can now put the open pipe on your propane tank assembly and screw it into your last elbow as you have with all of the other connections above (plumber’s paste, tighten).
Repeat this step for the male pipe-to-flare adaptor, screwing that into your open elbow. Then apply paste onto the pipe side for the pressure regulator, attaching it to the open side of your pipe-to-flare adapter. When this is properly installed, the regulator’s vent side should be pointed down; this keeps rainwater from seeping into the device.
Step 8: Attaching the Flare-to-Flare Regulator
Start on the outlet side of your pressure regulator, screwing one end of the flexible regulator connection in tightly. Take the other end and screw it into your propane tank outlet. If you have a portable tank, this is the part that you will typically screw and unscrew on a regular basis. If it is portable, don’t use plumber’s paste on this connection.
Step 9: Pressurizing the Line
Open up the tank valve as well as the shutoff valve on your water heater; this is meant to pressurize the line. Add in 2 teaspoons of dish soap with a full cup of water and mix it together gently, careful to not overdo it. Swap that mixture onto all of the unions to check for any potential leaks. Should you see any bubbles that push through your solution, take the joints apart, reapply the paste, and then put the joint back together.
With all of the joints now airtight and secure, you can then follow the specific manufacturer’s directions in order to get the pilot light started. With everything set up properly, all you need to do is start up the water heater.
Do You Need Water Heater Installation or Replacement?
Get free, zero-commitment quotes from pro Appliance Repair near you.
What is the Difference Between Natural Gas and Liquid Propane?
For homeowners, the biggest difference between natural gas and liquid propane is that the latter is compressed down into liquid. It is generally sold in canisters that are portable or get delivered through a truck service into a permanent tank that is located somewhere on the property.
Natural gas remains a gas at all times. It is delivered into the home through underground pipelines; these need to be installed by your local municipality so check to see what needs to be done to have natural gas pipelines installed on your property. Be prepared, though: the costs can be quite high (in the thousands) depending on where your property is located.

Ryan Womeldorf has more than a decade of experience writing. He loves to blog about construction, plumbing, and other home topics. Ryan also loves hockey and a lifelong Buffalo sports fan.
More by Ryan Womeldorf


![Finishing Basement Without Permit [Is It Really Illegal?]](https://cdn-fastly.upgradedhome.com/media/2023/07/31/9070078/finishing-basement-without-permit-is-it-really-illegal.jpg?size=350x220)


![10 Best Electric Lawn Mowers - [2022 Reviews & Top Rated Models]](https://cdn-fastly.upgradedhome.com/media/2023/07/31/9070486/10-best-electric-lawn-mowers-2022-reviews-top-rated-models.jpg?size=350x220)