Can You Add A Second Layer Of Grout? (Find Out Now!)
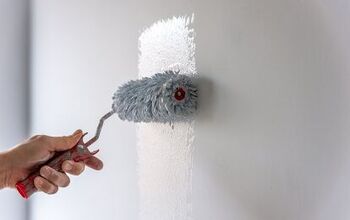
A fresh coat of grout in your bathroom or kitchen leaves your fixtures looking bright and gives the entire space a clean appearance. Though, over time, grout can start to look dingy and if water or grime gets into the joints of the tile, serious problems can occur. Perhaps your grout is starting to crack, separate, or crumble. While these fissures in your grout may seem small, failing grout is not a small problem.
At this point, you may be wondering if a re-grout is needed or if it’s possible to simply add a second layer of grout on top of the old grout. The short answer is that no, you cannot put another layer of grout directly over the old grout. While you might assume that you can repair grout as you would holes in a drywall, by using spackle to fill in the holes. However, this same method does not apply for fixing issues with failing grout.
Applying grout on top of grout is not a permanent solution and will likely lead to the same problems over time. We’ll go into further detail as to why adding a second layer of grout is not the ideal solution and what can be done instead.
Do You Need Grout Replacement or Repair?
Get free, zero-commitment quotes from pro contractors near you.

Can You Apply New Grout Over Old Grout?
While it might be tempting to mix up some grout and apply a new layer over the existing grout to fill in the spots where it has come loose, it’s not going to last. Unlike spackle, which is a putty that is designed for filling in drywall, wood, or paste, grout is a combination of water and powder that forms a porous paste. It creates a bond between tiles, making the surface watertight.
Grout is essentially Portland cement with special additives and colors added to the mix. The strength of the grout relies on it being set into the groove between tiles. When you put new grout over old grout, it cannot adhere properly. This can lead to cracking and leaves the tile open to water damage. Not to mention, the old grout has a sealer that prevents dirt from sticking to it and will also prevent the new layer of grout from sticking as well.
If you attempt to apply grout to just the inside of cracks or where there’s separation, the grout will cure and break away – leaving you right back where you started. Another reason why it’s not recommended to apply new grout over old grout is that the result won’t be aesthetically pleasing. The new layer of grout will be thin, which makes the old grout visible underneath. Also, if you only repair one section with a new layer of grout, you’ll be able to easily see the difference between the “repaired” area and the area that you didn’t apply new grout to.
Adding a Second Layer of Grout to Raise Level?
The only instance where it may be acceptable to apply a second layer of grout is when the existing layer was recently grouted. Perhaps you grouted your bathroom floor or shower walls within the last couple of days (or hours) and have a few low spots that you need to cover. In this case, adding a second layer should bond well assuming that:
- The grout is still clean,
- You clean the surface of any dust and debris,
- And the existing grout is still damp.
However, if your existing grout is incredibly shallow, you may be better off in the long term with grinding out the grout and starting over. Thin layers of cementitious material are more prone to flaking away over time.
How to Regrout Tile
Instead of simply filling the grout line where the material is missing, you must remove as much of the old grout as you can – or, at least 2/3 of the depth of the tile. That way, the new grout has plenty of surface area to adhere to and the likelihood of water, dirt, and grime getting in is reduced. Follow these steps for regrouting your tile, rather than simply adding a second layer over top of your existing grout:
Step 1: Prep Work
Removing grout is a very messy process that will likely have dust flying around the room. To make clean up easier, it’s a great idea to put some plastic sheeting in your work area. You also want to have a dust mask and eye protection to protect yourself against debris. Keep a spray bottle of water and a shop vacuum on hand to help keep the dust under control.
Step 2: Grout Removal
There are a number of different tools that you can use to remove the grout between tiles. However, an oscillating tool with a carbide grout removal blade and a basic handheld grout saw seem to be the best combination for grout removal. The oscillating tool will work well for the majority of the grout lines, while the handsaw is ideal for corners and any other hard to reach spots.
Before operating the oscillating tool, spray some water on the grout that you’re going to remove. This helps reduce the amount of dust that the tool kicks up and also prevents the blade from overheating. Avoid lingering too long in one spot, as the oscillating tool blade heats up pretty fast and can crack or scorch your tiles.
Once you’ve successfully removed as much of the grout as you can with the oscillating tool, use the handheld grout saw to grind out the remaining sections. If you need a smaller tool, a dull utility knife will work well for tight corners and tiny crevices. After you’ve removed as much the grout as possible, use the shop vacuum to clean up the dust and debris that remains in between the tiles and tidy up your work space.
Step 3: Mixing the Grout
Following the instructions from the manufacturer, pour the recommended amount of dry grout into a bucket and combine approximately half the amount of water required. Use your trowel to mix and gradually add water until the grout is the consistency of peanut butter. For best results, it should be paste-like and somewhat beyond pourable. Mix slowly and keep in mind that you can always add water, but you can’t take water away if you’ve added too much.
Do You Need Grout Replacement or Repair?
Get free, zero-commitment quotes from pro contractors near you.
Step 4: Applying the New Grout
Once the grout is properly mixed, use your trowel to spread the grout over the tile joints generously. This step doesn’t have to be precise, as you just need material to work with. Then, use a rubber grout float at a sharp angle to press the grout into the joints with a spreading motion. Continue sweeping excess grout around the adjacent joints until you need to gather more from the bucket. The goal here is to completely fill all the joints and have no excess grout sitting on the tiles.
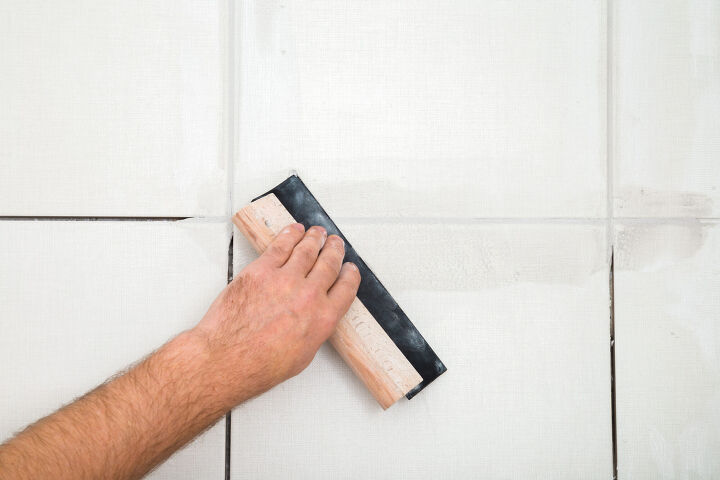
Step 5: Sponge Downs
With a slightly damp sponge, wipe all of the joints and tiles. Move gently so that you don’t disturb the grout in the joints, but ensure that you have enough moisture to clean up the excess grout. Continue rinsing and squeezing out your sponge during this process and until the surface of your tiles is completely clean. Let the grout dry for approximately 24 hours before you try to clean more.
After 24 hours, there will be a light haze visible on the surface that was recently grouted. With a fresh sponge, repeat the process of cleaning the tiles to remove this layer of haze. Cleaning all of the haze can take several days, but it will not stick to your tiles. Once the second sponge down has dried completely, you can go back in with a soft microfiber towel to give the surface a nice shine. For problematic areas, you may have to implement a de-hazing product to get the tiles clean.
Related Articles

Jessica considers herself a home improvement and design enthusiast. She grew up surrounded by constant home improvement projects and owes most of what she knows to helping her dad renovate her childhood home. Being a Los Angeles resident, Jessica spends a lot of her time looking for her next DIY project and sharing her love for home design.
More by Jessica Stone