Wedi Vs. Kerdi Waterproof Membranes: Which Is Better?
No, we aren’t speaking a foreign language here. We reference two of the newest and most popular systems for construction custom shower and bath surround designs. The products meld technology with ease of use to make projects faster, easier, and less costly. What we want to know is which is better, Wedi or Kerdi?
Wedi (pronounced vee-dee) started building wet room installation products 37 years ago. The company now manufactures a full line of easy-to-install bathroom backer and pan systems in the US. Schluter, whose North American headquarters is in Dallas, TX, is the source of Kerdi waterproofing underlayment for wet room applications.
Wedi and Kerdi are innovative underlayment and construction systems used to create custom bathroom installations. Each has its strengths and weaknesses performing admirably in where you use these strengths to your advantage. Deciding which system is best for your application is the challenge.
Do You Need to Hire Tile Installers?
Get free, zero-commitment quotes from pro contractors near you.

Wedi
Wedi is a family-owned company that now operates almost worldwide. The innovative underlayment and backer materials used in the Wedi system offer designers and builders a wide range of possibilities. You need to understand that concept of the Wedi system to appreciate its capabilities fully.
The Wedi Concept
The Wedi system uses flexible underlayment and backer panels. In addition to these construction panels, Wedi offers a full line of compatible shower pans, curb and seat structures, sealants, and other components for constructing wet rooms.
These panels and other accessories utilize a proprietary construction utilizing a blue core made from extruded polystyrene rigid foam, free from HCFCs. This polystyrene material provides a waterproof substrate for hanging tile in wet environments. When the Wedi adhesive bonds the panel edges, a waterproof continuous surface is created.
The flexible panels can be conformed to various curves and other shapes to create unique custom shower enclosures and bathtub surrounds. Wedi systems are also fast to install, cutting costs on most projects without compromising quality.
Best Applications
Wedi shines where curves and other unconventional shapes make up the structure. Think of a scroll-shaped shower enclosure with curving walls. Applying a conventional cement backer board to such a structure is almost impossible. With Wedi products, the compound curves are easy to produce quickly.
Incorporating the other Wedi system parts, a complete shower can be assembled and ready to tile in hours instead of days. Wedi systems often save labor costs, speed up the overall construction process, and reduces material costs.
Wedi building panels and other system components are versatile enough for many applications. For example, consider the following.
- Wedi building panels are layable on floors as a substrate for tile. The 1/8 inch thick Wedi panels are the minimum thickness for this application.
- You can install Wedi panels directly to wood or metal studs. The minimum thickness of the Wedi panel for this type of installation is ½ inch.
- If your walls have a gypsum board or greenboard covering, Wedi products can be applied directly to these surfaces that have been prepared according to Wedi specifications.
In many cases, Wedi product uses are limited only by your imagination, provided you do the proper installation and preparations.
Where Wedi Shouldn’t be Used
The applications where Wedi is a suitable material are many and varied. However, there are places and situations where you should not use Wedi products. These applications and situations include:
- Wedi is not suitable in any location where the temperature may exceed 175 degrees.
- The temperature limit of 175 degrees restricts the use of Wedi around fireplaces and in dry saunas.
- You should not use Wedi for exterior applications. Exterior construction is not a recommended location to use Wedi products.
There may be other restrictions on the use of Wedi products in some locations and under some conditions. Consult the Wedi technical documents or contact Wedi support for questions about other unusual locations and applications.
Wedi Installation
Installing Wedi is relatively straightforward. If you can run a decent bead of caulk and run a screw gun, you probably can successfully install Wedi underlayment and backer. These are the general steps for installing Wedi products.
Step 1: Start at the Bottom
Cut your Wedi board to fit the space. Apply a generous bead of Wedi adhesive to the top of the shower pan edge. Embed the bottom edge of the Wedi board into the adhesive on the shower pan and tilt the Wedi board into place. Using the screws and washers, attach the Wedi board to the framing of the shower.
If you have a long wall in the shower, apply adhesive to the vertical edges of Wedi boards where they meet and use a putty knife to smooth any adhesive that oozes out of the joints.
Step 2: Add Wedi Board as You Work Upward
Cut your Wedi board for the next level. Size your Wedi boards so that successive joints are staggered. Apply a bead of Wedi adhesive to the top edge of the first row of the Wedi board and to any vertical joints as you install the Wedi board.
Step 3: Seal the Screws and Washers
Use the Wedi board adhesive to seal the screws and washers thoroughly. Check all your joints and edges, especially the corners, and fill any voids or holes where adhesive may be thin or non-existent.
Step 4: Wait
Give the Wedi board adhesive time to cure and you can start applying your wall finish. Wedi board is that simple.
Our Take on Wedi Board
Wedi board is a great product for creating waterproof underlayment and base structures in wet areas. As support for tile, we think it is superior to standard cement board or greenboard in areas such as bathtub surrounds or showers. Wedi is easy to use, and most homeowner do-it-yourselfers can achieve professional results with a little attention to detail and practice.
Kerdi
Kerdi is an underlayment product developed and distributed by Schluter Systems. Schluter’s product line includes a variety of surface preparation materials for both interior and exterior applications. Schluter’s Kerdi products are popular with many contractors who install ceramic and porcelain tile bathtub surrounds and shower enclosures.
The Kerdi Concept
Rather than a board system, you install the flexible Kerdi over another substrate material to form a waterproof barrier before installing tile. The concept of a sheet application allows flexibility in the shapes and surfaces to which a contract can install the Kerdi products.
You can apply Kerdi membrane sheeting over standard drywall in wet areas. The Kerdi material is completely waterproof. The use of standard wallboard often makes the installation of Kerdi a more cost-effective method of building structures in wet areas.
The flexibility of Kerdi lends it to creating special structures in your wet areas, such as curbs, niches, and seats. If you follow Schluter’s recommendations on overlaps and joint creation, your Kerdi installation will be waterproof.
Best Applications
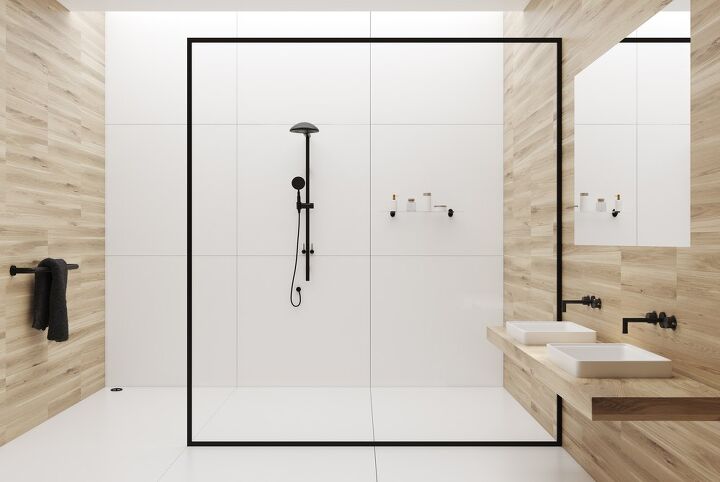
You should use Kerdi products in wet areas. Kerdi is a perfect underlayment for tile installations where a waterproof barrier is needed to protect the underlying structural framing. The recommended uses of Kerdi include:
- Bathtub surrounds
- Shower enclosures
- Tile countertop underlayment’s
- Steam rooms
- Laundry rooms
Kerdi is especially useful in wet areas that require intricate structural details such as small niches, steps, curbs, and insets. Curved surfaces are easy to cover with Kerdi and provide a smooth and stable base structure for hanging tile or stone materials.
Where Kerdi Shouldn’t Be Used
There are situations that Schluter recommends you not use Kerdi. In general, the following situations and locations are not recommended for Kerdi installations.
- High-temperature areas such as dry saunas
- Exterior applications where extremes in cold and heat can occur
- When using modified thinset to install tile
For unusual applications or if you have any questions about the suitability of Kerdi for a particular application, you should consult with the Kerdi support staff. These knowledgeable professionals can answer your questions and make recommendations about your project.
Kerdi Installation
Installing Kerdi does require some skill. You must take care to ensure that the surface to which you apply the Kerdi membrane is clean and smooth. When you are ready to install the Kerdi Membrane, these steps are required.
Step 1: Apply the Base Coat Adhesive
Schluter recommends using their Kerdi unmodified thinset mortar as the adhesive behind the Kerdi membrane. Spread a smooth thin coat of unmodified thinset mortar to the area where you want to install the Kerdi membrane. When the thinset coat is smooth and even, use the notched side of the trowel to comb the thinset.
Step 2: Install the Kerdi Membrane
Apply the Kerdi membrane working from the bottom to the top of the enclosure or structure. The Kerdi membrane must extend in a single sheet above any openings, such as showerhead cutouts.
Step 3: Making Joints on the Kerdi Membrane
Joints on the Kerdi membrane material must have a minimum two-inch overlap. Apply unmodified thinset mortar to the adjacent area of the first membrane and butter the two-inch joint overlap. Continue to spread your thinset over the area and then comb the thinset before hanging the next length of the Kerdi membrane. Smooth the membrane and ensure complete contact with the thinset mortar.
Step 4: Seal any Pipe Intrusions
Install Kerdi Shields around any pipe intrusions through the wall and into the shower or tub enclosure area. The shields seal the pipe openings creating a waterproof underlayment in the wet area installation. Follow the manufacturer’s instructions to install the Kerdi Seals.
Step 5: Wait
Before hanging tile or applying other finish materials, allow the Kerdi membrane installation time to cure properly. The time may vary depending on the type of thinset used and the underlayment over which you apply the Kerdi membrane. Follow the Schluter instructions carefully to ensure a proper bond.
Our Take on Kerdi Membrane
Kerdi is an economical and efficient way to create a waterproof and vapor-proof tub or shower enclosure. With a little practice, most homeowners and do-it-yourselfers can manage a Kerdi membrane installation. Applying the unmodified thinset mortar can be a little tricky in some instances.
We like that the Kerdi membrane material installs easily over almost any substrate, including standard wallboard. This feature makes building the base structure much easier and more cost-effective. When combined with the other Kerdi products, the installation is well within most do-it-yourselfers’ skill range.
Do You Need to Hire Tile Installers?
Get free, zero-commitment quotes from pro contractors near you.
In the End, Which is Better?
In my opinion, there is no either-or decision here. In some situations, Wedi may be a better option. For some installations and some installers, the Kerdi membrane is a better choice. In the end, you should consider your skill level, the application and the project, and which product makes the installation easier and more cost-effective.

Dennis is a retired firefighter with an extensive background in construction, home improvement, and remodeling. He worked in the trades part-time while serving as an active firefighter. On his retirement, he started a remodeling and home repair business, which he ran for several years.
More by Dennis Howard