How To Vent A Microwave On An Interior Wall (Do This!)
Microwaves are modern conveniences that allow us to cook or reheat our food quickly and effectively. In many homes, the kitchen and microwave are positioned on an interior wall, making venting the hot air to the outside difficult. While some modifications and a little extra work are required, it is possible to vent a microwave on an interior wall.
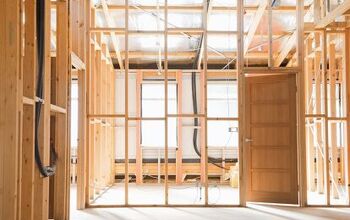
To vent a microwave on an interior wall, you must access your home’s ductwork to allow the hot air produced in the microwave to exit your home safely. You can use existing ductwork in your home, but you may have to install new ducts and channels if you do not have immediate access to existing ductwork.
While many over-the-range microwaves can be modified to accommodate a new vent, adding an exhaust adapter will help make your microwave vent more efficiently to the outside.
A homeowner with a strong DIY background can install the new microwave and vent on an interior wall, but expect some handy work and modifications along the way. This installation is an advanced DIY project that requires several tools and innovative thinking to make your interior vent work.
If you have any doubt or are uncomfortable drilling through cabinetry and ductwork, it is best to contact a professional to help with this project. Damaging your existing ductwork with an improper vent can lead to further complications that will impact your home’s integrity and air circulation.
Do You Need Appliance Repair Services?
Get free, zero-commitment quotes from pro contractors near you.

Why Is It Necessary to Vent a Microwave?
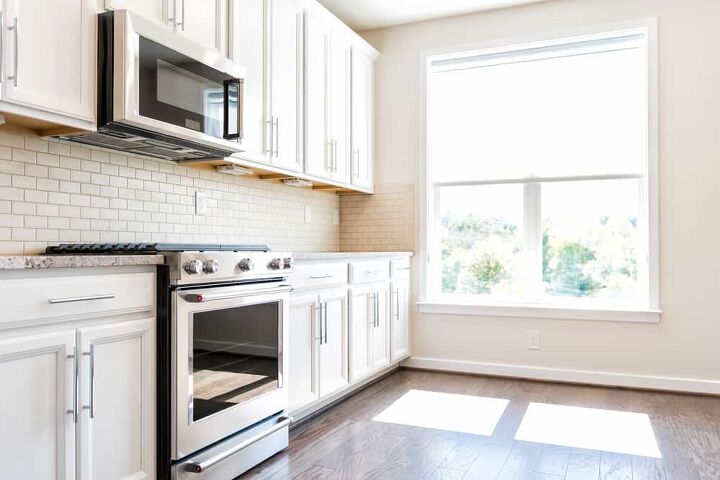
A microwave can help heat your dinner or prepare a quick snack in the evening. To cook your food, a microwave produces a great deal of heat and moisture. Many over-the-range microwaves positioned over your range simply have a blower that helps to recirculate this accumulated heat and moisture.
While this helps to dissipate the moisture, it does not remove it from the house. Venting a microwave will help direct the heat and moisture away from your kitchen and out of your home.
Further, microwaves will often produce a smell and aroma related to the food you are cooking. This smell can permeate your house and linger long after your meal is done. Having a vented microwave can help remove this smell, leaving your home smelling clean and fresh after your meal is over.
A microwave that is not properly vented can lead to damage over time. When moisture is left to collect in your kitchen, it can penetrate your cabinetry and walls. Too much humidity mixed with heat can lead to mold, mildew, and damage to the wood fibers in your cabinets. Over time, a microwave that is not vented or a microwave that simply relies on a circulating exhaust can damage your kitchen and home.
Tools are Needed to Vent a Microwave On An Interior Wall
- Drill
- Appropriate Drill Bits (multiple sizes may be needed)
- Jigsaw
- Hole Saw
- Measuring Tape
- Flashlight
Venting your microwave on an interior wall can be completed by a homeowner, but expect a high level of DIY know-how and ability. Mounting your microwave will also require special materials and supplies often provided by your particular microwave manufacturer.
Many microwave manufacturers have their own installation methods, so it is important to read your microwave company’s directions and instructions carefully. Be sure to use the associated microwave bracket and template provided by the manufacturer.
Further, depending on your home’s configuration, you may be required to install new ductwork or modify your existing ductwork. To do this, you will need additional supplies, including:
- Ductwork
- Metallic Adhesive Tape
- Sheet Metal Screws
- Vent
- Optional Exhaust Adapter
Why Use a Template?
Positioning a microwave in your kitchen and creating a vent on an interior wall is finely tuned, accurate work. It requires precise measurements to ensure that the microwave vent and ductwork are appropriately aligned. Once the microwave is bracketed into place, it is finite. Using a template will ensure that you have your microwave positioned accurately and minimize the number of holes drilled into your permanent wooden cabinets.
How to Vent a Microwave On An Interior Wall
Step 1: Prepare the Space
To vent your microwave on an interior wall, you must first examine your current ductwork configuration. Decide on which path your vented air will take. Try to find the least resistant path, with the straightest and most direct way for air and moisture to reach the exterior. Once you know your microwave location, use the template to mark where the holes and bracket will go.
Step 2: Cut the Power
Turn off the power to the circuit connected to the microwave and kitchen. Do not plug the microwave into the outlet.
Step 3: Install Ductwork
If you must modify or build new ductwork to properly vent your microwave, you must do this before installing and running the microwave. Install both the ductwork and necessary vent cap. Be sure to piece together individual ductwork pieces with sheet metal screws and then secure the seams with metallic tape to ensure a tight and secure fit.
If you are venting to the exterior through the roof, be sure to seal the edges of the vent with sealant or caulk, and make sure shingles are firmly affixed around the vent exit. This process will prevent leaks and moisture from entering your roof.
Step 4: Prepare and Install Your Microwave
Once the ductwork is in place, drill the bracket holes using the template and install the microwave. Drill a hole in the bottom of the upper cabinet to allow the power cord to pass through.
Step 5: Prepare Your New Vent
Now it is time to prepare the vent. If you use an existing recirculating exhaust on your microwave, it may be necessary to turn the exhaust by 90 degrees to redirect the air into the vent. Otherwise, an exhaust adapter may be required. You may also need adaptor pieces to fit the round microwave exhaust into the square ductwork.
Step 6: Test Your Vent
Once the microwave is installed, it is time to test the vent. Turn on the power to the microwave circuit and plug the microwave into the outlet. Put a glass of water in the microwave for a trial run to make sure the air is venting correctly to the outside. Never run a microwave empty because it can damage the appliance.
What Is An Exhaust Adapter for a Microwave?
While many over-the-range microwaves have a recirculating exhaust, some microwaves will rely on a powerful exhaust adapter that helps vent the moisture and heat away from your home. Venting a microwave on an interior wall will often require the use of an exhaust adapter. This feature is a special type of adaptor that will help pull the air through the ductwork in your home, allowing the hot air and moisture to exit to the exterior.
Often, exhaust adapters can work with a conventional over-the-range microwave but need special modifications and adapters to secure a tight fit.
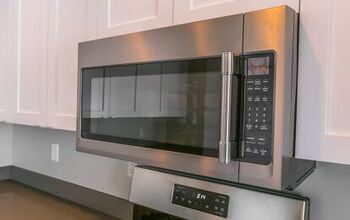
Can An Over The Range (OTR) Microwave Vent To An Interior Wall?
Microwaves come in many styles, and an over-the-range microwave is a popular option for many homeowners. This type of microwave is positioned above the range and typically comes with a recirculating exhaust. With the right tools and supplies, converting an over-the-range microwave to vent to an interior wall is possible.
To do this, you must locate the exhaust motor within the microwave. Rotate the motor by 90 degrees to ensure the air is pulled from the microwave body and redirected toward the interior duct. Adding an exhaust adapter to this type of microwave will make venting more efficient. Be sure to check your manufacturer’s individual specifications and instructions before installing an exhaust adapter.
Do You Need Appliance Repair Services?
Get free, zero-commitment quotes from pro contractors near you.
Related Questions
What Does Routine Maintenance Look Like for a Vented Microwave?
To keep your vent and exhaust fan working efficiently, you will need to perform regular, routine maintenance on your new vented microwave. Sometimes microwaves will have a charcoal filter that works to trap moisture, food particles, and oil. This filter becomes less effective with repeated use and must be replaced about every six to twelve months.Using your microwave more frequently will often decrease the lifespan of the filter. Some microwaves have an aluminum filter. While this filter type does not need replacement, it needs to be washed and cleaned every six months to keep your vent working efficiently.
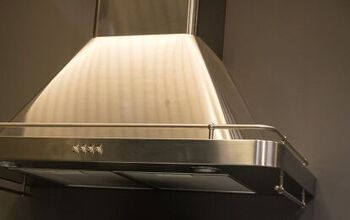
Can A Range Hood Utilize an Interior Vent for a Microwave?
Many people choose to install a similar vent for their range, pulling heat and moisture away from the kitchen, redirecting the heat to the exterior of your home. Once a vent and ductwork have been located or installed to accommodate a microwave on an interior wall, the same duct can also accommodate a range hood.Be sure to use the exhaust fan provided by your range hood manufacturer, or purchase a similar exhaust adapter intended for use with a range hood. Once the ductwork is established, heat and moisture will follow the same path.

We are a team of passionate homeowners, home improvement pros, and DIY enthusiasts who enjoy sharing home improvement, housekeeping, decorating, and more with other homeowners! Whether you're looking for a step-by-step guide on fixing an appliance or the cost of installing a fence, we've here to help.
More by Upgraded Home Team