


How To Replace Garage Door Rollers (Step-by-Step Guide)
If you hear a loud grinding or screeching when you open your garage doors, it’s time to replace your rollers. Most homes come with cheap, unreliable garage door rollers that aren’t designed to last longer than a year or two. Fortunately, replacing those rollers isn’t too hard.
To replace your garage door rollers, you’ll need to disconnect your door, pry open the roller track, then replace the rollers one at a time. Start with the bottom rollers and work your way up to the top.
When you’re working with machinery this heavy, it’s important to take as many safety precautions as possible and work slowly. Don’t skip any steps! In less than an hour, you’ll have a quiet, functioning garage door.
Do You Need a Garage Door Opener Repair or Adjustment?
Get free, zero-commitment quotes from pro contractors near you.

Replacing Garage Door Rollers
Here’s a detailed, step-by-step guide on how to replace your garage door rollers:
Tools You’ll Need
- New garage door rollers
- A ladder
- Pliers
- A flathead screwdriver
- A clamp
- Someone to help you hold the door
Phase 1: Set Up Your Garage Door To Replace The Rollers
The first thing you need to do in order to safely replace your garage door rollers is to open your door and set it up to work. This phase can be broken up into three key steps.
Step 1. Open your garage door
The easiest way to replace garage door rollers is to start from the bottom and work your way up. That’s why you’ll need to open the door before you start working. Pull your garage door open, or use the power opener if you have it.
Step 2. Disconnect the power
If you have a power garage door opener, make sure you disconnect it. This will keep the door from closing on you while you’re working.
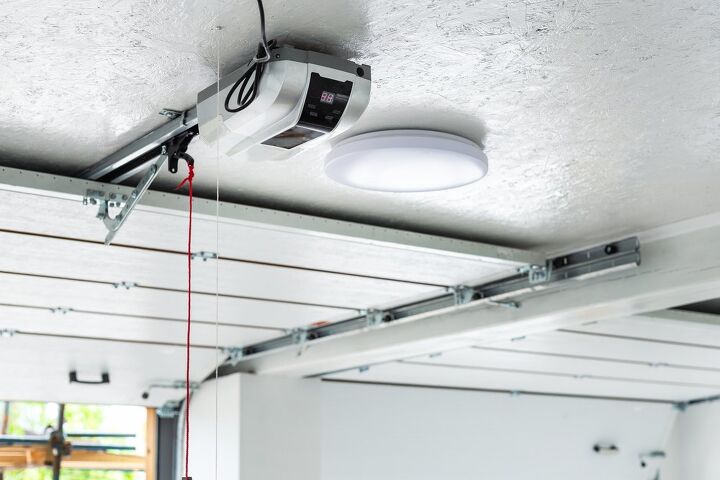
First, pull the cord attached to your power opener to release the garage door. Then, manually unplug the device as an added safety measure. If your power opener is hardwired into your home (not attached by an extension cord), shut off the breakers or fuses that power it.
Step 3. Pry open the track
You’ll need to pry open the roller track near the front of your garage door to remove the rollers. Look for a seam at the top of the vertical roller track and use your pliers to pry it open at a 90-degree angle.
You should now have an opening in the track, where you will be able to remove the old rollers and insert the new rollers.
Phase 2: Replace The Bottom Rollers
Again, it’s safer (and easier) to start with the rollers on the bottom of your garage door, then work your way up. For this phase, you’ll need a helper to support the door for you. It will also help to have a workbench or table nearby so you can easily reach your tools.
Step 1. Pull down the garage door
Pull your garage door down so that the bottom roller lines up with the point of the track you pried open. Remember, the door will be disconnected from the power opener at this point, so you will need to hold it in place with the help of another person.
Step 2. Pry the first roller out of the track
Slide the tip of your flathead screwdriver underneath the round part of the roller. It’s best to do this with your dominant hand while using your non-dominant hand to support the garage door. The roller should pop right out of the track.
That section of the door will also come off the track when you take out the roller, so make sure you’re holding it in place to keep it from falling down. This will also help you to reduce tension on the garage door torsion spring, which helps it open and close smoothly.
Step 3. Replace the roller
Grab the round end of the roller you’re replacing and slide it out of place. It should come out smoothly; you won’t need to loosen any bolts or screws. Then you can slide in the new roller in its place.
Lift the door so that the new roller lines up with the bent part of the track. Push it back into place. You may need to lightly tap the end of a roller with a hammer to settle it into the center of the track.
Step 4. Repeat with the rest of the rollers on that side
Repeat this process with the rollers on that side of the garage door. Take your time and be sure to have your helper support the door as you work. Keep working until there is one roller left at the top of the door.
Step 5. Repeat with the other side of the door
Once you have finished one side of the garage door, open the door all the way, and repeat the entire process for the other side of the garage. You will need to pry open the track on that side as well.
Phase 3: Replace The Top Rollers
Now that you’ve completed the first two phases, you have two garage door rollers left to replace: the top roller on each side of the door. These take a little more care to replace than the bottom rollers. For this phase, you’ll need your ladder and a clamp.
Step 1. Place a clamp at the bottom of your garage door
Secure your clamp on the track about 1 foot from the bottom of your garage door. This will hold the door open while you’re replacing the top rollers. For additional support, you can have your helper hold the bottom of the door.
Step 2. Remove and replace the roller
Use your screwdriver to pop the top roller out of the track on one side of your garage door. At this stage, you’ll need to climb up your ladder so you can comfortably reach the top roller.
The part of the door above you will drop when you remove the roller. Make sure to watch your head and support the top of the door with your non-dominant hand if you can. Pull the top roller out of the bracket, then slide the new roller into place.
You should be able to twist the track with your hand in order to fit the new roller into place. If the track doesn’t easily twist, you can bend it with your pliers like you did for the bottom rollers.
Step 3. Repeat on the other side
Move your ladder to the other side of the garage door, then repeat the process to replace the final roller. Remember to watch your head and keep a hand on the top of the garage door for your own safety.
Once you’re finished, test out the garage door by opening and closing it manually. Then you can reset the power opener. Your garage door should now open and close smoothly and quietly!
What Kind Of Garage Door Rollers Should You Buy?
Before you replace your garage door rollers, you have an important decision to make: what kind of rollers should you buy? The answer depends on what you’re looking for, whether it’s affordability, durability, or low maintenance.
Plastic rollers are the cheapest option but won’t last as long. You will probably have to replace your plastic garage door rollers again within a year or two. The nice thing about plastic is that it’s much quieter than steel or nylon.
Steel rollers are much more durable than plastic and come at a higher cost. While they will last a long time without replacement, you will have to maintain them by applying lubricant every few months or so.
Nylon rollers are generally regarded as the best option for a combination of affordability and function. They are quiet, durable, and will last for years with occasional maintenance.
Do You Need a Garage Door Opener Repair or Adjustment?
Get free, zero-commitment quotes from pro contractors near you.
Related Questions
How do I stop my garage door from screeching?
It’s common for a garage door ton make a loud noise when opening or closing. This might mean the rollers need to be replaced, or that you need to lubricate them. Applying a home lubricant like WD-40 to your garage door track and rollers will keep them quiet and help to prevent that loud screeching or rattling.
How much does it cost to install a garage door opener?
Installing a power opener for your garage door will make it easier to open and close. It will cost between $200-$500 to have a power opener installed, depending on the type of opener you buy, and the time required by the mechanic.
What should I do if my garage door spring is broken?
The tension spring on your garage door is what keeps it from snapping shut. If it breaks, the door will be held down by gravity alone. It’s crucial to replace a broken spring as soon as possible in order to safely open the garage door.You will be able to open the door manually while your spring is broken, but it will be very heavy. Be sure to close it again immediately, to avoid having it fall down while you are working in your garage.

We are a team of passionate homeowners, home improvement pros, and DIY enthusiasts who enjoy sharing home improvement, housekeeping, decorating, and more with other homeowners! Whether you're looking for a step-by-step guide on fixing an appliance or the cost of installing a fence, we've here to help.
More by Upgraded Home Team


![12 Washing Machine Brands to Avoid [with Recall Data]](https://cdn-fastly.upgradedhome.com/media/2023/07/31/9075781/12-washing-machine-brands-to-avoid-with-recall-data.jpg?size=350x220)
