How To Remove Faucet Handles Without Screws

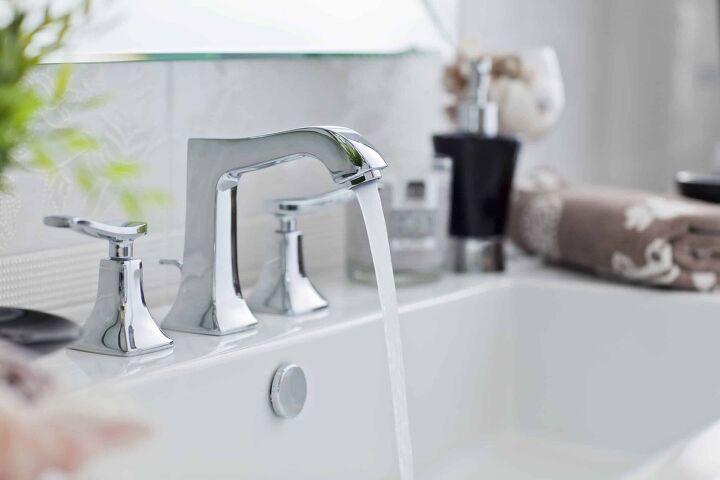
For many years faucets handles were easy to remove. Turn the screw in the middle of the handle and off it came. New designs and new technology have made the screw in the faucet handle almost a thing of the past. How then do you remove a faucet handle with no screw?
Shut off the water and close the drain with a small towel so that nothing falls down it. Grip the faucet handles with pliers and twist them. Pull on the faucet handles until they come off, and grease them if you need to.
If that gentle tug doesn’t work, don’t despair. There are several other methods of attaching faucet handles without screws that are almost as easy to remove. We will look
at these different methods of removing screwless faucet handles in this article.
Do You Need a Faucet, Fixture, or Pipe Repair or Replacement?
Get free, zero-commitment quotes from pro contractors near you.

What Kind of Faucet Handle to You Have?
There are several different methods that faucet manufacturers use to attach faucet handles to the stem of the faucet. Determining how the faucet hand attaches to the stem may be the biggest challenge of fixing your faucet. Among the methods used by faucet manufacturers are:
- Capped and hidden screws
- Side-mounted set screws
- Flange threaded mounts
- Friction fit mounts
Friction Fit Faucet Handles: Push and Pull
At least one faucet manufacturer has started using friction fit faucet handles. Some older models of faucets also featured a push on faucet handle design. If you are the owner of one of these new models or if you are a vintage faucet user, the removal of the faucet handle can be as simple as giving the faucet handle a bit of a pry.
A small screwdriver or a scraper with a thin, flexible blade is often the tools of choice if your friction fit faucet handle needs a bit of encouragement to come loose.
Gentle is the Key: Things to Remember about Friction Fit Faucet Handles
There are a few things to remember about friction fit faucet handles, especially with older faucets
- Older faucets may suffer from corrosion and thinning of the metal. Take care if you intend to keep the faucet
- Newer faucets with friction fit faucet handles may have plastic stems that can bend easily.
- Often the friction mechanism may be damaged during removal and may not fit if reinstalled.
A Gentle Turn May do the Trick
At least on faucet manufacturer features a combination faucet handle with an elevated base. The faucet handle and base are all one unit. The faucet handle includes an attached stem that fits into the actual faucet valve. The handle base threads onto the faucet body and holds the entire assembly in place.
If you suspect that your faucet is this type, to remove the faucet handle, grasp the handle firmly and, with your other hand, gently turn the base of the handle counterclockwise. The base of the handle should come loose, and the entire handle and faucet handle base should lift away.
Corrosion May Be A Problem: A Little Pre-Treatment May be in Order
If you live in an area where the water has a lot of mineral content, build-up around the faucet handle may create problems. This build-up can sometimes almost cement the handle or stem to the rest of the faucet.
Using vinegar or other products that remove mineral build-up may aid in removing the faucet handle. Apply these products before trying to remove the faucet handle. Follow the manufacturer’s directions carefully.
The Mystery of the Hidden Screw
Many new faucet styles feature a hidden screw to give the faucet a sleek look. There are several different styles, but most fit into two categories
- Hidden or Capped Screws
- Set Screws
Finding the Magic Screw: Knowing Where to Look
Many of these faucet styles with hidden screws put the screws where you would expect them. The screws themselves are hidden with caps or plugs to make the faucet look like it has no screws.
Examine the top of your faucet handles carefully. Most have a small-cap covering the screw. These button caps are friction fit and should remove easily with a small screwdriver.
The Hunt for the Elusive Set Screw
Some double-handle faucets and most single handle faucets use set screws. These set screws often hide on the side of the faucet handle. A trim ring or button cap may hide some set screws on faucet handles.
Once you have located the set screw, you will need the right size of the hex wrench to loosen the set screw. If you hadn’t kept the hex wrench that came with the faucet, a multi-hex-wrench tool is handy to find the right size.
Take a Few Precautions: The Unexpected May Happen
Before you begin working on a faucet, there are some precautions you should take. We never want to have bad things happen when we are doing home repairs. A few simple steps may save you frustration and grief later.
Step 1: Turn off the Water
Before you begin to disassemble your faucet, turn off the water at the shut-off valve under the sink. There should be no problem with removing a faucet handle with the water turned on, but failures have happened. Turning off the water at the supply prevents a fountain should the valve body be broken or defective.
Step 2: Close the Drain
You will be dealing with tools and small parts. Inadvertent slips happen and closing the drain or putting a small towel over the opening will prevent tools or small parts from finding their way down. Why add to your workload by creating the need to disassemble the drain as well.
Step 3: Protect your Faucet
If you find that you need to use gripping tools such as pliers to grasp parts of your faucet, use an old cloth to protect the finish on your faucet. Avoid scratching or gouging the finish on your faucet body or handles, if possible.
What’s Inside: Going Beyond the Faucet Handle
Once you remove the faucet handle, you should find either a compression-valve or a cartridge valve. Repairing these two types of faucet valves requires a different approach.
Compression Valves: Putting the Squeeze On
Compression valves work by squeezing a soft rubber gasket against a valve seat. Over time both the rubber gasket or O-ring can become worn out and needs to be replaced. If water has been leaking through the faucet, the valve seat may wear enough that it needs resurfacing.
Cartridge Valves: The Plug and Play Solution.
Newer faucets often have cartridge valves. The cartridge that is the actual valve is easily removed and replaced with a single unit. Most of these replacement jobs are well within the scope of most home do-it-yourselfers.
Don’t Forget to Stop the Flood Before it Happens
No matter the type of valve in your faucet, before you remove the valve body, be sure that both the hot and cold water supplies are off. Once you unscrew the valve stem or remove the cartridge, there is nothing between you and a major water event if the water is not shut-off.
For more information about faucet problems, see the article at this link.
Do You Need a Faucet, Fixture, or Pipe Repair or Replacement?
Get free, zero-commitment quotes from pro contractors near you.

The Screwless Faucet Handle Unmasked
Even though your faucet handle appears to have no screws, more than likely, the screws are there. In some cases, your faucet handle may be a true screwless design and a gentle tug is all you need. However, a little diligence and care will often reveal the hidden faucet handle screws.
Good luck with your plumbing project. We hope that this article has helped you answer your questions about the missing faucet handle screws.

Dennis is a retired firefighter with an extensive background in construction, home improvement, and remodeling. He worked in the trades part-time while serving as an active firefighter. On his retirement, he started a remodeling and home repair business, which he ran for several years.
More by Dennis Howard







![How To Reset A Whirlpool Cabrio Washer [In 5 Easy Steps!]](https://cdn-fastly.upgradedhome.com/media/2023/07/31/9076531/how-to-reset-a-whirlpool-cabrio-washer-in-5-easy-steps.jpg?size=350x220)


