How To Fix A Lawnmower Throttle Cable (Step-by-Step Guide)
If you use a push lawnmower, one of the components that can help you work faster and more efficiently is the throttle cable. Although many modern mowers use an automatic throttle, older machines mostly used the cable. Unfortunately, this piece can break over time, which means that you have to buy a replacement.
To fix a lawnmower throttle cable, you will have to remove the old one and then attach the new one to your mower’s handle. Usually, the line will be extra long to fit on a wider variety of machines. This means that you’ll have to cut the excess length so that the cable works correctly.
Alternatively, if the cable connections are simply gummed up, you can use penetrating oil to clean them out, and it should start working again.
There are multiple methods you can try to get your lawnmower up and running again, so we’ll be sure to cover all of the possible fixes in this article.
Do You Need a Mower Repair Service?
Get free, zero-commitment quotes from pro contractors near you.

What You’ll Need to Fix a Lawnmower Throttle Cable
Because there are different potential repair options, we’ll outline the various tools needed for each one.
For a New Cable
- New Throttle Cable
- Screwdriver
- Wire Cutter
- Pliers
- Drill (if applicable)
For an Old Cable
- Two Aluminum Crimps
- Extra Metal Wiring
- Pliers
- Wire Cutter
- Hammer
For a Clogged Cable
- Penetrating Oil
- Pliers
- Rags
- Socket Wrench Set
Step by Step Guide to Fix a Lawnmower Throttle Cable
Typically, there are three primary ways to fix your throttle cable. First, you can remove the old one and replace it with a new setup. Second, if the line has snapped, you can use aluminum crimps to reattach the pieces. Finally, if the problem is rust or debris clogging the throttle control, you can simply clean it out. Here’s a step-by-step breakdown for each option.
Installing a New Cable
Step One: Remove the Old Cable
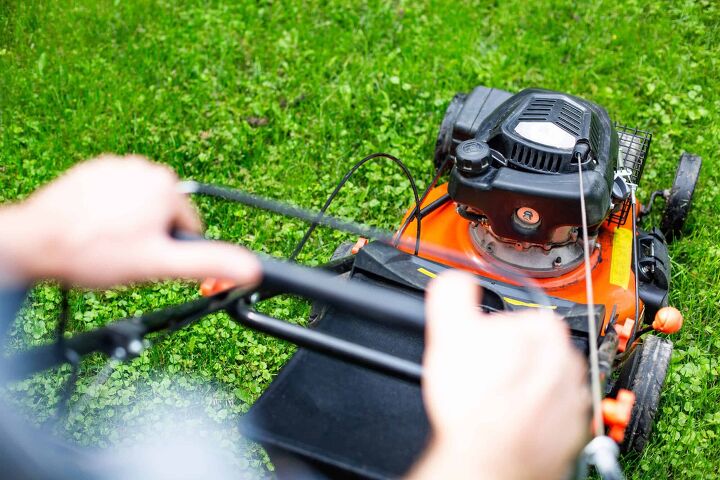
Your throttle control will be on the handle of the lawnmower, and it’s usually attached by screws or a bolt. You will need to detach the controller by removing these fasteners. Once that’s done, you have to follow the cable to where it connects to the engine — usually, the cable hooks to a mechanical arm that opens and closes the throttle. There is also a bracket that holds the wiring in place, so you will have to loosen this piece to get it out.
Step Two: Attach the New Throttle Controller
Ideally, the new component will be identical to the old one, meaning that you can reuse the same holes. However, in some cases, you might have to drill a new hole to get the controller to fit. If that does happen, be sure to use a hard enough drill bit. Otherwise, you could damage both the handle and the bit in the process.
Step Three: Measure the Cable
Throttle cables are always a bit longer than necessary because they have to fit on a wide array of push lawnmowers. So, you will have to measure the length to ensure that it will work for your machine. If it’s too long (or short), you won’t be able to close the throttle completely, which can be a hassle to have to do it by hand.
When measuring the new wire, be sure to allow for some slack between the bracket and the controller. This slack is necessary so that you can pull the lever back without being too tight. Then, make a mark to cut the cable where it meets the front of the engine. If you’re unsure where that is, find the throttle arm and measure a few inches beyond that. You can always cut the line shorter, but you can’t add more once it’s gone.
Step Four: Cut and Re-Measure
Once you’ve shortened the cable, make sure that it still fits. There should be a portion of exposed wiring that goes from the bracket to the throttle arm. Ensure that the arm is set furthest away from the end of the cable so that you know it will reach once the throttle is open all the way. If necessary, you may have to cut off a portion of the wire covering.
Step Five: Bend the Tip of the Cable
Using pliers, you want to make a z-shaped bend in the tip. This will allow you to move the throttle arm easily. Don’t make the angle too deep, or it won’t fit. From there, you can insert it into the hole so that it won’t come loose on its own.
Step Six: Secure the Cable
Tighten the bracket that holds the wiring to the engine. Make sure that it isn’t too tight, or the cable won’t be able to move freely. Once you’re finished, push the throttle control to ensure that it is working correctly.
Reattaching the Throttle Cable
Realistically, this procedure is only necessary if you’re trying to save money or if you can’t find a replacement for your lawnmower. Otherwise, new lines are relatively inexpensive, so you should be able to find one easily.
Step One: Remove the Throttle Control
Follow the same process as step one in the instructions above.
Step Two: Attach Excess Cable Via an Aluminum Crimp
Since the wire is snapped in half, you will lose some of its length by reattaching it. So, you have to add a small section of cable between both ends so that the throttle will work correctly. It doesn’t matter which side you start on (controller or engine), so pick the most comfortable one.
Once the cables are inside the crimps, you have to secure them by hammering the metal pieces together. Doing this will ensure that they don’t come loose later on. Once one side is finished, crimp the cable to the other side to complete it.
Step Three: Reattach the Throttle Control
Make sure that the throttle arm is in the extended position before reattaching the controller. This way, you know that you have enough slack.
Cleaning the Throttle Arm
Usually, if the cable is having trouble moving, the arm is to blame. Dirt and grime can collect on the metal, causing it to stop moving. In some cases, the arm may be rusted, meaning that you have to replace it. Otherwise, here’s what you can do to clean it.
Step One: Disconnect the Throttle Cable
You will likely have to loosen the bracket so that the tip doesn’t get in your way. Be sure to inspect the cable for rust or fraying as well, as it could be in bad condition.
Step Two: Put Penetrating Oil On the Arm
Let this sit for a few minutes before wiping it off. Then, use a lubricant (i.e., WD-40) to spray the arm. Doing this will ensure that it won’t get stuck again.
Step Three: Reconnect the Cable
Hook the tip back into the arm and tighten the bracket.
Tips and Tricks for Repairing a Lawnmower Throttle Cable
Since an error can mean you have to buy another cable for your mower, here are some ways to avoid headaches during this project.
- Practice Cutting First – If you have to remove a section of the wire covering, you need to be extra careful. The cable inside is wound like a screw, so you need to be sure that you cut just the covering and nothing else. Practice on the old line first, so you know what to expect.
- Clean Your Engine – Take the time to clean any gunk from your mower’s motor while you’re working on it. This way, you can be sure that the machine will stay in good working order.
Do You Need a Mower Repair Service?
Get free, zero-commitment quotes from pro contractors near you.
Related Questions
Is it better to replace the cable or fix it?
It is almost always better to replace the throttle cable because it will be much more reliable than repairing the old one.
What does a throttle cable do?
This piece controls the speed of the engine and the blades. You always want to mow at full throttle to make your lawnmower more efficient.

We are a team of passionate homeowners, home improvement pros, and DIY enthusiasts who enjoy sharing home improvement, housekeeping, decorating, and more with other homeowners! Whether you're looking for a step-by-step guide on fixing an appliance or the cost of installing a fence, we've here to help.
More by Upgraded Home Team