How To Cut Copper Pipe With A Dremel (Step-by-Step Guide)
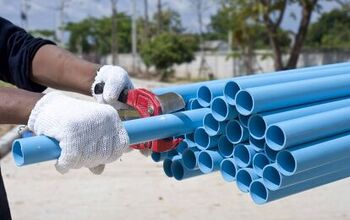
Copper pipe is one of the most commonly used materials in the construction industry. It creates supply and refrigerant lines for HVAC systems. It can also be used for hot and cold water applications.
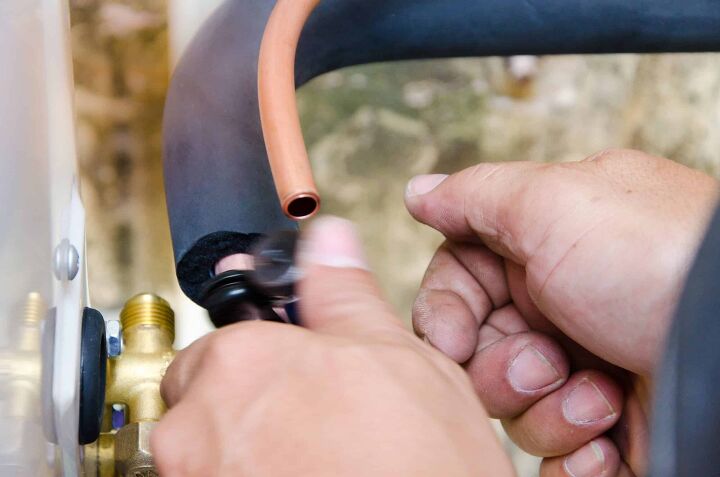
If your home has some copper pipe in it, then there may be times when you need to cut it to perform maintenance, repairs, or upgrades. Although copper pipe is typically cut with a saw, a Dremel will also get the job done.
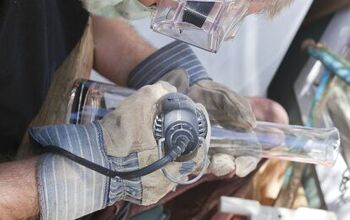
To cut a copper pipe with a Dremel, you first need to purchase the right blade attachment. Several options will do, but we recommend the SM510 3-inch Metal Cut-Off Wheel. Simply attach the wheel to your Dremel, power on, and cut in a circular motion around the copper pipe until the piece is severed.
Do You Need to Hire a Plumber?
Get free, zero-commitment quotes from pro contractors near you.

What is a Dremel?
Dremel is the name of an American power tool company that’s primarily known for its rotary tools. When DIYers use the word Dremel, they’re typically referring to the handheld rotary tool that the company is known for making.
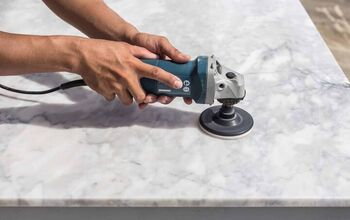
Dremels are popular because they have excellent functionality. DIYers can apply attachments and accessories to a Dremel that will allow it to carve, route, drill, and cut many different materials.
How Do You Use a Dremel?
If you’ve never used a Dremel before, don’t worry. They aren’t very difficult to operate. First, you’ll want to select which model you’re going to purchase.
Dremel produces several different kinds of rotary hand tools that can help you tackle your DIY projects more efficiently. There are fixed and cordless models, tools with fixed and variable speeds, as well as options that are lightweight and mobile or sturdier and stronger.
After you’ve selected your tool, make sure to read the owner’s manual for an overview of how to operate it. You’ll also need to wear proper safety gear when using a Dremel.
Gloves will keep your hands safe from debris and sharp edges, while safety glasses will keep your eyes safe when performing cutting tasks.
When using a Dremel, you will also need to insert and secure bits. To do so, simply place the bit into the hole located at the end of the Dremel. Then, back it out slightly and tighten the collet nut so that the bit is secured.
Materials Needed For Cutting Copper Pipes
If you’d like to cut a copper pipe with your Dremel, you’re going to need to gather a few materials first. Thankfully, you won’t need too much gear to get the job done. Here’s what you should have before getting started:
- A Dremel rotary tool
- A metal-cutting blade attachment. We recommend the SM510 3-inch Metal Cut-Off Wheel
- A vise or clamps
- Mandrel
- A wrench (optional)
- Protective gear, including gloves and safety glasses
How to Cut a Copper Pipe with a Dremel
Once you’ve learned how to use a Dremel for other projects, you won’t find it very difficult to cut a copper pipe with the tool. Here’s a step-by-step guide you can follow in order to do it:
- Start by attaching the metal-cutting blade to the mandrel. To do so, you’ll need to unscrew the tiny screw on the top of the mandrel so that you can remove one of its washers. Then, slide the wheel onto the screw and add the second washer. Finish by tightening the second washer with your hands or a wrench.
- Attach the mandrel with your metal-cutting wheel to the Dremel. Doing this is fairly straightforward. Simply place the mandrel into the hole located at the end of the Dremel. Then, back it out slightly and tighten the collet nut so that the bit is secured.
- Clamp the copper pipe into your vise or clamps.
- Put on your protective gear. Make sure to wear at least safety goggles and gloves while working on this project. You may also want to put on earmuffs.
- Power your Dremel on at the correct speed setting. Check the owner’s manual for your Dremel to see which setting is correct for a copper pipe. This will generally need to be on the higher end of the spectrum.
- Begin cutting the copper pipe. This should be done gently at first. As you work, move in a circular motion around the pipe until the cut is complete. Avoid pressing down too hard while cutting, as this can damage both your Dremel and its attachments.
- Repeat as often as needed until the project is complete.
Dremel Buyer’s Guide
If you don’t own a Dremel yet and you’re reading this, then you’re probably interested in purchasing one. There are many different options to choose from, which can make finding the right fit for your needs somewhat challenging.
That being said, there is a right Dremel tool for every DIYer. Consider the following factors when selecting which one is right for you.
First, consider the input power of the devices that you’re considering. Most DIYers prioritize output power as this references the amount of power that the tool releases when in operation. Input power, on the other hand, refers to how much power the device needs to operate.
A Dremel that has a higher input power can make up for one that has a lower output power. This is an important thing to consider while shopping.
If you’re purchasing a kit, you should also consider the attachments and accessories that are included. The ideal kit will come with a wide variety of attachments and accessories so that you can use your Dremel for many different products.
Finally, DIYers should also prioritize durability when purchasing one of these tools. Dremels that are resistant to rust and corrosion will last longer, giving you a much better return on your investment.
Can You Drill with a Dremel?
While Dremels are highly-functional handheld tools, they aren’t a great option for drilling holes or driving screws. For these tasks, DIYers are generally better off with sticking to a traditional cordless drill.
The reason for this comes down to torque and RPM. Rotary Dremels have a much higher RPM than most cordless drills do. Dremels produce upwards of 30,000 RPM while drills produce only about 1,500.
However, Dremels can’t match the torque that’s offered by drills. A solid cordless drill will produce about 600lbs of torque, which isn’t even closer to what Dremels offer. Additionally, Dremels are designed to output forces that are perpendicular to the drive shaft. Drills are meant to produce forces that are parallel to the shaft.
Collectively, these differences between Dremels and drills add up to make a big difference. This means that although a good Dremel should be in every DIYers toolkit, it shouldn’t replace a standard drill.
Do You Need to Hire a Plumber?
Get free, zero-commitment quotes from pro contractors near you.
Related Questions
How much do Dremels cost?
Dremels are available at several different price points to fit the diverse needs of DIYers and professionals. You can purchase a stand-alone Dremel for as little as $50. Your costs could go up to upwards of $250 if you choose to purchase a high-powered Dremel with lots of attachments.
What else can Dremels cut?
If you plan on using your Dremel to cut through a copper pipe, you may also want to use it to cut through other materials. Dremels are capable of cutting through many different materials, including metals, soft and hardwoods, fiberglass, and plastics.

Kellan is a content writer who specializes in everything DIY. When he's not behind the keyboard, he enjoys spending time with his pets, playing music, and geeking out about basketball. He hopes to make your home improvement projects a little bit easier to accomplish.
More by Kellan Jansen