How To Build A Concrete Catch Basin

You’ve seen catch basins on almost every city street. They are metal grates or concrete curbs along each block that collect water runoff, making them essential to a city’s infrastructure. But did you know that a catch basin can be a necessary part of landscaping and water management in your yard?
To install a concrete catch basin in your yard, you’ll first need to identify the right location. Then, make a plywood form, run a drain pipe, and pour some concrete, adding rebar for stability. Don’t forget to top it off with a metal grate for safety!
Prefabricated catch basins can be purchased at home improvement stores, but concrete is preferred for longevity. If installing a basin yourself seems daunting to you, fear not! Once you understand how they work, you’ll see that a catch basin is a smart choice for water management.
Do You Need Minor Grading or Resloping Services?
Get free, zero-commitment quotes from pro contractors near you.

What’s the Catch? All About Catch Basins
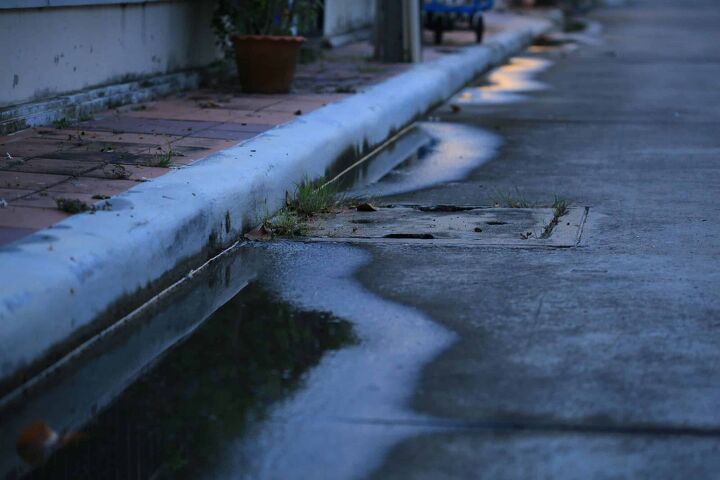
Catch basins prevent erosion, control flooding, and mitigate the hazard of standing water in your yard. They’re also essential to water management in paved areas such as driveways and sidewalks.
They drain excess stormwater, groundwater, and runoff in a safe and controlled manner through an underground pipe. The catch basin also catches debris from leaves and other debris, preventing clogged pipes further down the line.
Concrete catch basins are topped with a metal grate to prevent people and animals from accidentally falling into them. They also keep the drain free of leaves and other debris.
Why Do I Need a Catch Basin?
Does the basement or ground floor of your house flood? This flooding could signal that your yard is graded improperly, which won’t allow water to drain away from your house. A catch basin can be a solution to that frustrating problem.
Flood walls can help mitigate more significant surges of water, but catch basins can control average rainfall. You can address minor flooding or habitual wet spots on your lawn by installing a catch basin.
Gutters should be sloped to one point and drain through a single pipe. Sometimes, this runoff is too much for nature to take care of on its own. In these situations, a concrete catch basin can help collect and divert that excess water.
Types of Residential Catch Basins
If you’ve determined that your property would benefit from a catch basin, you have a number of options to choose from. The following are some of the “large” catch basin products available for residential use.
- Pre-Cast Concrete: This type of catch basin is the most common and is relatively inexpensive. However, it does require a small crane or backhoe to install.
- Cast-In Concrete: If a pre-cast basin is too heavy for your particular situation, you can form a large basin in place. This type of catch basin involves digging a pit, place a metal frame and Styrofoam structure in the hole, and suspending it with rebar.
- Polymer Concrete: Polymer concrete catch basins are constructed of natural mineral aggregates and a polymer binder. It is much stronger than traditional concrete.
- Plastic: These types of catch basins are made of high density polyethylene or PVC, for smaller options.
Where Do You Put a Catch Basin?
Ideally, a catch basin should be placed at the lowest point of your property. It could be where you frequently see water pooling after a storm or habitually puddling due to groundwater patterns.
First, make sure the foundation of your house is in good condition. The foundation serves as one of the four walls of your catch basin. The last thing you want is to divert water into your house instead of away from it.
Find a place along the perimeter of your home that’s out of the way for foot traffic and aesthetic purposes.
What Size Catch Basin Do I Need?
Experts say that a 2 x 2-foot catch basin with a 6-inch drain is sufficient for most homes. Anything larger is considered more appropriate for commercial applications.
You may also use a smaller 1 x 1-foot basin if your water management needs are minimal. When choosing the size for your basin, consider the amount of rainfall and your roof surface area. If your roof is larger than 4,000 square feet, consider using the larger size.
How Do You Make a Concrete Catch Basin?
Tools You Need for the Job
- Shovel
- Plywood and 2×4 lumber
- Circular saw
- Screws or nails
- Drill or hammer
- Drain pipe
- Rebar
- Ready-to-mix concrete
- Water hose
- Concrete mixing hoe
- Large container or concrete mixing tub
- Small shovel
- Flat trowel
- Sand
- Metal grate
Step One
Dig a hole — Dig out the appropriate area on your lawn or next to your foundation. Make the hole at least 32-inches wide in each direction for a 2-foot box, accounting for the concrete wall’s width.
Step Two
Make a concrete form — Using plywood cut to size, create a box that will become the catch basin’s interior. Screw or nail the pieces together, securing with 2×4 lumber on the interior corners of the box.
Be sure to leave 4 to 6-inches of space between the plywood form and the edge of the hole. This space will become the catch basin wall.
NOTE: If you are building the catch basin next to your home, your form only needs three sides. The foundation of the house will serve as the fourth wall.
Step Three
Install your drain — Before your pour the concrete, secure your drain pipe in place. It should connect to your catch basin at the base of a side wall. It should then slope away at a gradual angle that can be sustained until exiting at a curb or dry well.
NOTE: When determining the drain’s height, don’t forget to account for the thickness of the concrete floor you’ll pour. It should be 4 to 6-inches just like the walls.
Step Four
Reinforce with rebar — Insert pieces of rebar into the ground where the concrete will be poured. Drive the rebar at least 4-inches deep and make sure it’s not protruding above ground level. One piece every 8-inches is usually sufficient.
NOTE: It’s a good idea to check local building codes. Make sure the depth and length of your rebar are sufficient for this application.
Step Five
Pour the concrete — Fill the space between the plywood form and the hole’s edge with concrete mixed to the package’s specifications.
NOTE: Hand-mixing your concrete is the most economical method, or you can hire a concrete company and a big truck. Just be aware that they will have a minimum order that this small project may not meet.
Step Six
Remove the form — After the concrete has cured according to package instructions, remove the plywood form and any additional building material.
Step Seven
Pour the bottom — Add three inches of sand to the base before pouring the concrete base. This will prevent settling in the future. Smooth the concrete with a trowel.
Step Eight
Top it off — Build or purchase a metal grate for the top of the catch basin. It should be secure enough so people and animals can walk on it without fear of falling into the basin.
Related Questions
How Often Should You Clean Your Catch Basin?
The most important part of maintaining your concrete catch basin is removing any debris regularly. Leaves, mud, garbage, and other neighborhood debris can accumulate in the basin, rendering it ineffective.If left unattended, the debris can get into the pipe and cause clogs down the line that are harder and more expensive to fix. Grab a shovel and dig out the foreign matter. Or, call a professional such as a plumber to help you get the job done.Use caution when removing the grate on top of the catch basin. It’s heavy and can cause injury to fingers and toes if dropped. It can even injure your back as you try to lift it, so grab a buddy to help if needed.
How Much Time Should You Set Aside To Make A Catch Basin?
Take your time planning out where to put your catch basin and how to lay the pipe so it will drain properly. This planning, plus creating the plywood frame, could take anywhere from two to six hours. Timing will vary depending on your level of skill and attention to detail.Mixing concrete can be very time consuming, so grab a buddy to help you. With one person constantly mixing, while another person lays the concrete, this stage should take about two to three hours.The longest part of this process will be waiting for the concrete to set. Concrete doesn’t fully dry for about 28 days. However, it should be dry enough to touch and remove the plywood frame after about 48 hours.
How Much Does It Cost To Install A Catch Basin?
Professional residential installation can cost anywhere between $2,500 and $5,000. This includes labor, materials, and an expert assessment of your drainage needs. This is the best way to go if you are unsure how to divert excess water most effectively.Ready-to-install plastic catch basins are available at home improvement stores from $50-$100. (This doesn’t include the cost of the pipe.) While these are the easiest and cheapest available, you get what you pay for: plastic is less durable than concrete.The middle ground is a DIY concrete catch basin. Material cost should be under $1,000 by using tools you already have. The investment of your brainpower and labor can save you a pretty penny!
Do You Need Minor Grading or Resloping Services?
Get free, zero-commitment quotes from pro contractors near you.

Wrapping Up
You can make a concrete catch basin efficiently and affordably by building a plywood frame and pouring your own concrete. It’s a simple solution to a host of landscaping dilemmas.
Your new concrete catch basin will increase your home’s value, solve damage-causing drainage problems, and prevent unsightly erosion. Happy digging!

Stacy Randall is a wife, mother, and freelance writer from NOLA that has always had a love for DIY projects, home organization, and making spaces beautiful. Together with her husband, she has been spending the last several years lovingly renovating her grandparent's former home, making it their own and learning a lot about life along the way.
More by Stacy Randall




![The 5 Best Angle Grinders – [2022 Reviews & Buyer's Guide]](https://cdn-fastly.upgradedhome.com/media/2023/07/31/9071326/the-5-best-angle-grinders-2022-reviews-buyer-s-guide.jpg?size=350x220)

