How Much Water Do You Add To Joint Compound For Texture?

Joint compound is a highly versatile substance. It’s simple to use, and it can give texture to any project you’d like. Normally, it’s used on walls to create a variety of textures, from swirls to popcorn styles. The great thing about adding texture to your home’s walls or ceilings is that it’s very easy to do.
To add water to the joint compound to make texture, just add 8 ounces of water to a 5-gallon bucket of joint compound. Stir it, and if it is still too thick, add more water a few ounces at a time until the consistency is correct.
It’s an affordable way to create a new look without replacing walls. A good texture can also help cover imperfections, like joints or nails. Mixing joint compound is easy to do. In this article, we will give you step by step instructions for how to create the joint compound for texture so that you can finish your project the way that you want.
Do You Need to Hire Drywall Installers?
Get free, zero-commitment quotes from pro contractors near you.

How Do You Prepare Joint Compound For Texturing?
To prepare a joint compound for texturing, you need to start with your joint compound in a five-gallon bucket. Choose the type of joint compound you need for your project. Most people choose topping, all-purpose or finishing compound to create texture. Once you put your compound into a container, add water until it becomes the consistency of thick pancake batter.
Step 1: Pour The Compound
Put your texturing compound into an appropriately sized bucket. You will at least want a give gallon bucket or bigger for this project. It’s also a great idea to ensure that it’s made of strong plastic rather than the thinner material as stirring can pop holes into the sides.
Step 2: Add Water To The Compound
Add 8 ounces of water to the compound and stir it thoroughly. You should take time to do this slowly instead of dumping it in at once. By pouring slowly, it helps ensure that the mixture is mixed thoroughly and correctly. However, if you pour too much water, you can add some more compound to create the right consistency.
Step 3: Check The Consistency
Check the consistency of the compound with a paint stick or fork; it should run but still have a thick consistency. If it’s too thick, you can add more water one ounce at a time until you reach the desired level. On the other hand, if it’s too thin, then you will ned to add more compound mixture.
Step 4: Continue To Add Water And Stir
If the compound is chunky or doesn’t run, add 2 to 3 ounces of water and stir it. Continue to add a few ounces of water at a time until you get the correct consistency prepared.
Step 5: Mix Thoroughly
Make sure to mix the compound thoroughly for consistency as you use it and to make sure the compound dries correctly.
How Do You Apply Joint Compound To Walls?
Step 1: Tape
Before you start applying joint compound to your walls, it’s a good idea to tape off any areas that you don’t want the compound to touch. Once it dries, you would have to sand the compound to get it back off the walls, so tape is an excellent resource to prevent that issue.
Step 2: Cover The Floors
Once you tape off the area you’d like to work on, you should add a cover to the flooring below you. Any splatters will then fall onto the cover, preventing damage to your floors. Make sure you tape the sides of the covering to keep it in place as walking on it will cause it to shift and move, potentially invalidating its purpose.
Step 3: Apply The Compound
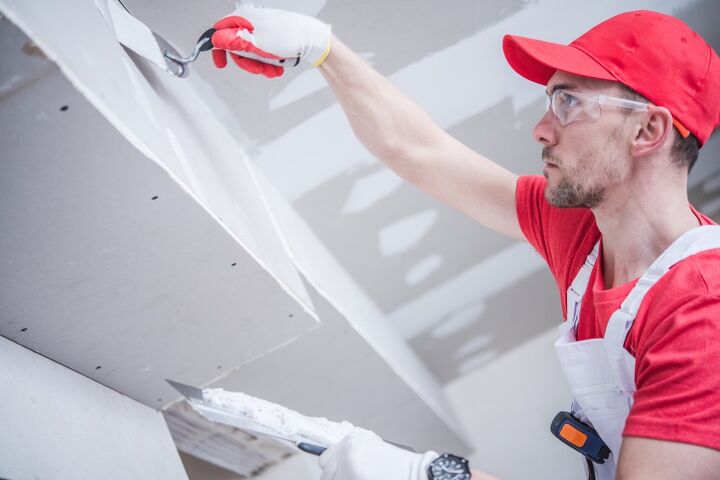
To apply joint compound, mix it to the thickness of pancake batter. Then, using one of the tools, like a trowel or roller, apply your first layer of joint compound.
If you’re creating a texture in a specific pattern, don’t worry about the pattern at this stage. You’ll create the pattern the third time you paint this compound onto the walls.
Step 4: Allow Time For It To Dry
After you’re done coating the first area, allow the wall to dry completely for 24 hours. It may take longer than 24 hours, so make sure it’s fully dry before continuing.
Step 5: Sand the Compound
Next, you’ll want to sand down the layer you just did before adding the next layer. Repeat the previous steps until you are ready to finish the third layer.
Step 6: Add Texture
With the third layer, you should add the texture you want. Move slowly, making sure to use the roller in way that creates a pattern without a seam.
Alternatively, if you are using a trowel, you can make movements in the same direction over and over again. This gives you the repeating pattern you’d like on your wall.
Do You Need to Use a Primer Before Adding Joint Compound?
For the most part, you do not need to apply primer before using joint compound. This is because joint compound sticks to surfaces of many types well without needing a smooth base coat.
If you would like to add a primer, do so at least 24 hours before you intend to add your joint compound, and make sure the primer is totally dry. Using a primer can be a good way to block out certain areas that you’d like to coat with joint compound and to prepare the area for work if there are different materials that the compound will need to adhere to.
How Long Should You Allow Joint Compound to Dry Between Coats?
As with any kind of wet application, you need to give it time to dry before it will set. After you lay down joint compound on your walls or project, allow it to dry for 24 hours between each coat.
You’ll need to wait 24 hours if you want to sand, paint or prime over the joint compound. Keep in mind that 24 hours of drying time is an average.
If your area is humid and warm, it may take longer for the compound to dry. Similarly, cooler, drier air may cause the compound to dry more quickly.
What Kinds of Joint Compounds Are There?
There are three main types of joint compounds that you can use for your project. These can come premixed or unmixed, depending on your preference.
Types of joint compound include:
- Taping compound
- Topping compound
- All-purpose joint compound
Each one has a different purpose and can create different textures and shapes.
Taping compound is used for taping and bedding coats. Finishing compound, also known as topping compound, is used to fill and finish coats. Finally, all-purpose joint compound is designed to be used at any stage of the process.
Is Spackle the Same as Joint Compound?
Spackle is not the same as joint compound. Spackle is suitable for covering up holes in your walls, preparing them for painting or texturing. Spackle is best used for small holes, though.
Spackle is nothing more than a drywall-fixing material. It is designed to bind drywall and to cover things like nail heads and indents.
Spackle is also typically prepared in advance, which means that it’s ready to be used when you open the container. Some joint compounds are premixed, but not all, giving you the option of mixing to your preferred thickness.
What Tools Can You Use to Texture Walls?
Wall textures can be added in several ways including with:
- Wal-Board tools, like texture-pro design tools that have a plastic straight edge
- Painting sponges
- Loop-texture rollers
- Texture rollers with specific textured cuts and designs
- Splatter techniques
- Rubber squeegees
- Painters’ knives
- Spray texture guns
These all create different types of textures and designs that you can paint over with your favorite color.
Related Questions
What Kind of Joint Texture Is Right for My Project?
There are various kinds of textures. The right one for your walls may be smooth, sanded, popcorn, orange peel or others. You can try a few and use sandpaper to start over if you don’t like the texture you create.
How Do You Texture Walls With Drywall Mud?
You can use drywall mud with a sponge. Dab the sponge into the mixture and then onto the wall, creating a kind of mottled pattern.
How Do You Texture Ceiling to Hide Imperfections?
One great thing about ceiling imperfections is that they can be covered easily with texturing. The ceiling can be textured in the same way as any other wall. If there are holes, fill them first, sand the area, and then add your texture with a sponge, trowel or another tool.
Do You Need to Hire Drywall Installers?
Get free, zero-commitment quotes from pro contractors near you.

Wrapping It Up
In order to mix compound for texture, you will need to ensure that the mixture is created properly to give it the stiffness you need when applying it to the surface that you’re using it for. However, if it’s too thick, or too thin you can always add more water or more compound to fix the mistake. We hope this guide has been helpful to you, and wish you the best of luck with your project!

We are a team of passionate homeowners, home improvement pros, and DIY enthusiasts who enjoy sharing home improvement, housekeeping, decorating, and more with other homeowners! Whether you're looking for a step-by-step guide on fixing an appliance or the cost of installing a fence, we've here to help.
More by Upgraded Home Team





![10 Best Scroll Saws for 2022 [Ultimate Reviews & Buyer's Guide]](https://cdn-fastly.upgradedhome.com/media/2023/07/31/9070684/10-best-scroll-saws-for-2022-ultimate-reviews-buyer-s-guide.jpg?size=350x220)

![10 Best Electric Lawn Mowers - [2022 Reviews & Top Rated Models]](https://cdn-fastly.upgradedhome.com/media/2023/07/31/9070486/10-best-electric-lawn-mowers-2022-reviews-top-rated-models.jpg?size=350x220)
