Caulking In The Winter: Can You Caulk In Cold Weather?

If you can’t seem to stop a cold draft from entering through tiny cracks around your window, you might feel compelled to do something about it then and there.
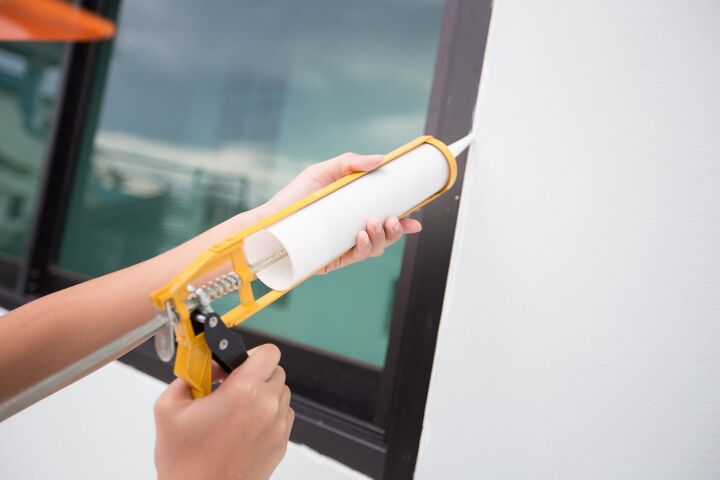
Even though it is the frigid dead of winter, you are probably determined to seal up your home so you can enjoy warmth and cut down on your energy costs. But as you reach for your caulking gun, you should understand that there are only certain types of caulking that can be applied in cold weather.
Many types of caulk should not be applied in conditions below 40 degrees Fahrenheit. There are, however, some types of caulking that you can use in cold weather, including rubber and silicone caulks that can be applied in temperatures as low as minus 20 degrees.
When caulking in the winter, store caulk in a warm place, choose a dry warmer day, and caulk at the warmest time of day.
The coldest winter months are less than ideal for most outdoor projects. This includes applying caulk. But sometimes you need to do what you have to do in order to survive comfortably in your home.
If you have options, you should wait. So, as you consider caulking in cold weather, perhaps it is wise for you to understand the best conditions to caulk before you put on your parka and get to work.
The Best Conditions For Caulking
If you want to know the best time to caulk, you probably won’t be surprised to learn that it is not in the dead of winter. In fact, for most types of caulk, the ideal temperature range is between 40 degrees and upwards of 100 degrees.
In addition to temperature, you should take moisture into consideration. Caulking cures and best adheres in dry conditions.
So, foggy, wet and humid days are all less than ideal conditions to apply caulk. Snowy conditions are also a bad time to apply caulk, but snowy conditions are not good for any outdoor home improvement project.
Only Certain Types Of Caulk Work In Cold Weather
The most important thing you need to know before caulking during cold weather is the type of caulk you plan to use.
This is because many types of caulk should not be applied in temperatures below 40 degrees. So, if you live in an area with very cold or extreme winters, this could greatly limit your options.
The good news, however, is that there are a few types of caulk you can use in very cold weather. Arguably the best type of caulk to use in the winter is silicone caulk.
This is because you can apply silicone caulk in below freezing temperatures, and it has other benefits. It is, for example, waterproof and also very flexible. This makes it a versatile caulk that should stand up to your winter caulking needs.
You can also opt for other low-temperature caulks. There are specially caulks that blend either silicone or rubber into their mixture that make them usable in the winter months.
Tips To Successfully Caulking In Cold Weather
Caulk On The Inside When Possible
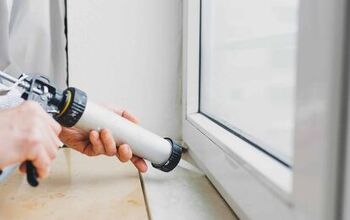
One possible solution to caulking in frigid and less than ideal conditions is to try applying the caulk from inside. There are several benefits to this.
For one, you can control the climate inside your house. This means you can caulk at ideal temperatures, and make sure the surfaces are dry.
This is not always possible, but it often can work. Also consider applying a caulk from inside your home as a temporary fix. Remember that you can always do a more thorough job after the weather improves.
Store Caulk In Warm Conditions
Another way to ensure better results is to keep your caulk in a warm place until you are ready to use it. This ensures that even if it is applied in cold conditions, it will still be at an acceptable and workable temperature when applied.
Make sure you aren’t applying a caulk that is unable to perform in very cold conditions. But if you are able to wait for a more mild day, or apply a caulk that can withstand colder conditions, this is a great way to ensure decent results.
Check The Weather Before You Caulk
Just like with painting and any other outdoor project, the meteorologist is your friend. Make sure you check the local weather, and ideally the full 7-day forecast. Choose to do your outdoor winter caulking on the warmest dry day that you see.
Since the caulk might take a bit longer to cure in the winter, it is probably a good idea to choose a day where it will be dry the day after as well. This way, even if it takes the caulk a while to harden, it won’t be compromised by weather.
Do Exterior Caulking At The Warmest Time Of Day
The odds are that your caulking project will not take the entire day. In fact, in many instances, caulking takes only a fraction of the day. If this is the case for you, then you should consider caulking at the absolute warmest period of the day.
Caulking when the sun is strongest and the weather is warmest ensures more ideal drying and setting conditions. After all, in some climates, temperatures can vary upwards of 40 degrees in a single day.
So, caulking at the warmer part of the day gives your winter caulking project a greater chance for success.
Dress Accordingly
Even when you are using a caulk that can handle temperatures below freezing, it doesn’t mean that your body can easily handle these conditions. Make sure you have a reliable hat and good gripper gloves for this project.
Boots and a warm winter jacket are just as important.
If the project takes more than an hour, don’t hesitate to take refuge in your warm house to thaw out a bit. The last thing you want is to get very sick while trying to keep your house warm and cozy.
Consider A Temporary Fix
Surely the DIY wizard within you wants to do the project completely and perfectly on the first try. This should always be the goal, but it does not always need to be the reality.
You might just want to look into a temporary fix to last you through the winter.
This might involve caulking from the inside, covering the windows, or blocking a draft using other methods while you await spring.
This might not be ideal, but if caulking in warm weather will result in a longer lasting and reliable fix to your issue, then you should consider waiting to do the major causing project until then.
Step-By-Step Guide To Caulking In The Winter
Step One: Remove Old Caulking And Clean Surfaces
The first step to caulking in the winter is the same as any other season. You should remove any old caulk as well as scrub the area to remove any dirt or grime. Allow time for the area to dry completely before moving to the next step.
Pro Tip: Perform this on a day when the weather is above freezing, as cleaning with products is nearly impossible in below freezing temperatures.
Step Two: Tape The Area
Taping the caulking area ensures even lines and cleaner results, just like when you tape before painting. This also allows you to focus the caulking in the correct locations only.
Step Three: Apply The Correct Caulk
The next step is to apply the caulk. Make sure you are using the right caulk for the weather conditions.
If it is below 40 degrees, many types of caulk aren’t recommended. You can, however, use certain rubber and silicone caulk in these cold conditions.
Step Four: Smooth And Push-In Caulk
Make sure you smooth out the caulk and push it inward to ensure it gets into all the cracks and crevices. This is particularly important in colder conditions when caulk is less pliable and is likely slower moving.
Step Five: Check Caulk To Ensure It Has Dried And Set
Once you have applied the caulk, allow it some time to dry and set. After you allow it the recommended time to set and dry, inspect the area.
Check the seal to see if you need to re-caulk it. The job might also require some touch ups. Make sure the caulk was able to stand up to the winter weather as well.
Summing Up Caulking In The Winter
If you are wondering if you can caulk your home in the cold winter months, the answer is: sometimes. The biggest factor you need to consider when caulking in cold weather is the type of caulk.
Some caulks are only reliable in temperatures above 40 degrees. You can use other caulks, like many rubber or silicone caulks, in temperatures as low as below 20 degrees Fahrenheit.
If you want to caulk in the winter, consider caulking your home from the inside or a temporary fix to last you until the spring. Otherwise, make sure you bundle up appropriately, check the weather for warmer dry days, and caulk during the warmest part of the day.
Related Guides:

Tom Gaffey is an expert writer who currently resides in Washington D.C. Tom has a passion for real estate and home improvement writing, as well as travel and lifestyle writing. He lived the last twelve years in Hawaii where he worked closely with luxury resorts and event planners, mastering his knowledge of aesthetics and luxury products. This is where he found his passion for home improvement and a keen interest in DIY projects. Currently, Tom resides in Washington D.C, and also working on his debut fiction novel.
More by Tom Gaffey


