Can You Paint Plywood? (Find Out Now!)
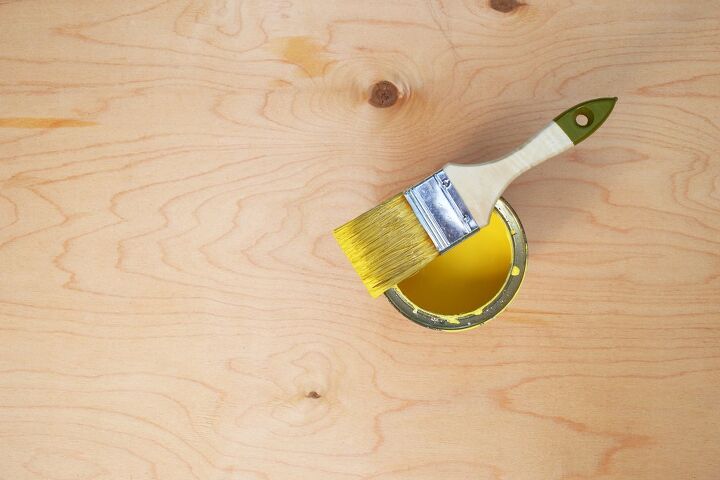
Maybe you have some scrap plywood that you’d like to use for an art project. Or perhaps you have a larger plywood surface that could use a change of color. Either way, the question is: Can you paint plywood, and what’s the best way to go about it?
You can paint plywood, and for the best results, you’ll need to prep it properly by sanding and priming it. Then, paint the plywood in thin, even coats, sanding in between each layer. Allow the plywood time to dry between painting and sanding each coat of paint for a completely smooth finish.
In this article, we’ll go over exactly what plywood is and whether it can be painted. Read on to find out how to best prepare your plywood for painting. We’ve also included step-by-step tips explaining how to get the most ideal results from the painting process below.
Do You Need Exterior Home Paint or Stain Services?
Get free, zero-commitment quotes from pro contractors near you.

What Is Plywood?
Plywood is a material that’s frequently used in the United States for everything from furniture to building construction. It’s made of several layers of wood veneers (or plies) glued together into a panel. Each layer is rotated 90 degrees in a process called cross-graining, which makes plywood extremely strong.
Can Plywood Be Painted?
Like most other types of wood, you can absolutely paint plywood. Of course, you’ll have to prep the plywood and use the right tools to ensure the best results. When done correctly, painted plywood will have a durable, aesthetically pleasing finish.
How To Prepare Plywood For Painting
Before you start painting your plywood, it’s important to prepare it so that the paint applies properly. But the very first step before even prepping the plywood is to ensure you have all the tools you’ll need for the process.
Step 1: Gather Your Supplies
To start off, you’ll need paint and primer. If you’re looking to paint the plywood for artwork, acrylic primer and paint will work well.
But what if you’re painting a plywood floor or another large plywood surface in your home? In that case, you’re better off with heavy-duty oil paint or latex acrylic. Meanwhile, spray paint is best to cover a small area of plywood with an ultra-smooth finish.
You’ll also need to get a paintbrush or paint roller. It’s often a good idea to purchase both. Paint rollers are great for larger areas, while brushes are ideal for small, detailed spaces and edges. For a particularly large piece, you may prefer to use a paint sprayer for the best coverage.
Other supplies needed include:
- Sandpaper to smooth out the surface of the plywood before painting
- An electric sanding tool to smooth larger areas
- Hole filler to fill in any imperfections that aren’t eliminated by sanding
- Painter’s tape
- Plastic sheeting
- Drop cloths
- Vacuum
- Microfiber cloth
Step 2: Prepare The Area
Protect any areas that you don’t want to be covered in paint and dust. You can do this using painter’s tape, plastic sheeting, and drop cloths.
Step 3: Use Hole Filler
Remember, the end goal is for your plywood to have a smooth finish. Carefully examine the plywood’s surface to see if there are any problem areas. Use hole filler to fill in any gaps or holes.
Step 4: Sand The Plywood
Sand the plywood, starting with rougher sandpaper such as 100 grit. This will break down larger imperfections. Once you’ve finished sanding with the 100 grit sandpaper, switch to a finer grit like 180 or 200.
Step 5: Clear The Surface
Once you’re done sanding, use a vacuum to remove the dust from the plywood’s surface. Follow up with a microfiber cloth to remove any remaining dust.
Step 6: Prime The Plywood
Apply the primer using a paintbrush, paint roller, or paint sprayer. Start by carefully priming the edges of the plywood. You’ll likely prefer to use the brush or roller for this step.
Then, for the evenest coverage across the surface, apply the primer in a “W” shape using smooth, overlapping strokes. Cover the entire surface of the plywood, and always follow the directions for the specific primer you’re using.
How To Paint Plywood
Now that your plywood is fully prepped, it’s time to get to painting! Here’s a step-by-step guide.
Step 1: Paint The Edges
Make sure the primer has dried completely before moving on to painting. Once you’ve given the primer time to dry, use a paintbrush to carefully paint the edges of the plywood. Take your time on this step and really pay attention to detail for the best results.
Step 2: Paint The First Coat
Next, it’s time to paint the entire surface of the plywood. During this step, it’s okay if you can still see primer underneath the paint. Instead, focus on making sure the first layer is thin and consistent.
Step 3: Sand The Surface
Before sanding, be sure to let the paint dry completely. Between each coat of paint, it’s important to lightly sand the surface using 180 or 220 grit sandpaper. After sanding, make sure to remove any dust created with a vacuum or microfiber cloth.
Step 4: Paint Additional Coats
Continue to alternate between painting thin, even coats and lightly sanding the surface of the plywood. Always allow each coat of paint to dry completely before sanding and moving on to the next coat.
Painting several thin coats rather than one very thick coat has its advantages. A thick coat of paint tends to remain pliable and less durable. Meanwhile, painting multiple even coats results in a harder, drier finished surface.
Additional Tips for Painting Plywood
Want to make sure your painted plywood turns out perfectly? Check out these tips and tricks!
Take Time To Prep
Take your time when prepping the plywood, and don’t assume that the paint will hide any imperfections. If anything, the paint will make small nicks and divots more apparent!
Get Good Brushes
For the smoothest finish, invest in high-quality paintbrushes. For latex-based paints, nylon brushes are ideal. If you’re using oil-based paints, go for a china bristle brush instead.
Clean your brushes thoroughly, and only dip them into the paint halfway as you paint your plywood. If you cover the metal part of the paintbrush in paint, the bristles will begin to crack and break off. After cleaning, comb through the bristles and wrap the brushes in newspaper to protect and preserve them.
Tint Your Primer
Save money on large plywood painting projects by asking the paint store to tint your primer. This can cut back on the number of paint coats you have to complete!
Make Use Of Additives
Make the paint flow more easily by mixing in paint additives like Floetrol (for water-based paints) or Penetrol (for oil-based paints). These additives can actually eliminate brush strokes, creating a beautifully uniform finish.
Do You Need Exterior Home Paint or Stain Services?
Get free, zero-commitment quotes from pro contractors near you.
Related Questions
What plywood should you use for subfloor?
The best type of plywood for subflooring is three-quarter-inch tongue-and-groove plywood. You can also use standard plywood. However, the tongue-and-groove plywood is recommended because it creates a stiffer floor and is more resistant to movement.
Is plywood stronger than wood?
Between plywood and solid wood, the solid wood is much stronger. This is because it’s a homogenous material (the same all the way through). Meanwhile, plywood is actually made up of multiple sheets that are glued together. There’s much more of a risk of plywood coming apart than regular solid wood.
Is plywood toxic?
There are multiple toxins often present in plywood. One is formaldehyde, which comes with multiple health risks, including an increased risk of cancer. Polyvinyl acetate is another toxin present in plywood.
If you prefer not to use plywood due to its toxins, there are other options available. For instance, you could purchase SoyStrong Maple Plywood, PureBond Birch Plywood, or a structural cementitious sheathing board. Another option is to use a plywood sealer to seal in formaldehyde, which protects the plywood from moisture.

With a lifelong passion for writing plus strong enthusiasm for home improvement and DIY projects, joining the team at Upgraded Home was an easy choice. Jessica Allen likes to share helpful information with current and aspiring homeowners. Aside from writing, Jessica loves doing yoga, playing the piano, and dabbling in graphic design.
More by Jessica Allen