Can You Paint Light Switches? (Find Out Now!)
DIY projects around the home are incredibly satisfying to complete, but sometimes it’s hard to know for sure what options you have for making certain upgrades. Take, for example, a light switch. These pesky little things are in every room in your home, and they tend to be an oversight when it comes to remodels. Until suddenly, you notice that bright white faceplate staring out at you against your freshly painted walls.
With so many light switches around your home, the thought of replacing all of them might seem a bit overwhelming. So, you might wonder, can you paint light switches?
Painting light switches is an excellent alternative to replacing them with a new product. Whether you’re trying to save or can’t find the color you are looking for, painting your light switches allows for optimal customization options. Since plastic can be a challenging surface to paint, take extra care to prime and prep your light switches thoroughly before painting.
Do You Need to Hire an Electrician?
Get free, zero-commitment quotes from pro contractors near you.

Buying New vs. Painting Light Switches
Light switches tend to be dinghy and ugly eyesores in homes. Rather than just living with them in this state, you can choose to blend them into your wall color or use them as an accent point. Whatever your reasoning may be, giving your light switches a fresh new look doesn’t have to be complicated or costly.
Suppose your light switches have never been painted before. They are prime candidates for a brand new paint job. You’ll want to take the necessary steps to ensure that the paint you pick will work well for plastic and prime your areas thoroughly, but otherwise, there is no reason paint won’t work just fine for your switches.
Alternatively, if your switches have been painted before, you might want to reconsider. Multiple layers of paint can cause a lumpy or thick appearance on your light switches, even if you are trying to blend them into the color of your walls.
If you notice that your switches have been painted before, it might be time to consider replacing them. Another thing to notice is if the light switch panels were painted without being removed from the wall. In these circumstances, you’ll never get a clean, crisp edge, so it’s best to start from scratch.
Thankfully, you can replace them with cheap covers that you can paint any color you like.
How to Paint Light Switches
Painting light switches is an excellent option if you’re looking for a quick fix for a recent remodel in your home. Follow these simple steps to learn how to paint light switches.
Step 1: Gather Your Materials
Just like any other home improvement project, you’ll want to gather your materials. Make sure you have the following items on hand:
- Etch primer for plastic
- Paint
- A paintbrush
- Sandpaper
Step 2: Make Sure You’re Safe
Safety should always be a top priority, and since you will be working near your electricity, you should turn it off to be safe. Thankfully, it’s a quick project, and you should be able to identify which breaker in your breaker box goes to which areas of your house in particular.
Step 3: Prep
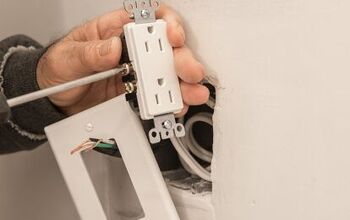
Once you’re ready to get started, you’ll want to begin by removing the light switch covers from the wall. You’re going to want to take each cover and thoroughly clean them, removing any signs of dust or dirt.
Air or towel dry the covers thoroughly before moving on to the next step.
Step 4: Prime
Plastic can be tricky to paint because it is so smooth, so you always want to make sure you prime any surfaces you will be painting. The primer will help to bond the paint to the soft plastic.
The best primer for light switches is going to be the etch primer. Use this to coat the covers and switches before you begin painting. Although you might think the priming stage is unnecessary, this will ensure your paint is long-lasting, especially on these high-traffic switches.
The etch primer comes in a spray which allows you to make a light coating on your switches and covers. Once this coat dries, you’ll need to prime it one more time.
Step 5: Paint
Once the second coat of primer is completely dry, you can move on to painting your switches and covers. As a general rule of thumb when it comes to painting, remember that multiple thin coats are the better alternative to one very thick coat of paint.
Depending on the original color of your switches and the new color you are painting them, you’ll likely need multiple coats. Usually, around three coats of paint will suffice. Before you get started with your next coat, though, make sure the previous layer of paint is thoroughly dried, then give the switch and cover a light sanding with fine sandpaper. We recommend 240 grit.
Step 6: Dry
Although you might be eager to get your new switches and covers back on the wall, you’ll want to ensure everything has dried adequately before doing so. The fresh paint on your switches can take up to 28 days to completely cure and will be pretty delicate in the meantime.
Especially if you know the switches you have painted are used regularly, you’ll want to allow extra time for curing to make sure you won’t have to be repainting any time soon.
Do You Need to Hire an Electrician?
Get free, zero-commitment quotes from pro contractors near you.
Should I Paint My Light Switches?
Can you paint light switches? The answer is yes. Should you paint light switches is an entirely different question, though. If you are on the fence, consider a few things.
First, you’ll want to make sure your light switches don’t already have too many coats of paint on them, as this can give an unsightly appearance to add even more. But, if they have not been painted before, you have free reign to customize your switches as you see fit.
Are you looking to learn more about what you can and can’t paint inside your home? Learn about painting laminate flooring along with painting Corian countertops to see if there are more DIY projects around the house you can get started on today!

We are a team of passionate homeowners, home improvement pros, and DIY enthusiasts who enjoy sharing home improvement, housekeeping, decorating, and more with other homeowners! Whether you're looking for a step-by-step guide on fixing an appliance or the cost of installing a fence, we've here to help.
More by Upgraded Home Team