How To Remove A Stationary Panel Of A Sliding Glass Window

When it comes to windows for your home, there is rarely a “one size fits all” option. Your home is unique and, thus, requires a unique set of windows to accommodate. Anything improper and you could be looking at reduced security and elevated energy costs.
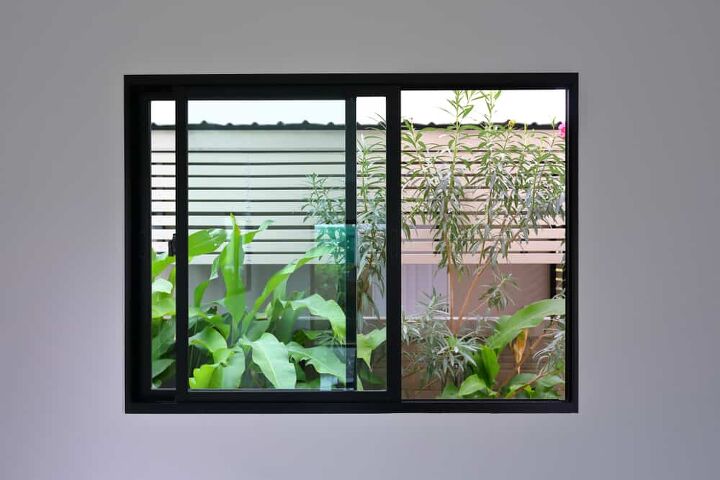
Those homes with stationary sliding glass windows may want to remove them from time to time due to broken components. There are quite a few screws that require removal, and it is imperative to wear gloves to protect against any broken components. You will also need to replace the gasket from the broken panel as well.
Do You Need Sliding Door or Tracks Repair?
Get free, zero-commitment quotes from pro contractors near you.

Removing The Stationary Panel Of A Sliding Glass Window
What You Will Need to Do the Job
The good news is that changing out a stationary glass window panel is relatively easy, and it doesn’t take much in the way of tools. They are preferred by some over the double-hung window option, which tends to be more traditional. The latter is the kind that raises and lowers when you want.
The unfortunate thing with either kind of window is that they are broken about as often as the other. Things happen, pieces break, and you may find yourself needing to fix it. With just a screwdriver and a rubber mallet, you can swap out the old, broken panel for a new one in no time flat. Moreover, you can save about $100 in costs from hiring a repair professional to do the job.
Step 1: Remove the Sliding Half
The very first thing that you should do is put on thick gloves. If there is broken glass, you don’t want to run the risk of slicing your hand during the repair process. You can go with designated safety gloves or something that is thick, soft cotton in nature.
- Take out the sliding half. Take out the sliding portion of your two-paned window. Lift from the bottom carefully and slowly, pressing it into the top part of your window frame. Then, pull it out towards you. You should see the bottom portion clear the track before removing it.
- Lay it aside. When you have successfully removed that portion of the window, lay it off to the side for now.
- Check the channel. Check the top portion of the channel where the window was removed. You will be looking for a roller in particular. When you find the roller, take out the screw and pull the roller out as well.
Step 2: Examine the Center Bar
With the window and the roller out of the way, it is time to give the center bar a good look. The center bar is responsible for holding the half that is stationary in place. You are verifying that it has been broken and needs replacing.
- Locate the screws. Start by finding the screws that hold the middle retainer bar. Remove them carefully and keep them off to the side where they won’t get lost.
- Tap the window. Grab onto the window firmly. Make sure that you hold onto it securely as you tap the window at the bottom edge using a rubber mallet. If you use a regular hammer, it will shatter the pane and you will have a whole other set of problems facing you.
- Work the window out. Tape gently, working the window out of the channel. When it starts to turn loose, you should be able to lift it out entirely. Take your time and be careful; the last thing you want is broken glass.
Step 3: Remove the Screws
With the window and the channel out, it is time to remove the screws from the top and bottom of the window frame. Start at the bottom and then remove the top in that order. Make sure that you hold both the window and the frame over something that is soft in the event that it slips, and you wind up dropping it.
- Tap. Carefully tap the two-piece frame apart. Use your rubber mallet to do the job, working on one half at a time.
- Examine the gasket. Take a good look at the now-exposed gasket that surrounds the freed up window. Look at it carefully as the intention is to re-use it when you put the new glass into the frame. Don’t just get rid of it. Even if the gasket is broken, it can make for great reference when trying to locate a new one.
Step 4: Finding New Glass
If the window has shattered, you will need to buy a replacement. Take the biggest piece that you can find and take it to your local glass shop. They should be able to determine what kind of glass was used and order a new one.
Don’t do it yourself. Whatever you do, do not measure the thickness or attempt to guess it. The local company will not only do an accurate job of getting you the right glass thickness, but they will also assume responsibility in the event that it is the wrong cut.
If you bring the measurements to the glass shop and the new pane doesn’t fit, you probably won’t be able to get your money back. Let the professionals do both the measuring and the ordering instead of trying to do it on your own.
Step 5: Replace the Gasket
When you get the new glass piece, it is time to replace the gasket. Remember, you should have kept it whether it was broken or not. In most cases, the gasket should hold up and you can simply put it back into place when you put the new pane in.
Fit the gasket carefully over each corner as well as down one side and into the corner. Do this one at a time until you have the glass completely back on the gasket track. The fit will be obvious; if it is off, start over and try again. Make sure that the gasket does not fold down over itself and against the glass when the glass is being reinserted.
Step 6: Tap the Frame Into Place
With your new glass pane fitted back into the gasket, it is time to slide it back into place. Fit it into part of the frame and then tap it back into place using your rubber mallet. Do so one half at a time to ensure that the fit is right.
Start from the corners and work down the side of the frame until it is completely and securely around the gasket once again. Make sure that you set it back into the channel and then put the divider bar back where it came from. Finally, all that is left is to reinsert the half that slides, and your window should be good as new once again.
Do You Need Sliding Door or Tracks Repair?
Get free, zero-commitment quotes from pro contractors near you.

What About Vinyl Window Glass Replacement?
Every house is different. You may have vinyl windows instead of the stationary panel, requiring a much different fix. Vinyl windows are most likely to have stops to them. Thankfully, those stops are pretty easy to remove.
- Start at the bottom. Begin with the bottom vinyl window, using a flat-head screwdriver between the window frame and the stop. Pry carefully upwards, beginning at one end and then working your way to the other.
- Support the window. Whatever you are doing, provide support to the window. It could potentially fall out and shatter, leaving you with not only broken glass but another repair that needs to be done.
- Replacement inserts. With the window out, look for any replacement inserts that may have fallen out. Make sure that you get them all, they are necessary when you install your new glass into place. The purpose of the inserts is to keep the pane centered while it is in the frame. It also prevents rot to the frame by allowing proper airflow and circulation.
- User proper safety. Whenever you are doing work with windows, make sure that you have property safety equipment. Even when the pane is in one piece, there is always the chance that you could cut yourself. Thick gloves will prevent against cutting especially when the pane has been broken or shattered.
Related Guides

Ryan Womeldorf has more than a decade of experience writing. He loves to blog about construction, plumbing, and other home topics. Ryan also loves hockey and a lifelong Buffalo sports fan.
More by Ryan Womeldorf


