How To Winterize A Dog Door (Step-by-Step Guide)
Anyone with a dog door can tell you how convenient they are, letting your pups go out as they please, making your dogs happier and your life easier. But as with most things in life, there are pros and cons. Your dog door could be hiking up your electric bill and wasting energy if your furry friend likes to play the “in and out” game repeatedly.
To winterize your dog door clean it, seal gaps with silicone caulk, and add weatherstripping around the door frame. Use magnets on the bottom of the door to keep the flaps in place and prevent heat loss. You can reinforce flimsy flaps with an industrial plastic curtain and add a second flap for more protection from the elements.
In this article, we’ll go over these steps in detail, and give you tips for finding a new winter-friendly dog door if needed.
Do You Need Handyman Services?
Get free, zero-commitment quotes from pro contractors near you.

Winterizing your Dog Door
You can easily improve your dog door’s efficiency if you prefer not to purchase a new one.
Step 1
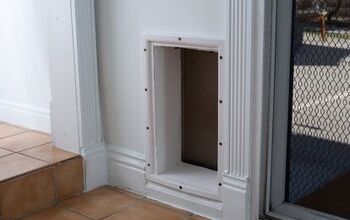
First and foremost, clean the dog door thoroughly. Surprisingly, even a small amount of dirt or debris can affect how air-tight the seal is.
To clean it, combine some warm water and vinegar. Use a cloth to scrub the frame and flaps of the dog door.
Step 2
Once it’s clean, perform an inspection of the dog door. You can do this by running your fingers around the frame of the dog door, or by using a lit candle.
If you feel air coming in with your finger, you probably have a leak. If the candle flickers or changes its direction, it’s safe to say you have a leak.
Step 3
If your dog door is drafty, you may consider sealing off your pet door for the winter. This might not be a popular decision with your dog, but it will save your furnace from working too hard.
To temporarily seal the dog door, you can purchase a pet door cover. Check with the dog door manufacturer to see if they make a cover that is compatible with your door.
Step 4
If you need the dog door through the winter, there are a few ways to seal the frame.
Weatherstrips: You can find these for under $10 on amazon. They come in an adhesive roll of rubber or foam. Simply peel off the adhesive and stick it along the frame of the dog door where there’s a draft.
Silicone Sealant: This is another inexpensive way to seal any leaks. Just follow the directions on the tube and use a line of the sealant around the pet door frame.
Step 5
Lastly, do another inspection – but on your actual door. With your dog door properly sealed, you’ll want to make sure the door it’s attached to is doing its job. If your actual door is drafty, you can use either weather strips or silicone sealant there as well.
Should I Get a New Dog Door?
If these solutions didn’t work for you, or the door is old it might be time to make a change.
Keep in mind that if you go with a different brand that’s different from yours, there might be a size discrepancy. Before you look at new dog doors, measure your current dog door. Try to find a door that’s as close to that size as possible.
If you find the perfect dog door, but it’s a different size, you’re not out of luck. You can always expand the size of the hole in the door if the new dog door is bigger. If it’s smaller, you can fill it in the gaps with additional pieces of wood.
Best Cold Weather Dog Doors
If you’ve decided to invest in a more weatherproof, energy-efficient dog door, here are our top choices. These can all be found on Amazon and have overwhelmingly positive reviews from verified buyers.
Rating: 4.7/5
Features: This pet door is an energy-efficient all-weather pet door with an inner telescoping frame, plus 2 vinyl flaps for maximum insulation.
Rating: 4.7/5
Features: This pet door is constructed from energy-efficient structural foam molded plastic, with nylon for draft-resistance. It also has a double vinyl flap design for insulation. It includes a panel that slides down to cover the door when not in use.
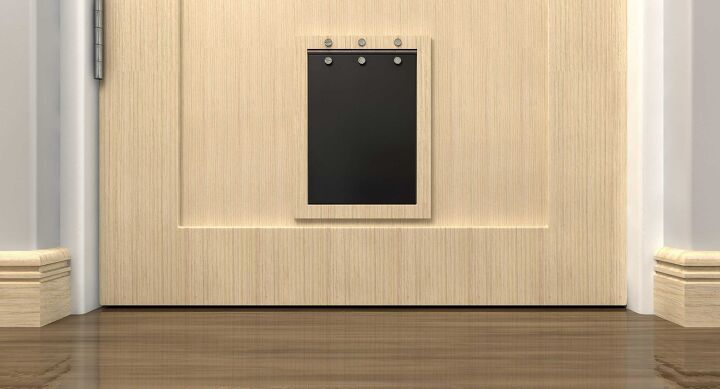
Rating: 4.4/5
Features: This door boasts a 3-flap system and claims to be 3.5 times more energy-efficient than single flap doors. The center flap is insulated and designed for all climates. It comes with a snap-on closing panel to cover the door when not in use.
How to Install a Dog Door
Step 1
Before you purchase a new dog door, be sure to measure your dog accurately. If your dog is a puppy, make sure to allow room to grow.
You will need to measure the distance from the floor to the top of your dog’s shoulder blades when he’s standing. Then add 2 inches to that. Next, measure the distance from the floor to just above his elbow when he’s standing.
Subtract the second measurement from the first to get the minimum height you’ll need for a new dog door. Then measure his width at the widest part of his body.
Step 2
Once you have your new pet door, you’ll need to take out the existing dog door. If you can’t figure out how to do it, check with your dog door manufacturer. You can also try to work backward using the instructions to install it to remember the order.
Step 3
Mark where you want the pet door to be installed on your door. Do this by tracing the door template onto your door with a pencil. Mark the inside corners of the opening since this is where you’ll be cutting.
Step 4
Drill Holes in the center of each marking with an electric drill. Follow the manufacturer’s instructions for the mounting hardware.
Step 5
Use a hand saw to cut the dog door opening in the door, sticking to the template you traced. Outside, install the side of the dog door without the flap in the outer frame of the dog door.
Step 6
Install the interior frame of the dog door from the inside, along with the screws that came with the product.
Step 7
Seal the inner part of the outer frame with caulk for extra winter protection.
Do You Need Handyman Services?
Get free, zero-commitment quotes from pro contractors near you.
Related Questions
How do I seal a Dog Door?
Measure the space in the inner frame. Cut a piece of wood and a piece of Styrofoam to fit inside the frame. Insert, and then caulk around the edges of the wood to seal it.

We are a team of passionate homeowners, home improvement pros, and DIY enthusiasts who enjoy sharing home improvement, housekeeping, decorating, and more with other homeowners! Whether you're looking for a step-by-step guide on fixing an appliance or the cost of installing a fence, we've here to help.
More by Upgraded Home Team