


How To Waterproof Plywood (Quickly & Easily!)
Plywood is a popular material commonly used in all sorts of projects spanning from commercial to residential. DIY enthusiasts love to use plywood because it’s effortless to work with, and it’s affordable; plus, you can use it for indoor and outdoor projects. However, the issue is that it’s not waterproof. So, how exactly do you waterproof plywood?
To waterproof plywood, you need to clean the surface. Then, choose whether you will use penetrating oils, sealers, or sheet plastics. Use wood filler to fill gaps, sand the surface, and then apply the waterproofing agent.
While plywood is an excellent material to use for all sorts of different projects, the downside to it is that it isn’t waterproof. However, you can take action and waterproof it yourself, which we’ll tell you how to do using several different methods.
Do You Need Painting or Staining Services?
Get free, zero-commitment quotes from pro contractors near you.

What Happens When Plywood Is Exposed To Water
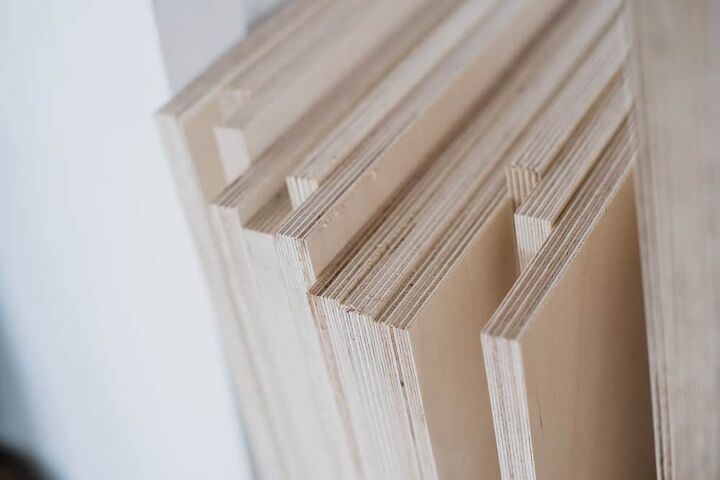
If your plywood is exposed to large amounts of water, such as heavy rain or snow, this will cause it to disintegrate. This is because plywood is made of thin layers of softwood that are connected with adhesive glue and finished by using a veneer.
Since the plywood has several layers of veneers, it’s incredibly vulnerable to water damage. It causes moisture to build up inside the layers, which then causes it all to separate and disintegrate.
Using Plywood Indoors vs. Outdoors
It’s essential for you to know exactly where you are going to apply our plywood, as the process for waterproofing will differ. For example, if the plywood will be in an area with less moisture or water exposure, then penetrating oils will work fine for waterproofing.
However, if you were to install the plywood outside where it’s exposed to heavy rainfall or snow, you will want a full protective coat of liquid latex sprayed on or painted onto the board.
Different Types Of Waterproofing For Plywood
There are many different options when it comes to waterproofing your plywood. These include:
- Spray or paint on liquid latex
- Penetrating oils
- Sealers
The most common form of waterproofing for home improvement projects is the liquid latex that gets sprayed or painted onto the plywood. However, these are applied when the surface is wet rather than dry.
When the application dries, the plywood will form a protective plastic layer that helps keep moisture and water from seeping into your board. Another type of waterproofing for your plyboard is using a sealer or penetrating oils. These help protect your board as well if it’s not in an area regularly exposed to water.
How To Waterproof Plywood Using Liquid Latex
- Clean your board. Before you even begin applying the liquid latex, you will need to clean the surface of your plywood. You can use a brush and dustpan to clear away dust and debris.
- Fill the holes. Use some wood filler of your choice to fill any gaps that are in the plywood. Use your scraper to do this. You can also apply wood filler around the edges to cover up the end grain.
- Sand the plywood. Next, use 100 or 200 grit sandpaper to sand down the plywood. Make sure that the filler is dry first, so you can make the surface nice and smooth. Getting the wood smooth will help when it comes to applying your waterproofing latex.
- Tape any areas you don’t want to be covered. If there are any areas that you don’t want to be covered with the latex, then you should tape those up before moving onto the next step. You can use painter’s tape to do this as it’s easy to remove when you are finished.
- Apply liquid latex. You can either spray the latex on or paint it. For a better and fuller coating, painting is preferred. Make sure you cover the entire side, including the edges and the corners. You want every inch of the board completely covered except for the areas you don’t want to be waterproofed.
- Let it dry. Let the application dry. It should be dry to the touch before moving on.
- Apply to the other side. Now, you can flip the board over and repeat steps 4 and 5.
- Dry the application. Let the application dry until the outside looks a bit plastic-like. This layer is what will keep water and moisture from damaging your plywood.
You can either use a roller or brush to apply the liquid latex. A roller is easier to use than a brush, and so is the spray on. However, if you decide to use an electric sprayer, you will most likely need at least 5 to 7 coats.
Waterproofing Plywood Using Epoxy Sealer
Applying sealer is an excellent idea if your plyboard will be used in an area that will be exposed to moisture or water. It will help protect the softwood, and you can find the epoxy sealer at any home improvement store.
To seal the plywood, you will need to make sure that you have:
- Varathane exterior varnish
- Exterior polyurethane varnish
- Stain brush
- Epoxy sealer or any other type of water sealer
- Water-based stain
- Garden sprayer
- Apply the exterior polyurethane varnish. Apply this product with a stain brush but keep the varnish from the plywood periphery. You will use this only the seal the edges at first.
- Use the sprayer. Now, use the garden sprayer to apply an exterior water-based stain and coat it well. This helps to keep the wood from sustaining any ultraviolet damage.
- Let it sit for 24 hours before continuing. The varnish and stain will need at least 24 hours to dry.
- Apply the epoxy sealer. When the board is dry, it’s time to apply the epoxy sealer (or the sealer of your choice.) Use the garden sprayer to apply several coats. Remember, you will need to do this at least every two years to keep it well sealed.
- Let it dry. Let the sealer dry for at least 24 hours before installing your wood. You will also want to check the edges and corners before installing so that you can make sure they were covered. If they weren’t, you’d need to go back over them with the exterior polyurethane varnish.
Where Can You Use Waterproof Plywood?
You can use waterproof plywood virtually anywhere! Since it’s waterproof, you can use it both indoors and outdoors. Some ideas for waterproof plywood include:
- Backing for your shower tiles
- Subfloor
- Outdoor patio or porch
- Deck
- Garden Gazebo
- Shed
- Carport supports
- Stairs
- Trim for windows and doors
- Boats
- Boat Launch Platform (Not the underwater supports)
How Much Does It Cost To Waterproof Your Plywood?
How much you will pay to waterproof your plywood depends on several different factors, such as:
- What method you use for waterproofing
- How much plywood do you need to waterproof?
- If you already have the tools necessary or need to buy them
If you already have most of the tools necessary for the project, then you can expect to pay between $30 for a small project to $120 for a large project. However, if you need the tools, then a smaller task will cost about $60, and a larger one can cost as much as $200. Again, this depends on the amount of plywood you have to waterproof.
Should You Hire A Professional Or Do It Yourself?
This project is a very DIY friendly one, and it’s great for beginners. Waterproofing plywood is extremely easy and very straightforward. There’s no expertise that is needed to do this job. Instead of paying a specialist between $250 and $400 to do this, you can save money and do it by yourself.
Safety Tips
Of course, it’s essential to make sure that you’re executing this project in the safest way possible. Here are a few safety tips for you before you begin your project:
- Make sure the area is well ventilated. If you cannot do this outside, make sure you open some windows and doors. You can also turn a fan on and aim it out the window. If there’s no possible way to do this, you should use a ventilator to protect your lungs from the fumes.
- Use gloves. Don’t allow the products to come into contact with your skin as they can harm you. Using gloves is a great idea. Stuff your long sleeve shirt or plastic covering into your gloves for the best protection.
- Wear goggles if you are cutting wood. Debris and wood dust fly through the air when you use a saw. Wear goggles if you are planning to use a saw to cut your plywood.
Do You Need Painting or Staining Services?
Get free, zero-commitment quotes from pro contractors near you.
Wrapping It Up
Waterproofing your plywood is extremely easy, regardless of the method that you choose. However, you will need to make sure the wood is clean and that you apply the product correctly. Don’t forget to apply the product to the edges and corners, as these areas are more susceptible to water penetration.
No matter the DIY project you’re taking on, safety is of the utmost importance. When waterproofing your plywood, use gloves, and do this in a well-ventilated area! If you are still unsure of how to do this, contact a friend for help to save money on the costs of hiring a professional.

Heather is a passionate writer who loves anything DIY. Growing up, she learned everything from home repairs to design, and wants to share her tips with you. When she's not writing, she's usually hiking or searching for her next DIY project.
More by Heather Robbins


![12 Washing Machine Brands to Avoid [with Recall Data]](https://cdn-fastly.upgradedhome.com/media/2023/07/31/9075781/12-washing-machine-brands-to-avoid-with-recall-data.jpg?size=350x220)