


How To Remove Texture From Painted Walls

Textured walls had a moment of popularity not too long ago. The method of swirling highly textured paint onto the drywall was an alternative to wallpaper and a departure from the smooth wall. It is, after all, a great way to hide imperfections in the wall.
But if your old textured walls no longer fit into your modern home aesthetic, you might want to do away with them. But when it comes to removing texture from painted walls, what exactly are your options?
If you want to remove texture from painted walls, the best DIY solution is to add a skim layer to the walls using joint compound. This additional layer creates a new and smooth surface for you to paint.
You can also try the soaking and scraping method. This method, however, is messier and difficult with painted walls, since paint is a natural water repellent.
Turning your textured walls into smooth walls does not take magic, but it is definitely not an easy feat. In most cases, turning painted textured walls into smooth surfaces is a project that involves many steps.
The project can also be a messy one. So, before you start this project, make sure it is the right decision for you. Also, make sure your room is ready for this fairly invasive project.
Textured Walls Versus Smooth Walls
As you stare at your textured walls and wish they looked different, it might be a good idea to note the differences, pros and cons, of both textured and smooth walls.
Textured Walls
Your textured walls have some benefits, believe it or not. For one, textured walls add a dynamic element to the room. This is likely one of the reasons they were initially installed.
Also, textured walls are effective at hiding imperfections in the wall. This is why you commonly find them in areas along stone wall surfaces, or uneven walls.
But while there are some benefits to textured walls, there are also drawbacks. The main drawback is that textured walls are mostly out of fashion. They certainly had their moment in the 1950s through 1970s.
But now it is all about smooth walls and clean angles. Textured walls might even make your home a little harder to sell. Textured walls also tend to collect dust and can be a bit tricky to clean.
Smooth Walls
Smooth walls are the modern standard for walls. They are in most homes. Smooth walls help create smooth angular lines.
They can look modern or classic depending how you paint or decorate them. In fact, one of the best qualities of smooth walls is how versatile they are.
Unfortunately, the biggest downside to smooth walls is that they do not hide imperfections well. So, when you want to switch from a textured wall to a smooth wall, it is crucial you take the time to perfectly smooth and level the surfaces.
This will ensure your new walls look as good as they do when you picture them in your head.
Is Removing Texture From Painted Walls Expensive?
If you are interested in removing the texture from your painted walls, then you surely want to know exactly how much it will cost to smooth them out. The price to remove texture from walls, however, will vary based on the method you use.
Using the soak and scrape method and the skim coat method are the two cheapest methods. These methods often average out to about one to two dollars per square foot. More involved methods cost significantly more.
If, for example, you hire a professional or need to replace your drywall, then your project will easily cost several thousand dollars.
Therefore, it is critical you either have the budget or are confident you can complete the project in a DIY fashion. Inspect the surfaces to make sure they have their integrity.
Then see if you can scrape or easily cover a small section before diving all the way in.
4 Ways To Remove Texture From Walls (And How-To Guides)
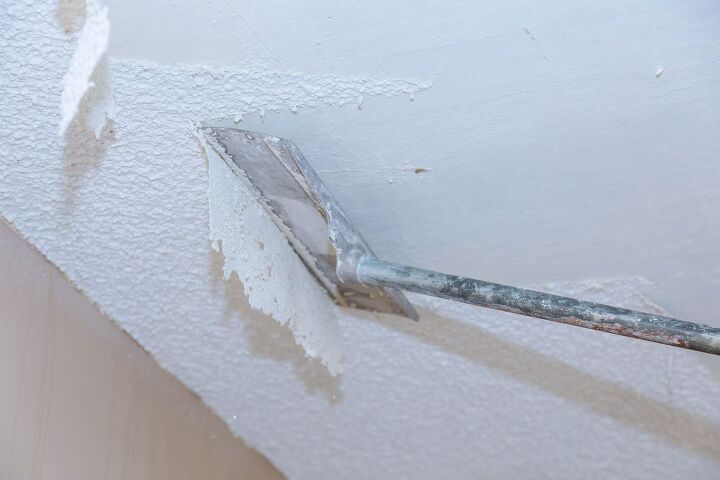
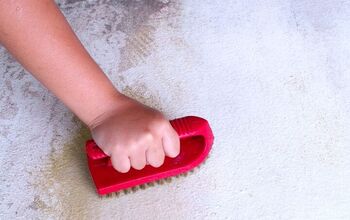
The Soak And Scrape Method
The soak and scrape method is a popular way to remove texture from walls. Unfortunately, using this method on painted surfaces is difficult.
This is because paint is often naturally repellent to water. This prevents the water from soaking into the material.
Normally, you would soak the texture before picking up the scraper. In the case of painted walls, you usually need to do some scraping first in order for the moisture to break through that paint layer.
Please see the steps below on how to scrape texture off your painted walls.
Step One: Prepare The Room And Materials
For this project, you will need a power- and/or hand-sander, a scraping tool, a spray bottle for water, and tarps to cover the floor and furniture.
Step Two: Use Scraping Tool Or Power Sander To Break Through Paint Layer
This can be the most labor-intensive and frustrating step. Patiently sand and scrape the texture until most of the painted layer is gone. Use a power sander, hand hander, scraping tool or a combination.
Each textured wall is different, so use whatever combination works best for you.
Step Three: Spray Walls With Water
Use the spray bottle to soak the exposed textured material. This will loosen it and make it easier to scrape.
Step Four: Use Scraping Tool To Remove Remaining Texture
Once you allow the moisture to soak into the wall, you can start to scrape. Work in small sections, making sure the area stays moist. This makes it easier to scrape.
Step Five: Inspect And Scrape As Needed
Inspect the walls, scraping off remaining bits when you notice them.
Step Six: Sand Wall Until Smooth
Once the scraping is done, you just need to sand the walls smooth. Start with a rougher grit sandpaper. Finish with a fine grain sandpaper until the walls are smooth.
Add A Skim Coat To Your Textured Walls
The skim coat method is definitely the preferred method when trying to remove texture from painted walls. This is because instead of having to work tirelessly to take off the hard-to-scrape texture, you simply apply a smooth layer over the existing texture.
The skim coat method involves using joint compound, and applying it over the existing texture. You apply enough compound to create a new smooth and flat surface on the wall over the existing textured wall.
This approach uses different tools and has a different process, which we have described in detail below.
Step One: Gather Materials And Prep The Room
Make sure you cover your floors and furniture, as this can be a messy situation. For this project, you will need a nap paint roller, ample joint compound, a 10-inch drywall taping knife, and hand sander.
Step Two: Sand And Rough Up Painted Surfaces
Sand off some of the paint to ensure the joint compound will stick. It can slide off glossy surfaces.
Step Three: Prepare Joint Compound
Mix your joint compound using a paddle bit. You want the texture to be a bit runny, almost like a cake batter. If the mixture is too firm it will not make it easy to apply, and it will dry too fast.
Step Four: Use Nap Roller To Apply Joint Compound
Use a thick nap roller to cover your textured walls. These rollers can work their way into the grooves of the textured walls for more complete coverage.
Step Five: Skim And Smooth The Joint Compound
Use the drywall knife to smooth out the compound you applied to the wall. This works to remove the excess and also to create a flat surface.
As it slowly dries, it will become more of a solid, but also harder to work with.
Pro Tip: Work in small sections. This allows you to focus your energy and time.
You don’t want the joint compound to dry until you have scraped and shaped it. Once it is set, it is hard to manipulate.
Step Six: Dry And Repeat Where Necessary
Work the compound and smooth it out. Once complete, allow it all to dry. Repeat in areas where you still notice texture.
Step Seven: Sand Walls Until Smooth
Start with a coarse grit paper, and then a fine grit paper to smooth out the walls. Continue until a smooth seamless surface is all that remains.
Replace Drywall Entirely
In some cases, your textured walls might need to be completely replaced. If the textured walls are very old, or there is no salvaging them, you might be better off ripping out the drywall and replacing it with new drywall.
Obviously this is a much larger project. If this appears to be the best option, you should do this project when it coincides with another major project in the room.
Hire A Professional
It is definitely possible and feasible to do this project yourself. You can also just hire a professional.
You might want to consider shopping around for a few professional quotes before you start this project yourself. Maybe think about having a professional do the scraping and cleanup, and maybe you do the sanding, finishing work and painting.
Regardless of how you do it, just plan and budget accordingly. And know that while it might cost you significantly more money to hire a professional, it will sure save you some time and headache.
Summing Up How To Remove Texture From Painted Walls
If you want to smooth out your painted textured walls, you have several options.
The best option is to add a skim layer using joint compound. This method involves adding an additional layer to the textured walls, and smoothing it out until it is flat.
You can also use the soak and scrape method. Keep in mind it is difficult to soak textured walls once they have been painted. If the project proves too time consuming or messy, you might want to consult a professional for an estimate.
Related Guides:
Tom Gaffey is an expert writer who currently resides in Washington D.C. Tom has a passion for real estate and home improvement writing, as well as travel and lifestyle writing. He lived the last twelve years in Hawaii where he worked closely with luxury resorts and event planners, mastering his knowledge of aesthetics and luxury products. This is where he found his passion for home improvement and a keen interest in DIY projects. Currently, Tom resides in Washington D.C, and also working on his debut fiction novel.
More by Tom Gaffey


![How To Reset A Whirlpool Cabrio Washer [In 5 Easy Steps!]](https://cdn-fastly.upgradedhome.com/media/2023/07/31/9076531/how-to-reset-a-whirlpool-cabrio-washer-in-5-easy-steps.jpg?size=350x220)


