How To Measure For A Storm Door Replacement (Quickly & Easily!)

Adding a storm door to your entryway can increase functionality, security, and allow a substantial amount of light into the habitually dark areas of your home. In fact, this is a very popular DIY project for homeowners. However, before you head over to your local home improvement center to purchase a door, you want to make sure that you choose the right one.
Prior to selecting your new storm door, you must gather precise measurements to ensure a perfect fit. The first thing you should do is to check for possible obstructions that could hinder the installation of your door and then determine the size based on the measurements of the opening.
Although this may sound like an involved process, it can be a relatively easy project. Follow our guide to walk you through the proper way to measure for a storm door replacement.
Do You Need Storm Door Installation?
Get free, zero-commitment quotes from pro contractors near you.

How to Measure For a Storm Door Replacement
The process of measuring for a new storm door can be broken down into four basic steps:
- Check for potential obstructions that will impact the storm door placement.
- Measure the height of the door.
- Measure the width of the door.
- Estimate door dimensions.
Let’s dive in and explore the procedure step-by-step to better understand how to determine the correct size storm door based on the measurements gathered.
Step One: Check for Obstructions
Before you start collecting any measurements for the storm door, you want to make sure you actually have the room for it. Give the area around your doorway a quick inspection to check for any potential obstructions that may interfere with your installation.
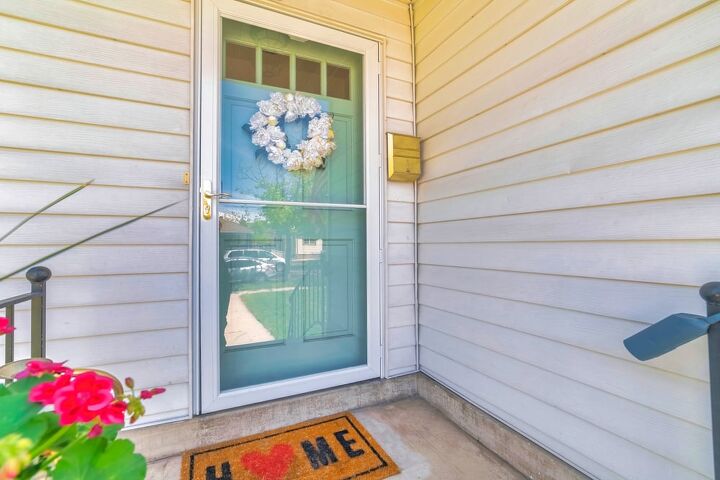
More specifically, look at the placement of exterior lights, door handles, a doorbell, and possibly even a mailbox. In some instances, these elements may inhibit the placement of your storm door or prevent it from opening and closing properly. Check the pillars on your front porch to ensure that the door will have ample room to swing outwards. Here is a comprehensive list of obstructions to look out for:
- Front porch decorations and design elements
- Mailbox
- House numbers
- Railings and pillars
- Doorbell
- Outdoor lighting fixtures
- Door handle and knob placement on front door
For decorations, these can simply be moved or repositioned to ensure that the storm door fits and is easy to operate. For the more permanent fixtures, you’ll most likely have to find ways to work around them.
At this point, you may also want to consider which way you want your storm door to open. If you want the handle on the right side and the hinges on the left, your door will be categorized as a left-hinged outswing. Whereas, a storm door with the handle on the left and the hinges on the right has a right-hinged outswing. Choose the hinge side that has the fewest obstacles to allow your door to swing open properly. The outswing you choose, along with the measurements you collect will dictate the specific storm door you purchase.
Step Two: Measure Door Height
The two primary measurements you need to gather for a storm door are width and height. You’ll want to take three separate measurements for the height from the top of the bottom threshold to the underside of the top trim piece – right, center, and left. The reason for this has to do with the fact that houses settle over time and can cause door frames to warp. As a result, the distance at the top may be very different from the bottom.
- Locate the top of the door threshold. It is generally made of silver/brass metal or concrete.
- Place your tape measure on this spot and stretch it to reach the bottom of the top section of the outer trim.
- Position the tape measure like this in the center of the opening, the left side of the door opening, and the right side. Write down each of these measurements.
- On newer homes, you can generally expect to get measurements between 80” and 81”. Openings with older or bigger doors will usually come in somewhere between 96” to 97”.
- Record the shortest of these three measurements. This is the one you’ll be working with.
Quick Tip: Whether you’re measuring width or height, make sure you’re calculating these dimensions in the area where the storm door will sit and not where the front door already exists.
Step Three: Measure Door Width
To measure the width, you also must gather three different measurements – top, middle, and bottom. More specifically, measure left to right inside the brick mold where the storm door will be installed – as opposed to inside the door jamb.
- Measure width in three locations: the top of the door opening, in the center of the door opening (near the handle), and at the base of the door opening.
- Record these three measurements.
- Make a note of the narrowest width, as this is the one you will be working with.
When you have an existing doorway, there is no cutting involved in the installation of a storm door. As long as you take exact measurements, you will ensure a precise fit.
Step Four: Estimate Door Dimensions
Most door openings will fit among the list of standard sizes. Take the smallest measurements that you gathered for the door height and door width. Then, write them down in “width x height” format.
For example, if the smallest width dimension you calculated was 34 inches (86.36 cm) and the shortest height dimension was 80 inches (203.2 cm), you’ll notate it as 36” x 80”. This is the measurement that you will bring along with you to purchase your storm door replacement. If you some additional reassurance that you’ve got the correct measurements, consider repeating the process a second time.
Choosing the Right Storm Door
With your measurements, this should allow you to select a standard-sized storm door. All pre-hung storm doors come in an assortment of standard sizes, which tend to vary slightly from manufacturer to manufacturer. In most cases, all you’ll need to do is match your particular door dimensions with the standard size that is the closest match. Start by choosing a manufacturer (such as EMCO, Larson, or Anderson) and consulting their doorway opening size guide to match your dimensions.
Examine the chart below for the most standard sizes available from Anderson and EMCO.
| Standard Door Size Width Ranges: | 30” | 32” | 34” | 36” | Standard Door Size Height Ranges |
| Andersen 4000 & 3000 Series Storm Doors with 45 Minute Easy Install System | 29 7/8″ TO 30 3/8” | 31 7/8″ TO 32 3/8” | 33 7/8″ to 34 3/8” | 35 7/8″ TO 36 3/8” | 80″ TO 80 7/8”
|
| Andersen 3000 TruEase, 2500 & 2000 Series and EMCO Storm Doors (excluding Forever®) | 29 3/4″ TO 30 3/8” | 31 3/4″ TO 32 3/8” | 33 3/4″ TO 34 3/8” | 35 3/4″ TO 36 3/8” | 80″ TO 80 7/8”
|
If your personal measurements do not fit within the standard width or height ranges outlined above, your installation will require a custom storm door.
- Andersen Custom Door Opening Widths: 27 7/8″ TO 42 3/8″
- Andersen Custom Door Opening Heights: 72″ TO 96 7/8″
- EMCO Custom Door Opening Widths: 27 7/8″ TO 42 3/8″
- EMCO Custom Door Opening Heights: 75″ TO 91 7/8″
For storm doors manufactured by Larson, most standard sizes are 32” and 36” wide, while some models are also available as 30” and 34”. Their doors require a 1-inch wide x 1-inch deep mounting surface. In some cases, hinge-side shimming may be needed for the door to fit the existing opening. Larson storm door standard sizes are as follows:
| Larson Nominal Door Sizes | Door Opening Width (no shim required) | Door Opening Width (shim required) | Shim to Opening Width | Min. to Max. Height |
| 30” TO 81” | 29 7/8” TO 30” | 31 1/16” TO 30 3/8” | 29 7/8” TO 30” | 80” TO 81” |
| 32” TO 81” | 31 7/8” TO 32” | 32 1/16” TO 32 3/8” | 31 7/8” TO 32” | |
| 34” TO 81” | 33 7/8” TO 34” | 34 1/16” TO 34 3/8” | 33 7/8” TO 34” | |
| 36” TO 81” | 35 7/8” TO 36” | 36 1/16” TO 36 3/8” | 35 7/8” TO 36” | |
| 30” TO 75” | 29 7/8” TO 30” | 30 1/16” TO 30 3/8” | 29 7/8” TO 30” | 74 1/2” TO 75 1/2″ |
| 32” TO 75” | 31 7/8” TO 32” | 32 1/16” TO 32 3/8” | 31 7/8” TO 32” |
If your measurements exist outside of these standard sizes, you will need a custom door. Tiny homes or mobile homes can have entries as narrow as 30 or 32 inches, whereas, large homes may feature grand entryways that are as tall as 97 inches. Larson offers a variety of models in custom sizes to fit your needs.
Other Storm Door Basics
The following are some other storm door basics to be aware of when you’re shopping for your replacement:
- Sometimes your door may measure wider than standard-sized storm doors. In this situation, you can buy a z-bar extender to place in the extra space between the storm door and door trim. This can be a convenient alternative to purchasing a custom door.
- Storm doors typically come in two standard sizes: 36 inches for entry doors and 32 inches for back doors.
- The construction of storm doors includes aluminum for the front and back layers, and the center is made of foam insulation.
- Pre-hung door kits that are sold by most manufacturers are very convenient and easy to install. Many of which can also be adjusted slightly to fit the top of a door frame.
- Most storm doors are outfitted with a sweep, or flexible strip, that is designed to keep outside air, dirt, and moisture from coming into your home.
- Security storm doors come with laminated security glass, protective grills, and a multipoint locking system that fortifies the door jam as well as the top and bottom of the storm door’s frame.
- Storm doors are available in a variety of screen and glass panel combinations. Many also have removable panels that can be switched out depending on the time of year.
Do You Need Storm Door Installation?
Get free, zero-commitment quotes from pro contractors near you.

Related Questions
What is the difference between a storm door and a screen door?
The storm door and screen door terms are often used interchangeably to describe the door-mounted between your front door and the outside of your home. However, there is a difference between the two. Screen doors are exactly as the name indicates: a door with a screen. Their main purpose is to provide protection from bugs and other pests, while allowing air to continuously enter the home.On the other hand, storm doors come with a few more components to them such as the glass panel. This design offers fresh air on demand and, when closed, protects against rain, wind, and snow.

Jessica considers herself a home improvement and design enthusiast. She grew up surrounded by constant home improvement projects and owes most of what she knows to helping her dad renovate her childhood home. Being a Los Angeles resident, Jessica spends a lot of her time looking for her next DIY project and sharing her love for home design.
More by Jessica Stone


![10 Best Zero Turn Mowers – [2022 Reviews & Ultimate Buyer's Guide]](https://cdn-fastly.upgradedhome.com/media/2023/07/31/9070522/10-best-zero-turn-mowers-2022-reviews-ultimate-buyer-s-guide.jpg?size=350x220)


