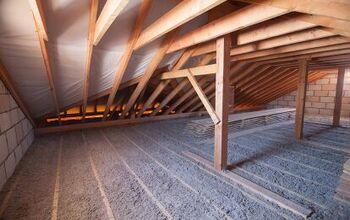
How to Get Rid of Mice in Attic With Blown Insulation
Mice are small, fuzzy members of the rodent family that can cause just as many issues as the closely related rats and other large rodents. Not to mention, the bubonic plague, or Black Death, that occurred during the Middle Ages was carried by mice. It’s because of them that around half of Europe’s population perished from the plague.
While contracting this disease nowadays is very rare, mice can potentially carry over 30 different diseases. They breed quickly and create very concerning health hazards by depositing their urine and feces in your home. Your attic is a warm area that provides the perfect breeding ground for these tiny creatures.
In addition to the health concerns, mice can also chew through your duct work and hide inside the blown insulation that is often found in attics and walls. To ensure that your family’s home and health is protected, you need to eliminate the mice problem, prevent them from returning and clean up the infestation.
Since there are many places to hide inside of an attic, it takes a very sophisticated approach to completely remove them from your home.
Do You Need Blown-In Insulatio Installation or Replacement?
Get free, zero-commitment quotes from pro contractors near you.

What Are The Signs You Have Mice In Your Attic?
Having a mice infestation in your home is often easy to identify. However, when it comes to your attic, it’s a different story. Since most homeowners spend little time in their attic, you likely won’t discover a mice problem until they’ve made their way into the rest of your home.
Here are some of the most common signs that indicate mice have taken up residence in your attic:
- Footprints & Chew Marks: A mice infestation may be identified by gnaw markings on hard surfaces. If you have mice, you’ll likely find gnaw marks on the floors, house siding, rafters, ventilation ducts, electrical wires, and nearly all solid surfaces.
- Noise: Mice are generally most active in the evening, as this is when they’re building their nests and seeking out food sources. Pay close attention to the noises that are coming from your attic, especially at night.
- Holes: Mice can make their way into your home even through particularly small holes. Holes bigger than a dime can provide the ideal entry for mice.
- Tunneling: Tunneling is a major sign that mice are living in your attic, especially if you have blown insulation. Mice like to tunnel behind insulation to stay warm while nesting.
- Droppings: When mice are navigating around your house, they will leave a trail of feces. This is the most obvious giveaway. Mice droppings appear very small, oval shaped, and are pointed on one end. You’ll often find the most concentration of mouse droppings near food sources, and their nesting areas. Although mouse urine is another sign, it can only be seen under black light.
Even if the infestation only exists in your attic, it must be dealt with promptly. That way, you prevent the mice from possibly spreading disease through your home’s ventilation system.
Materials You’ll Need
The following are all the necessary materials for getting rid of mice in an attic with blown insulation.
- Ladder
- Flashlight
- Broom and dust pan
- Gloves
- Twist ties
- Garbage bags
- Steel Mesh
- Staples
- Staple gun
- Concrete
- Caulk or expanding foam
- Fan
- Traps and/or rodenticide
- HEPA mask and any other essential protective gear such as rubber gloves, a stocking hat or full body clothing.
Step 1: Inspect For Holes In The Attic
Using a ladder, climb up to examine the exterior walls of your attic. Pay special attention to the areas where pipes, wires, or any other object creates a hole that leads to the outside. Mice only require a gap that is around ¼ inch to enter a structure.
We also recommend using a flashlight to further inspect and illuminate dark spots. If an area still appears dark after you shine your light on it, it’s a hole.
Step 2: Further Examine The Attic Exterior
Continue your attic inspection in the corners of the walls, under the roof’s overhang, along vents and eaves and any other place where two pieces of wood join together.
Over time, wood can deteriorate, swell when it comes into contact with water and shrink in cold temperatures. This weakening of the wood can result in rot or the creation of gaps that mice can enter through.
Most of this area is above the attic’s insulation level and can also be inspected from inside the attic itself. Turn off lights and cover windows to darken them and make it easier to detect any other holes to the outside.
Step 3: Inspect The Roof
If possible, climb onto your roof to further inspect the situation. You should especially look in the areas around trim, where eaves meet the roof and any surrounding vent pipes or chimneys. Ensure that all roof vents are properly capped to prevent any rodents from entering the structure.
Step 4: Clean Up The Conditions
After you’ve finished your inspection of the conditions in the attic and surrounding areas, you want to clean up the mess before closing any holes. Use gloves and a broom and dust pan to clean the attic space of all nests and mouse droppings.
If found, place the nests into a garbage bag, seal tight with a tie and dispose of them into your curbside trash can. This seemingly very easy step will help dissuade mice from returning to your attic.
Step 5: Fill The Holes
Your next step is to cover or fill any of the holes that you found. Even if the holes may be too small for rodents to enter they should still be covered as they can threaten moisture and insect hazards as well as airflow issues in your attic.
To patch up holes, avoid using anything made of plastic, rubber, vinyl or any other material that can be easily chewed through.
Instead, install patches of steel mesh over the holes and secure with screws or staples. To fill small holes, you can use caulk, expanding foam insulation or mix a small portion of concrete.
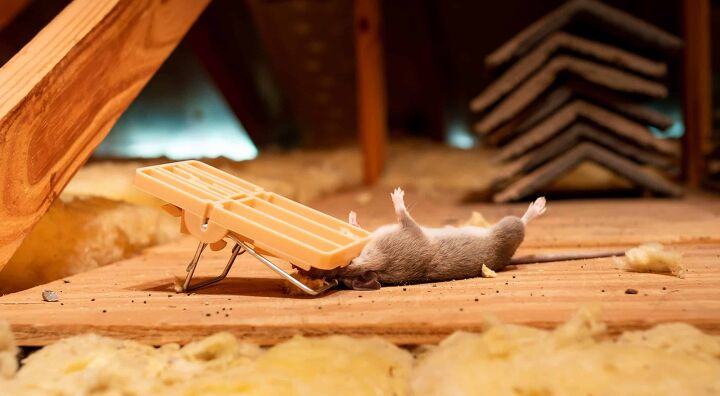
Step 6: Eradicate The Existing Mice
With the droppings and nest cleared and the holes patched, you now want to eliminate any mice that are currently living in your attic. For the more humane, environmentally friendly approach, you can use traps. Snap traps kill mice quickly whereas, live traps collect several mice at once and require you to kill them yourself.
Some other options for eradicating mice include battery-operated electrocution traps, rodenticides and glue traps. The active ingredients involved in both glue traps and rodenticides make them the least desirable options for removing mice. Rodenticides are a poison, are not environmentally-friendly and will kill mice in their tracks, possibly leaving a lingering awful odor in your walls.
What Are Some Tips For Placing Mouse The Traps?
In general, when installing traps, you’ll want to place them in dark corners of the attic, where you notice the most mice droppings or near any possible points of entry. Check the traps often and empty them frequently.
Pro Tip: Some other less conventional methods for removing mice is placing mint plants in your attic and adopting a cat. Mice do not like the smell of mint and will avoid it. Additionally, cats are natural predators to rodents and have an instinct to hunt and kill mice.
Step 6: Treating The Blown-In Insulation
After you’ve completed all the above steps, you still need to handle the blown-in insulation in the attic. Before proceeding make sure that you open any windows or doors to the attic or use a fan to ensure ventilation. Once you’ve filtered in ample amount of fresh air, mix together a biocide solution that is one-part household bleach to ten parts water.
Wearing a HEPA filter mask, use a spray bottle to saturate the insulation surface and any other objects where mouse feces were present. The bleach will disinfect while the water will weigh down any microscopic particles that become airborne when disturbed.
Next, remove the blown-in insulation by manually removing it or vacuuming it up. Use the same bleach and water solution to wipe down any surfaces that had mouse feces or urine. Additionally, spray solution along the entire attic floor for further sanitation.
Step 7: Replace The Blown-In Insulation
Now that the entire attic has been effectively cleaned and sanitized, you can start reinstalling the insulation as desired. For easy insulation, use a commercial blown-in insulation vacuum that is specially designed for this task.
Do You Need Blown-In Insulatio Installation or Replacement?
Get free, zero-commitment quotes from pro contractors near you.
Final Thoughts
The above seven steps will help you to effectively clean, remove and prevent your mice problem in your attic with blown-in insulation. However, for some final notes, keep the following points in mind during this project:
- Do not cover old insulation with new insulation. This creates a bacterial breeding ground.
- The easiest way to remove dead mice is to pick it up using an inverted plastic bag. Fold the bag around the mouse, seal and dispose. Never touch a dead mouse, or their droppings, with your bare hands.
- Always avoid using mothballs. Mothballs are highly toxic materials and, when inhaled, can possibly be fatal.
- Once you complete the job, shower with hot water and soap. Dispose of clothing and tools or decontaminate with bleach.

Jessica considers herself a home improvement and design enthusiast. She grew up surrounded by constant home improvement projects and owes most of what she knows to helping her dad renovate her childhood home. Being a Los Angeles resident, Jessica spends a lot of her time looking for her next DIY project and sharing her love for home design.
More by Jessica Stone