How To Fix Sticky Polyurethane (Step-by-Step Guide)

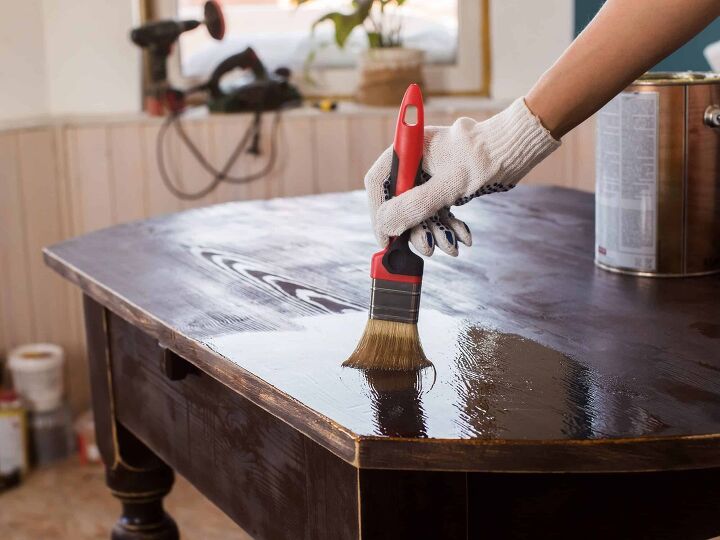
Polyurethane is an excellent choice for a protective finish on many projects. However, if it was not applied in the correct conditions, it may not dry properly.
Fortunately, there are several solutions to try to fix sticky polyurethane. Some effective tricks include using a dehumidifier, paint thinner, applying another kind of sealant, and refinishing if all else fails. In this article, we’ll help you figure out what went wrong with your project, and how to fix it.
Related Content: How Long Does It Take For Polyurethane To Stop Smelling? | Can You Paint Over Polyurethane?
Do You Need Painting or Staining Services?
Get free, zero-commitment quotes from pro contractors near you.

Why Does my Surface Feel Sticky?
There are many different reasons a polyurethane finish can end up feeling sticky. The solution to this issue might depend on the reason behind the stickiness.
Ask yourself these questions:
How long has it been since you applied the finish? Even though you waited for the suggested amount of drying time, the surface could remain tacky. This depends on the type of finish used. Water-based polyurethane takes less time to dry and harden.
Oil-based polyurethane dries in two phases. Once the solvents or thinners evaporate, the curing process begins. This is where oxygen combines with the finish to make it hard. It can take up to 30 days to cure, depending on what you painted and how many layers you used.
Is it too humid? Polyurethane will not get to the correct hard texture as easily if the humidity level is too high.
Did you stir the finish? Whether it’s oil-based or water-based, Polyurethane needs to be stirred gently, but thoroughly to be the right consistency. It should also be stirred periodically during application.
Did you use a heavy layer of polyurethane? It’s better to use several thin layers of finish rather than one heavy layer. Heavy layers have difficulty drying and curing and are more susceptible to drips and uneven textures.
Did you wait long enough between coats? Always be sure to read the manufacturer’s instructions on the can of finish. If you applied your second coat before the first was completely dry, your surface can end up permanently sticky.
Is there an old layer of varnish underneath? You’ll need to be mindful of this particularly if you are refinishing or repurposing older furniture. If there is lacquer or wax present in the old finish, it should have been stripped before applying the polyurethane. Also, neglecting to clean the surface can leave your project feeling sticky if any grease, wax, or silicone-based cleaner is present.
How to Fix Sticky Polyurethane
To fix polyurethane that still feels tacky, you’ll have to run through several troubleshooting tips and do some trial and error. Continue with each step until something works, or you’ve exhausted all options.
Step 1
The first thing to try is to simply wait longer. Wait a few more days and see how the finish feels. It may just need longer to cure. Some professionals advise that as long as the polyurethane is giving off an odor, it’s still in the curing process.
Step 2
If you’re located in a humid climate, or the room you’re working in is too humid, try running a dehumidifier in the room for a few days. You can also try pointing a fan at the surface to try and speed up the process.
Step 3
Try using a thinning agent like mineral spirits or paint thinner to remove some of the stickiness. This is a good thing to try especially when you’ve applied the polyurethane too thickly. To do this, dampen a rag with the thinner and gently wipe the surface. Wait a couple of days for it to dry.
Step 4
If the first three steps didn’t help, you can try applying another kind of sealant on top. This should only be done if the finish is slightly tacky – not wet. Shellac is a good, hard resin that doesn’t need to cure.
Step 5
If you’ve tried everything else, it’s time to strip the varnish and start fresh again. Either it wasn’t applied properly, there was another substance leftover underneath, or maybe you a bad batch of polyurethane.
Woodworking Glue And Finish Problems
How to Strip Polyurethane
It’s frustrating to have to start over again after sinking your valuable time into a project. But on the bright side, at least you can start over rather than having to ditch the whole thing.
Before you start, gather your materials. You will need:
- Paint stripper
- Paintbrush (use an old one – you’ll likely have to throw it away afterward)
- Rags/Cloths
- Respirator mask
- Rubber gloves
- Eye Goggles
Here are the steps to strip the finish:
Step 1
Make sure your workspace is very well-ventilated. Paint stripper contains harsh, potent chemicals that need to be aired out effectively. You’ll also want to cover the floor to protect it.
Step 2
Put on your eye goggles, a respirator mask, and rubber gloves to protect yourself.
Step 3
Use your brush to cover the surface with the stripper, making sure to apply enough so that it will stay wet for at least 10 minutes.
Step 4
Let it sit for about 10 minutes. You’re ready to move on when the polyurethane starts to bubble.
Step 5
Use a plastic scraper to remove the polyurethane from the surface – a metal scraper could damage the wood. You should notice the varnish peeling off with ease. You can use a steel-bristle brush for hard to reach areas.
Step 6
Use a damp cloth to wipe the excess polyurethane from the surface. Then use a clean, dry rag to give it a final wipe.
Step 7
If this didn’t fully do the trick, you can repeat the process.
Tips and Tricks for Refinishing
Once you’ve stripped the finish and the wood is dry, you’re ready to start over. Here are some helpful hints to keep in mind to make sure the second try is a success:
- Make sure your project and the area around you is clean and free of dust. If any dust or debris makes its way into the finish, it won’t look as smooth.
- Apply several thin coats. They will dry more quickly and give your project a sleek finish.
- Sand the finish lightly in between coats (when the finish is dry) to smooth out flaws.
Related Questions
How do I remove sticky polyurethane from my hands?
To remove polyurethane residue, try rubbing either vegetable oil or peanut butter on your hands. Then wash your hands with dish soap and rinse thoroughly.
Should I use oil-based or water-based polyurethane?
Both are great options for a durable, long-lasting finish if applied correctly. Oil-based polyurethane has an amber hue that will darken over time, takes much longer to dry, and is more toxic, with a strong chemical smell. Water-based polyurethane is clear, takes less time to dry, and is less toxic. You will need more coats of water-based poly, since it’s thinner and can be more vulnerable to surface scratches.
Is wood that’s finished with polyurethane waterproof?
To some extent, yes. It can protect your wood from water damage, but the water shouldn’t sit on it for too long or it can penetrate the wood. So, while it is water-resistant, it’s not waterproof.
Do You Need Painting or Staining Services?
Get free, zero-commitment quotes from pro contractors near you.

Wrapping Up
It can be very frustrating when your finish doesn’t set properly despite your best efforts. What’s even more discouraging is that it’s difficult to figure out what went wrong. But try to remember it happens to the best of us sometimes, and in the worst-case scenario, you can start fresh.
Related Guides

We are a team of passionate homeowners, home improvement pros, and DIY enthusiasts who enjoy sharing home improvement, housekeeping, decorating, and more with other homeowners! Whether you're looking for a step-by-step guide on fixing an appliance or the cost of installing a fence, we've here to help.
More by Upgraded Home Team


