How To Finish Cornhole Boards (Step By Step Guide)

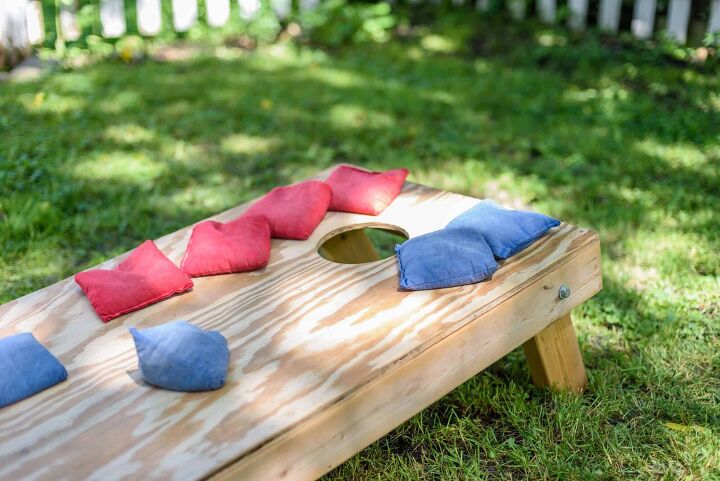
Cornhole is a summertime favorite. Friends and family come together to grill, enjoy the sun, and play this summer classic. Buying cornhole boards is an easy thing to do and you can even find some that are customizable with a favorite sports team or design. Others want to create their own cornhole boards.
Polyurethane is one of the most common and effective ways to finish a cornhole board. This makes it look great and makes it far more durable to frequent exposure to the sun’s rays. You’ll also need to add the foam to the board, as well as sand and finish it.
Keep in mind that if you have purchased a printed board, you don’t want to put any kind of product on it. Those boards are generally finished already and are meant to hold up against humidity, weather, and constant exposure to sunlight. In this article we will walk you through the steps to finishing your cornhole board.
Do You Need Handyman Services?
Get free, zero-commitment quotes from pro contractors near you.

Knowing More About Polyurethane
Polyurethane is actually a plastic material and it comes in a bunch of different forms. It can be made to be flexible or rigid and is actually the preferred material for a wide range of end-user applications. You can even get a half-pint of the material at your local hardware store for as little as $5.
When it comes to the cornhole boards, the polyurethane is there to give the board a slicker surface and a coat of protection. A slicker surface is more ideal for this game as it allows the bags to slide easily when they hit the board.
Polyurethane can be an effective way to provide longevity to your cornhole board. This will ensure that it is capable of holding up for years to come. Keep in mind that using an oil-based polyurethane will take longer to dry than one that is water-based.
Step 1: Getting Started
Creating the structure of the board is a whole different beast; this is the process of finishing so that it is ready for action. Having the proper materials is the first step in the process. The list of items should include the polyurethane (either water or oil-based), a paintbrush or foam brush, and some 320-grit or higher sandpaper.
The first step should be to lightly sand the entire area of the board. By sanding the board, it prepares the surface to be able to better receive the polyurethane. You’re not trying to bring up much of the material, just make it rough enough to accept the polyurethane.
When you are finished sanding, wipe down the board. This is to keep it free of any potential debris that can get trapped underneath the polyurethane. Try not to miss any spots since it can impact the surface of the cornhole board.
Step 2: Applying The Polyurethane
After the board has been properly cleaned and cleared of debris, it is time to apply the polyurethane. It can take anywhere from five to ten coats of the poly for a cornhole board. Make sure that there is ample time to dry in between the coats (manufacturers will have their own recommendations).
You can also use some type of ventilation to shorten the drying time, but it is a good idea to wait somewhere in the 20-30 minute range before using the fan so that there are no bubbles forming on the polyurethane.
When you have applied all but the last coat, it is time to sand again. Use that very fine sandpaper to smooth out the surface of the boards and make sure to avoid any decals if there are any. Make sure to apply polyurethane to the legs and sides as well for complete coverage.
Polycrylic As An Alternative
Polyurethane may be the most common way of finishing a cornhole board but there is another commonly used alternative: polyacrylic. Polycrylic is water-based and dries quite fast. This will provide the same smooth surface, adding a little bit of slide to any board that it is applied to.
The coat of polycrylic will also leave a glossier look to the cornhole board and often takes less than two hours in total to dry. Polycrylic finishing is a great way to protect paint, artwork, and decals that may already be on the board and even any unfinished wood.
If you use a polycrylic finish, use a synthetic bristle brush. Many people tend to use a polycrylic spray on paint instead; this helps to avoid brush marks that can last through the coating. Polycrylic coating is a great way to protect against scuffing, abrasion, chipping, alcohol, water, and any other household chemicals. Best of all, it takes just two or three coats to fully coat the cornhole boards.
Painting The Cornhole Boards
The finishing is meant to protect the finished product of the cornhole board. But how do you get those cool paint designs that so many others seem to have? Well, purchasing them that way is the easiest option, but that can limit you in the number of design options and will cost quite a bit more.
Painting the cornhole boards is a great way to achieve a unique, 100% original design that will have friends and family talking whenever they see the boards.
Sanding And Taping
The first step is to use 220-grit sandpaper to sand the top surface of the boards. If you want the sides to be different in color from the top, use tape at the edges of the sides to prevent any paint from spilling over.
After properly sanding, the cornhole board is ready to take on the paint. For straight edges and angles, you can save yourself the trouble and create a sharper look by using painter’s tape. This will create crisper lines that don’t look shaky or uneven.
From there, you can paint the rest of the cornhole boards to look however you want. Assure that it has the proper amount of time to dry before making any other changes to the design. You can follow up by taking the painters tape off and painting the legs and sides to be whatever color or design that you want. The end result will be a unique, cool design for your cornhole board that is all your own.
Keeping The Board Protected
While some may not be concerned about the condition of their cornhole boards, others will want them protected. This is especially true if the boards have been built from scratch or had some unique design implemented.
Protecting the boards is relatively easy. It can be done with the polyurethane finish mentioned above or even a clear coat. The clear coat is just that: it is a clear coating that goes over the top of the paint to give it a nice sheen and an extra layer of protection.
While that protection won’t help you if the boards are thrown about or smashed, they should help deter chipping and scratches. Protecting the boards also means that they will be in use for a long time to come and can be used at countless family events.
Proper storage will help, too. Keep them away from the moisture of any kind and make sure that there aren’t any pests that will do them frequent damage. Storing them in a shed or basement is a good start.
Related Questions
How many coats of Polycrylic should I use?
When using polycrylic you will want to use at least three coats. If you cannot recoat it in 1 1/2 hours then you will need to wait for about 72 hours before you sand the area lightly and recoat it. The Polycrylic dries within about 30 minutes and you can handle it after about one hour. After you apply the final coating, you will need to wait for at least 24 full hours before you use the surface normally.
Can you polyurethane over the paint?
Yes, you can apply polyurethane over paint. You will want to apply about one or two coats to the surface that’s painted as this is a good way to protect the paint. You can use oil-based polyurethane so that it levels into a smoother finish. however, this can take several hours to dry.
Also, you can apply polyurethane on any type of paint. However, it needs to be clean and prepared properly beforehand.
How do I get a smooth finish with Polycrylic?
Adding polyurethane can give your paint a streaky appearance which is why it’s important that you get a nice and smooth finish with it. You will need to use a high-quality brush and paint it on going with the grain instead of against. Use long strokes with one direction. Make sure the coats are thin and even while keeping a nice and wet edge.
Do You Need Handyman Services?
Get free, zero-commitment quotes from pro contractors near you.

In Summary
Cornhole is a very popular, age-old game. Many people want to create their own so that they can put their own spin on the board, or perhaps to even customize the design to include the family name or common team names. Therefore, it’s important to follow the steps in this guide carefully to ensure you finish your cornhole board properly.
Related Guides

Ryan Womeldorf has more than a decade of experience writing. He loves to blog about construction, plumbing, and other home topics. Ryan also loves hockey and a lifelong Buffalo sports fan.
More by Ryan Womeldorf






![How To Reset A Whirlpool Cabrio Washer [In 5 Easy Steps!]](https://cdn-fastly.upgradedhome.com/media/2023/07/31/9076531/how-to-reset-a-whirlpool-cabrio-washer-in-5-easy-steps.jpg?size=350x220)
