How To Clean Toilet Siphons (Quickly & Easily!)

After enough use, you may notice that your toilet takes a little longer than normal for the water to flow out of the tank and into the bowl. Slow flushing isn’t a sign of anything more than a dirty toilet. Even if the bowl looks clean, the siphon and the jets may be clogged with mineral buildup, slowing down the flow.
Cleaning the bowl is certainly fine, but your toilet requires a deeper clean. But cleaning the siphon as well as the jets in the rim will result in a clearer path for the water to flow. All you need is a toilet brush, a few household cleaning items, and a little bit of elbow grease.
Do You Need to Install or Repair a Toilet?
Get free, zero-commitment quotes from pro contractors near you.

What is the Siphon?
That big hole at the base of the toilet where the water drains out is actually known as the siphon. This s-shaped tube distributes the water and waste down through your plumbing and out of your house. What you may not have realized is that water enters the toilet bowl through two different channels.
Siphon. The majority of the water comes in through the siphon. The siphon faces the toilet trap and water gets sent right into said trap to create that powerful flushing action.
Rim jets. The rest of the water that enters the bowl comes via the jets that are in the rim of the bowl. The rims are positioned at a certain angle to allow the cascading water to swirl. The reason for the swirl is that it is better at rinsing and cleaning the bowl with repeated use.
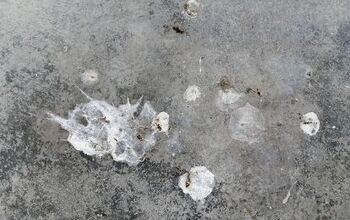
Over time and with repeated use, the siphon and the rim holes will get clogged. Typically, the clog is the result of mineral buildup from minerals found in hard water. Calcium is the most likely suspect. That calcium buildup eventually results in at least a partial blockage, keeping the toilet from flushing as quickly as it should.
How to Clean the Siphon and Jets
Before we begin, we need all the right tools for the job. The good news is that most of what you need is typically found around the home. Anything that you don’t have can be picked up at the supermarket for just a few bucks. You will need:
- Baking soda
- Vinegar
- Sponge
- Funnel
- Bucket
- Toilet brush
- Rubber gloves
- An Allen wrench, likely 3/16”
With the right tools, you are ready to start the cleaning process.
Step 1: Drain the Toilet
Because this process involves the use of vinegar, you should drain the toilet bowl and tank first. The vinegar will then have room to access the mineral deposits directly, breaking them down and removing them.
- Turn off the water supply. First and foremost, turn off the supply of water to the toilet. Find the shut-off valve (typically on the valve somewhere behind the toilet). A simple turn or push/pull depending on the valve should be quick and simple.
- Flush. With the water supply off, flush the toilet, and hold down the handle to ensure that as much of the water as possible drains out.
- Remove the tank lid. Because we need to access the interior of the tank, remove the lid, and place it off to the side. Make sure that it can’t fall over and possibly break.
- Soak up excess water. Any water that is left at the bottom of the tank can be soaked up using your sponge. When you’re done, squeeze out the sponge into your bucket and then give the tank a quick mop to remove any water that may be left.
- Water left in the bowl. Should there be any water left in the bowl, use the same step. Keep in mind that the water left in the bowl is dirty, so wear gloves. The water is meant to be a barrier between you and sewer gases, so try to move quickly to the next step.
Step 2: Use Duct Tape to Cover the Rim Jets
With the bowl empty, it is time to cover up the rim jets. If you haven’t seen the jets before, you can use a small mirror at the rim of the toilet to see them. You should see several small holes. Moreover, you should see how stained and/or clogged they are.
Cover up each of the holes with duct tape. You want to cover them so that the vinegar won’t flow to the bowl quite as fast as it would with the jets active. Instead, the vinegar will become trapped on the inside of the bowl rim, eating away at those calcium buildups.
Step 3: Adding the Vinegar
Should both the rim holes and siphon be clogged, it likely means that the inside of the toilet tank has a buildup of minerals, too. If you are going to take the time to clean the jets and siphon, it only makes sense to clean the tank as well. Otherwise, the minerals from the tank will eventually get into the siphon and jets, clogging them once again.
- Vinegar in the tank. Start by pouring vinegar into the toilet tank. Make sure that you use enough to cover all of the stains.
- Vinegar into the siphon and rim jets. When you have covered the stains in the tank, pour vinegar into the siphon jet and around the rim.
- Overflow tube. Locate the large tube inside of the tank. It should have a small tube clipped to it. Take your funnel and insert it inside of the overflow tube. Pour the vinegar into the funnel. The tube is directly connected to the flush valve. Poor enough so that it replaces any of the water that was at the bottom of the toilet bowl.
- Let the vinegar work. Now that the vinegar is trapped inside of the rip and the bowl, let it work. Give the vinegar about an hour or so; overnight if the toilet is in particularly bad shape. You can use bleach or other chemicals, but they can potentially damage the tank bolts or flapper, so beware.
Step 4: Cleaning the Rim Jets
Remember that Allen wrench? Here is where it will come in handy. After that hour is up, remove the duct tape, allowing the vinegar to flow out. When the flow has stopped, take the Allen wrench and insert it into each of the holes.
Rotate the Allen wrench fully to ensure that the holes have been cleared of any obstructions. The L-shape of the wrench makes it easier to hold and turn the wrench. Don’t have an Allen wrench? A piece of wire will work just fine in a pinch.
Step 5: Flush
Now that the vinegar has had a chance to work its magic, it is time to flush the remainder out of the toilet. By flushing, the action forces the vinegar that is in the tank out through the now unclogged rim jets. It will take those dissolved minerals with it as well.
That vinegar sitting at the bottom of the bowl will be pushed out through the siphon and down the drain. You can use a spray bottom to spray any additional disinfectant into the tank during this process. If there are particularly saturated stains, use that as the focal point of your disinfectant spray.
Step 6: The Baking Soda
Next, it is time to implement a cup of baking soda. Slowly add that cup of baking soda to the inside of the toilet bowl. Baking soda is an alkaline whereas vinegar is a mild acid. This combination will result in a fizzing reaction. If you mix them too quickly, you could wind up with a really messy situation, so mix slowly.
As the vinegar and baking soda foam, break out the toilet brush. Swish it around in your newly created solution. Put a focus on the rim each 5 minutes or so. You may need to scrub for around 30 minutes to get particularly bad buildups out.
Do You Need to Install or Repair a Toilet?
Get free, zero-commitment quotes from pro contractors near you.
Step 7: Cleaning the Tank
After you have finished with the bowl, it is time to move on to the tank. Take a hand brush with firm bristles or even a heavy-duty sponge to scrub to work through the tougher stains in the tank. Make sure that you get the walls and the bottom as these areas can get to be particularly bad.
For those hard-to-reach spaces, take an old toothbrush to get through those stains. When you are done, the tank should be practically sparkling.
Step 8: Cleaning the Bowl
It is time to grab the toilet brush and circle back to the bowl. Make sure that you scrub hard particularly along the rim as the tough angle can make it difficult to remove the mineral deposits. Make sure you keep an eye out for any other water stains, working them away.
With a glove on, insert your finger into the siphon. Check for any calcium that may be leftover. Finally, make sure that the toilet flushes as it should. With proper cleaning, it should have a powerful flush once more.

Ryan Womeldorf has more than a decade of experience writing. He loves to blog about construction, plumbing, and other home topics. Ryan also loves hockey and a lifelong Buffalo sports fan.
More by Ryan Womeldorf