How To Hush Your House
If someone told you to hush your house, you might start trying to find ways to make your home quieter. But house hushing isn’t about getting rid of clanging pipes, unpleasant sounds, or loud noises. It’s about quieting the visual noise in your home to create a more serene space and simplify your life.
Remove all visible, unnecessary items from a room and put them in a separate place. Leave the room empty for 24 hours before bringing things back into the space. Return things one at a time based on what you absolutely love and want in the room, nothing more. Work on one room at a time until you finish hushing your house.
What Is House Hushing?
Hushing the house means reducing the number of items in your home to achieve a quieter, more peaceful environment. House housing, or quieting the house is a popular trend in a world where everyone seems overworked and stressed. The idea of a simpler life and a serene retreat sounds amazing.
After all, your home should be a place where you feel at peace. But for many, a house causes stress instead of serenity. Unnecessary items pile up, leading to visual noise that makes it hard to focus and challenging to relax. By removing excessive items, you quiet the visual chaos, giving yourself more room to breathe.
8 Straightforward Steps To Hush Your House
If you’re tired of clutter, but you’re unsure about what needs to stay and what needs to go, house hushing is a good jump start. There’s no organizing or decision-making when you start to quiet the house. Therefore, you get to start right away. Without any overwhelming choices to make, you can clear out a space in record time and give yourself a blank canvas or a clean slate.
Having a calmer life certainly sounds appealing, so you’re undoubtedly ready to give house hushing a try. But before you start emptying your home, review these 8 steps that guide you through how to quiet the house.
1. Choose One Room At A Time
Don’t try to hush your whole house at once. Can you imagine trying to remove everything you can see from every room in your house at one time? Where would you put it all as you work through the steps? The front lawn? The backyard?
Instead, choose one room at a time, not moving on to the next space until you finish one. Although you can start with any space you want, you may want to begin with the space that’s causing you the most stress.
Or, as a way to motivate yourself, perhaps you start with the room that has the least clutter, so you finish quickly. Choosing the latter could be like doing a practice run through the process. It allows you to build up your decluttering muscles for the larger, harder spaces.
2. Remove Everything That You See
Once you know the room you want to hush first, remove everything in the room that is visible and unnecessary. (You don't need to remove furniture unless you feel you have too much in the room -- up to you.)
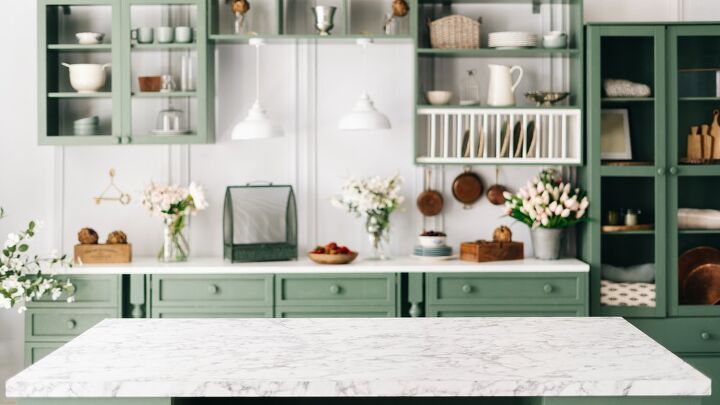
For example, if you decide to quiet your kitchen, take everything off the countertops and other surfaces. Focus on unnecessary, decorative items.
You don’t need to take everything out of cabinets, drawers, or the pantry. The primary focus of house hushing is removing the things you see when you are in a space. However, as you get the hang of house hushing, you could extend it to these hidden spaces for an even deeper dive.
3. Place Items In A Separate Staging Area
Choose a designated spot as a staging area for the items you remove from a room. Remember, the idea is to make the room you’re focusing on as empty as possible.
Make it a separate space from the room you’re working in but choose an area that isn’t too far away. You don’t want to trudge up and down stairs or walk to the other end of your house as you’re removing items or putting things back.
4. Leave The Space Empty For 24 Hours
After removing everything from the room, it’s time to breathe. Leave the room empty for 24 hours (or more if you need extra time to process and absorb the room’s new look). But 24 hours is the minimum.
Keep this in mind when you decide to try out house hushing. Before you begin, make sure you have the necessary time to devote to the overall project. For example, if you’re hosting a family dinner, starting to hush your kitchen two days before isn't the best idea.
5. Start Putting Things Back Intentionally
After 24 hours and taking time to reflect on your newly emptied space, it’s time to start putting things back. But, spoiler alert, you probably won’t be returning every single item to the room.
As you select the things you want to go back into the space, be intentional. Consider its purpose, how often you use it, how you feel about it, and where to put it. Is it something that needs to be out in the open or can you put it inside of a closet, drawer, cabinet, etc.?
This step highlights how house hushing is like decluttering backward. Instead of going through a space and deciding what to get rid of, you’re going through items and deciding what stays. Start with your favorites and your must-haves. Arrange your items in a way that’s functional and appealing.
6. Make Decisions About The Remaining Items
After you replace a few items, step back and assess how the room looks and feels. How do you feel in the space? Add a few more items and repeat the assessment. At some point, you’ll feel like Goldilocks — the room will look and feel just right.
This is when it’s time to stop adding pieces and look at what’s left in your staging area. This is the part of house hushing where you need to make some tough decisions. Since you already chose your favorite pieces and the things you use the most, do you truly need anything else?
If you’re not sure how to choose, consider some basic decluttering steps to help you. Be honest about the remaining items and determine if you’re ready to part ways for the sake of a calmer home. Visualize how your space and life will look if you maintain the quiet space you created.
If you’re unsure about certain pieces, tuck them away in a bin, out of sight. After a few weeks, if you never retrieved them, you can let them go with confidence.
7. Move To The Next Room
Once you finish in the first room, it’s time to move on to the next. The more rooms you do, the easier the process is likely to get. However, inevitably some rooms will present more challenges than others.
For example, rooms that hold lots of memories, photographs, and collectibles are especially difficult. These spaces bring a lot more emotion into the process. If you are the sentimental type, you’ll want to set aside extra time to tackle these types of spaces.
8. Revisit The Process As Necessary
Everyone acquires stuff over time. It’s just part of life. Therefore, hushing the house once isn’t likely to be the only time you do it. But depending on what type of person you are, you may do it a few times or many.
If you don’t purchase many things or aren’t one to hold on to items forever, you may only try house hushing a few more times or in certain rooms. It’s more of a maintenance plan as things get more cluttered than you like them to be.
But if you tend to say yes to everything, buy double when things go on sale, and so on, you might prefer to hush the house more frequently. It could become a yearly tradition. Ultimately, how often you decide to try this reverse decluttering is up to you.
And A Hush Fell Over The House
Do you hear that? It’s the sound of peace and serenity, but it’s not all about what you hear. It’s also about what you see (or don’t see). House hushing focuses on clearing the visual clutter to dial down the visual noise overwhelming your home.
Work through your house one room at a time, removing all the decorative items and putting them in a separate space. Once the room is empty, leave it be for a day or two, getting used to the sparse, quiet, uncluttered atmosphere.
As you return items to the space, only choose your favorites and the items that resonate with your style. Select items that add value to your life through their form and function.
As for the rest, seriously consider donating or selling it. When you finish, you’ll have a more peaceful house, which sends calming ripples throughout the rest of your life.
Related Guides:

Stacy Randall is a wife, mother, and freelance writer from NOLA that has always had a love for DIY projects, home organization, and making spaces beautiful. Together with her husband, she has been spending the last several years lovingly renovating her grandparent's former home, making it their own and learning a lot about life along the way.
More by Stacy Randall