


Can You Use Joint Compound On Cement Board?
Aside from performing the actual repair, half the battle of home repairs is choosing the right products. If you are installing cement board as the backer for your tile project, you may be wondering: “can you use joint compound on cement board?”
Drywall joint compound is not the best choice for filling the joints between cement board. However, you can mud over cement board and treat it as drywall – so long as it isn’t going to be exposed to moisture. If the cement board is being installed in a shower enclosure, bathroom floor, or tub surround, thin-set mortar should be used instead.
In short, cement board manufacturers require alkali-resistant tape to be embedded in thin-set mortar at the seams on walls and floors. Thin-set is an adhesive mortar that is made of cement, fine sand, and a water-retaining agent. Joint compound, on the other hand, is mostly gypsum dust, with mica, attapulgite, perlite, and starch.
What is Joint Compound?
Joint compound, commonly known as drywall mud or just “mud” by professionals, is comprised of primarily gypsum dust that is mixed to form a frosting-like consistency. Though, it can also be purchased in a pre-mixed tub from a variety of retailers. During the installation of drywall, large sheets of gypsum board are attached to the wall’s framing.
The seams between the boards are covered with tape and then the tape is covered using joint compound. With some finish work, the joint compound creates a smooth surface where the seams are undetectable. Unlike spackle, joint compound has a longer drying time that allows you to work meticulously to achieve the desired look.
What is Cement Board?
Cement board, commonly sold under trade names like Hardiebacker, WonderBoard, and Durock, is the standard substrate used for ceramic, stone, or porcelain tile laid with a thinset mortar adhesive. It is used for most floor tile and has essentially replaced both drywall and plywood backer materials for wall applications of tile in moist environments, such as tub surrounds and showers.
Cement board creates a stable, durable base for tile, and since it doesn’t consist of any organic materials it is not prone to shrinkage, rotting, mold growth, or decomposition caused by exposure to moisture. When ceramic tile is laid over cement board it yields the most durable floor or wall surface possible.
Cement board is so strong that it can get wet without sustaining damage.
What Kind of Mud is Best for Cement Board?
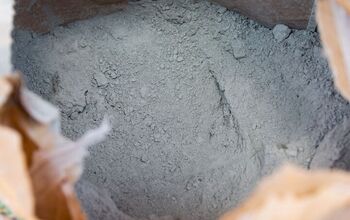
Thin-set is a cement-based powder that is mixed with a water or latex additive to create a thick paste. It is used to seal the seams between cement boards and also may be used for setting the tile. By squeezing the thin-set mortar into the gaps between boards, the mortar locks the sheets together and provides strength to the seam.
Many thin-set products feature latex and polymer additives in them that are designed to increase bonding strength. As the size of the tiles increase, sufficient mortar coverage becomes increasingly more important.
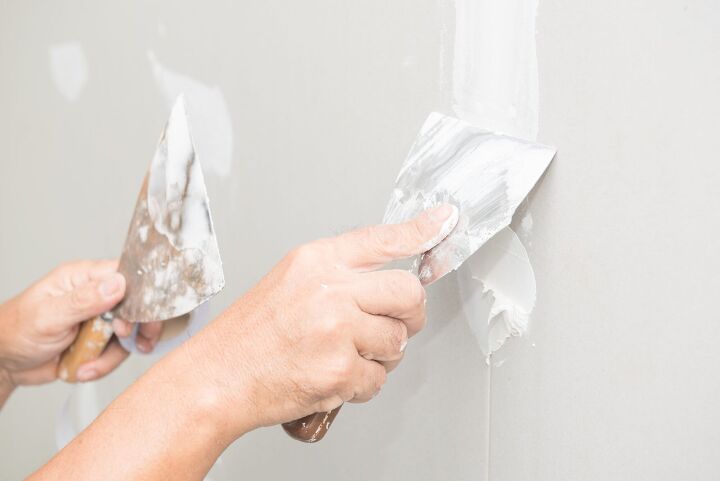
Fiberglass mesh tape must be applied first to all seams and gaps, then covered with a skim coat of thin-set mortar. The thin-set will fill all the voids and cracks in the tape. On the other hand, drywall joint compound is designed to be used alongside paper or fiber joint tape to seal joints between drywall sheets. It creates a seamless base for painting interior walls.
Drywall joint compound is not the ideal choice for sealing the seams between cement boards, as it does not add durability. It is only designed to create a smooth, seamless surface for painting. Not to mention, thin-set mortar is waterproof and drywall joint compound is not. If you are installing cement board in wet areas such as a shower, tub surround, or even outdoors, thin-set mortar should be used instead of joint compound.
Can You Use Drywall Tape With Cement Board?
While it’s sometimes ok to use joint compound with, you should never use drywall tape with cement board. Instead, you should opt for a thin fiberglass tape that’s specially made for cement board. Using the proper materials is essential to correctly installing cement board.
How to Properly Install Cement Board
You can use cement boards outside just as well as you can inside. Follow these steps to properly install cement board using thin-set mortar instead of joint compound.
Step 1: Plan Out the Installation
Start out by making a rough plan for how the cement boards are going to laid out, based on the size of the boards and the area that needs to be covered. For maximum floor rigidity, the joints between the boards have to be offset by the joints in the subflooring by approximately 8 inches.
Step 2: Prep and Apply the Thin-Set
Follow the manufacturer’s instructions to mix a small batch of thin-set mortar, combining the dry powder with water in a bucket. Apply a large amount of mortar to the subfloor and spread out evenly using a notched trowel. Cover an area that is just large enough to install the first cement board.
Step 3: Install the First Cement Board
Lay the first cement board sheet over the bed of mortar, with the rough surface facing up. Allow for a ¼ inch gap between the sheet’s edge and the adjacent walls. Use cement board screws to fasten the sheet, ensuring that the screws are either flush with the sheet or somewhat recessed. Space out the screws eight inches apart along the sheet.
Continue adding boards in the first row following the same technique of applying thin-set, laying the sheet, and fastening it in place. Place the sheets ¼ inch apart.
Note: Only use cement board screws and alkali-resistant cement board joint tape. Using standard screws or drywall joint tape will result in corrosion or deterioration from contact with the boards.
Step 4: Make Cuts
Once you reach the final sheet in the first row, use a utility knife and T-square to trim it. Two or three passes of the knife will score it and allow you to break off the piece in a straight line. To complete the cut, cut the mesh along the backside of the board as needed.
Step 5: Continue Installing Sheets
Continue adding cement boards to cover the entire work area, remembering to offset the joints between the boards and the subfloor and allowing ¼ inch gaps between each sheet. Only mix the thin-set mortar as needed to prevent it from drying before you can use it all.
Step 6: Tape and Seal the Joints
Apply the cement board joint tape to all the gaps between sheets and cover with thin-set mortar in a thin layer. Use a drywall knife to apply the mortar and work so that the tape is covered and the joints are smooth and level. Refer to the manufacturer’s instructions in regard to the appropriate curing time. Want to learn more about taping and sealing the joints, watch the video below to see how it’s done.
Cement Board to Drywall Transition
Transitioning from cement board to drywall can be done seamlessly and easily. You’ll want to follow the exact same steps as in the scenario above while making sure that the cement board you use is the exact same size as the drywall you’re transitioning to. You should also use a self-adhesive joint tape rather than a typical drywall tape for this transition.
You should also be generous with the amount of joint compound you add to the cement board/drywall seam. Apply two to three coats per seam and wait for 24 hours between each coat to allow it to fully dry. Make sure to use a setting type compound, which will provide a better finish than all-purpose joint compound will.

Jessica considers herself a home improvement and design enthusiast. She grew up surrounded by constant home improvement projects and owes most of what she knows to helping her dad renovate her childhood home. Being a Los Angeles resident, Jessica spends a lot of her time looking for her next DIY project and sharing her love for home design.
More by Jessica Stone


![Cost To Drill A Well [Pricing Per Foot & Cost By State]](https://cdn-fastly.upgradedhome.com/media/2023/07/31/9074980/cost-to-drill-a-well-pricing-per-foot-cost-by-state.jpg?size=350x220)


