Blower Works With A/C But Not Heat? (We Have A Fix)

A blower motor that works in A/C mode and not heat mode is a perplexing problem. Diagnosing these kinds of problems can be a challenge for a homeowner. Before you call an expensive repair technician, there are some things you should check yourself.
Typically, the cause for a blower motor that won’t run in the heat but will run in A/C mode is a faulty connection. This connection problem usually is related to the thermostat. Sometimes the problem is on the control board in the air handling unit. Occasionally, the problem is associated with a sensor or safety switch.
HVAC repairs can be expensive for even the simplest problem. Many issues with your HVAC system are resolvable quickly and easily.
Do You Need Central A/C Service or Repair?
Get free, zero-commitment quotes from pro contractors near you.

How to Troubleshoot a Blower that Works in A/C Mode, But Not in Heat Mode
Diagnosing a problem with a fan that runs in A/C mode and not heat mode is often a matter by following a few simple steps.
Step 1: Before You Start
Your HVAC system runs on 120 volts AC current, which can deliver a deadly shock if you touch the wrong thing. If your system has a condensing unit, you may have 220-volt service to that part of the system.
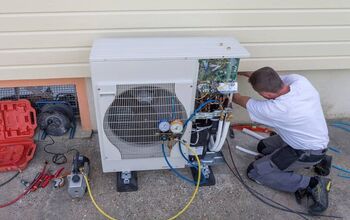
Be cautious when you open the service panel of your HVAC unit. The best policy is to unplug the air handling unit’s power before you open the service panel. There are very few homeowner serviceable parts in a condensing unit. We recommend that you call a service technician if the condensing unit needs service.
Step 2: The Tools You May Need
Before you start diagnosing your HVAC problem, you need a few tools. We suggest that you have the following ready before you start to save time and frustration.
- Screwdrivers – You may need both Philips and straight screwdrivers. You may need several different sizes.
- Nut Drivers – Many HVAC manufacturers use hex-head self-tapping sheet metal screws to hold covers and panels in place. A set of nut drivers makes accessing these openings much easier.
- Flashlight – A small flashlight can help to see into those dark nooks and crannies of your HVAC unit.
- Multi-meter – A multi-meter is a necessity to check for current and continuity in your HVAC wiring. A workable multi-meter need not cost much. Many of the discount tool retailers sell inexpensive multi-meters for less than $20.
- Protective gear – Don’t forget to wear your eye protection when working around HVAC equipment. A good pair of gloves can protect your hands from the sharp edges of the sheet metal on the HVAC unit.
Step 3: Start at the Thermostat
Often the cause of a fan that won’t run on the heat setting but will run on the A/C setting is in the thermostat. Generally, the voltages found on home HVAC system thermostats are low voltage systems. These thermostats are safe to check without worrying about electrical shocks. However, take care not to short any of the wires together accidentally.
Step 4: Remove the Thermostat from the Wall
Check the user’s manual that came with your thermostat for instructions. Some thermostats have a mounting plate, while others are screwed directly to the wall. In any event, you need to check the wire connections to the thermostat from the HVAC unit.
Step 5: Look at the Wire Connections
Check the wire connections on the thermostat for loose or broken wires. The solid core wire used for most HVAC to thermostat runs is subject to breaking. Make sure that all the connections are tight and corrosion-free.
Your HVAC unit may not use all the wires in the wire bundle. Typically, there are six wires in a thermostat wire bundle. Some HVAC units use a few as four of these wires. There is a standard color code convention. However, your HVAC system may not conform to the standard color code system.
We suggest that you take a picture of the wiring on your thermostat with your phone before taking any wires loose. A picture will give you a reference point back to the start of your project.
Step 6: Repair any Loose Connections or Broken Wires
If you find loose or broken wires, repair the connections. If you find a broken wire, it is best to remove all the wires and trim the thermostat wire back a few inches. Strip the insulation from the wire bundle and from each wire that you need to reconnect.
Make sure the connections are tight. If you have unused wires in the wire bundle, do not strip the ends. Wrap the end of each unused wire with electrical tape and fold the wire back along the thermostat wire. Wrap the entire wire bundle with electrical tape to ensure that no bare wire can come into contact with a metal surface.
Step 7: Replace the Thermostat and Test the Blower
Replace the thermostat on the wall by clipping it back into the mounting bracket or replacing the screws. Once the thermostat is in place, test your blower motor for proper function. Check all the fan functions of your thermostat.
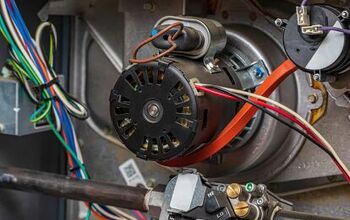
Blower Motor Problems
Multi-speed HVAC units often call for different speeds from the blower motor for A/C and heat. If your blower motor doesn’t work on the automatic fan setting in heat mode, try turning the fan setting to manual. If the blower motor works in manual fan mode, the blower motor is likely the problem.
Replacing a bad blower motor in a new HVAC unit is no small feat. We recommend that you call a trained HVAC service technician to make this repair. In most cases, the entire blower motor and fan assembly must be removed and replaced.
If the Blower Still Doesn’t Work
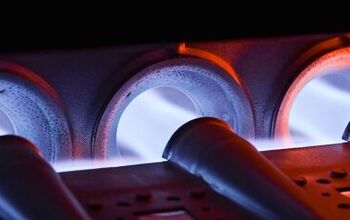
If the blower on your HVAC system still doesn’t work in heat mode, the problem is in the air-handling system. Newer HVAC systems include error code displays that can tell you if there is a problem with the control board.
Accessing the display may require you to remove the cover of the HVAC unit. Remove the access panel with caution. The control board on your HVAC system has high voltages. The error code readout may be a digital display or a blinking LED. Consult your owner’s manual for the location of the readout and how to interpret the codes.
Problems with the control board are usually not homeowner serviceable. If there is a problem with your HVAC system’s control board, you should call a qualified and trained service technician.
Basic Thermostat Wiring – Colors and Controls
Understanding the wiring on your thermostat and how it controls your system’s A/C and heat functions is important to troubleshooting. The following information is based on HVAC industry-standard color codes and conventions. However, your system may be different, or the installer may have deviated from common practice.
Color Codes and Functions
- Red Wire (Rc or cooling terminal) – The red wire attached to your thermostat is the 24-volt power from the transformer on your HVAC system. This wire provides the power to operate your thermostat and the communications between your thermostat and your HVAC system.
- Red h Wire (Rh or heating terminal) – Your HVAC system may have two transformers. On two transformer systems, a second red wire, labeled Rh, serves the system’s heating side.
- White Wire (W terminal) – The white wire that connects to your thermostat is typically connected to your HVAC system’s heating side and sends control messages.
- Yellow Wire (Y terminal) – Yellow wires typically connect to the compressor or condensing unit contactor on the A/C side of your HVAC system
- Green Wire (G terminal – Green wires on your thermostat connect back to the fan on your HVAC system.
- Orange Wire (O terminal) – On systems that use a heat pump, the orange wire on the thermostat operates the reversing valve on the condensing unit. The reversing valve switches your condensing unit from hot to cold and vice-versa.
- Blue wires (B or C Terminal) – Blue wires are the common wire in your thermostat wiring scheme. Since the blue wire is common, it often has a C instead of a B. If your thermostat requires a power source to operate, you must connect the blue wire.
A Note About Heat Pumps and Thermostats
If your HVAC system uses a heat pump, your thermostat must be compatible with heat pump systems. Trying to use a thermostat not rated for heat pumps can lead to erratic operation or damage to the HVAC system. If there is any doubt about your thermostat and HVAC system, contact a trained HVAC technician.
Do You Need Central A/C Service or Repair?
Get free, zero-commitment quotes from pro contractors near you.
Keeping Warm with Losing Your Cool
Problems with an HVAC system are frustrating at best. At worst, they can be dangerous and expensive. Many problems with your HVAC system, such as a blower motor that doesn’t operate properly, can be diagnosed easily. However, if in doubt, seek professional help and advice.
We hope this article has provided you with the information and help you need to keep your HVAC system running in top form. Remember always to work safe and seem professional advice for problems beyond your scope. Have fun and good luck.

Dennis is a retired firefighter with an extensive background in construction, home improvement, and remodeling. He worked in the trades part-time while serving as an active firefighter. On his retirement, he started a remodeling and home repair business, which he ran for several years.
More by Dennis Howard