Are Brita Pitchers Dishwasher Safe? (Find Out Now!)

Water quality is always a topic of great interest for homeowners who want to be certain that the water flowing into their homes is safe for consumption. Those who err on the side of caution will purchase products like Brita pitchers to ensure they’re drinking clean water. But to work their best, they need to be clean, leading to the question, are Brita pitchers dishwasher safe?
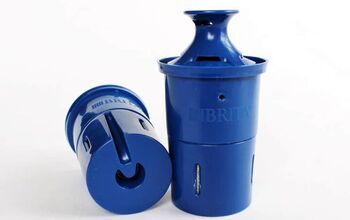
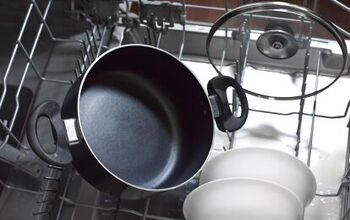
Brita pitchers and the parts are not dishwasher safe; you need to handwash your Brita pitcher. A dishwasher can scratch, melt, and ruin your Brita pitcher and its parts, making it ineffective. Improper care of a Brita pitcher can make it unable to filter water adequately.
You will have to hand wash the pitcher yourself unless you want your purchase to go to waste. Thankfully, hand washing a Brita pitcher is still a simple and straightforward task.
Learn more about that and other relevant topics by continuing with the rest of this article.
What Is A Brita Pitcher?
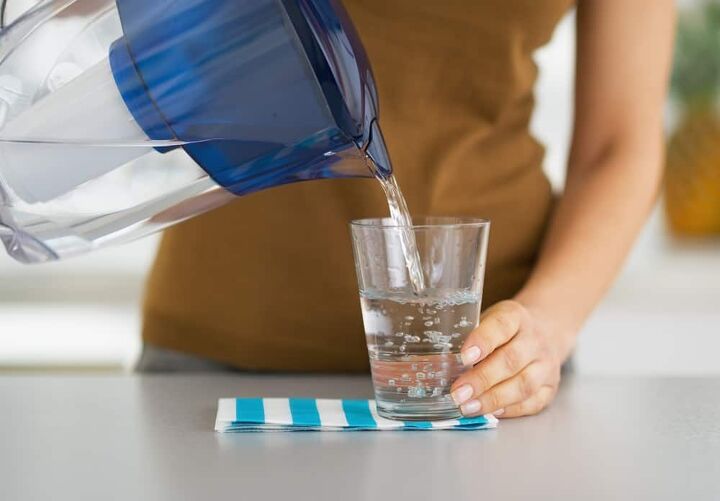
The distinguishing quality of Brita pitchers is the presence of the filter. That filter takes out several substances from the tap water you pour in. Examples of substances filtered out by a Brita pitcher include chlorine, copper, lead, and mercury.
If you have concerns about your tap water containing contaminants, investing in a Brita pitcher makes sense. The Brita pitcher could help keep you and your loved ones from getting sick.
Installing a filtering system can produce the same clean water that Brita pitchers do. However, some homeowners may not have the space to accommodate a large filtration system.
Brita pitchers provide a convenient solution for that particular issue. It’s important to know what kind of maintenance a Brita pitcher requires before you get one for your home.
Are Brita Pitchers Dishwasher Safe?
The advantages of owning a Brita pitcher are pretty clear. So, what about the downsides?
Probably the one downside to using a Brita pitcher is the fact that it’s not dishwasher safe. You cannot just place this pitcher inside your dishwasher at the end of the day and forget about it.
Brita pitchers cannot be placed in the dishwasher because of how delicate their components are. Remember that the dishwasher produces a good amount of heat and also moves its contents around a lot. All of that activity inside the dishwasher can have a damaging impact on the Brita pitcher.
In addition, harsh detergents can also play a role in damaging your Brita pitcher. The filter inside the pitcher is particularly susceptible to damage. You can get a replacement for it, but you probably don’t want those filters going to waste.
Even the body of the pitcher itself will not be able to withstand the dishwasher for too long. After a few runs through the dishwasher, the pitcher may be ruined.
Therefore, no question about it, Brita pitchers are not dishwasher safe. So, what’s the best way to maintain your Brita pitcher so it stays clean and can filter water effectively?
How To Quickly Wash A Brita Pitcher
The Brita User Guide recommends you wash all parts of the pitcher, including the pitcher itself, by hand. There are two ways to clean your Brita pitcher. The first is a quick wash which is necessary for daily maintenance. The other involves giving the Brita pitcher a deep clean that makes it almost seem like it’s brand new.
We’ll focus on quick cleaning first. The steps to quickly clean your Brita pitcher are detailed below.
Step 1: Clean The Inside Of Your Brita Pitcher
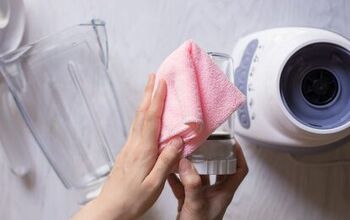
To clean the inside of your Brita pitcher, you have to start with getting the right items. Abrasive cleaners and scouring pads must be avoided when working on Brita pitchers. They will scratch up the inside of the pitcher and cause lasting damage.
Stick to using a non-abrasive sponge for this job. If you don’t have that, a cleaning cloth can work too. Microfiber cloths in particular work well for this task. As for the cleaning agent, you can use a mild detergent or dish soap. Go with whichever one you have on hand.
Put some drops of your cleaning agent of choice into your cleaner. Use that to give the inside of the pitcher a good scrub.
Step 2: Hand Wash All Of Your Brita Pitcher Components
Continue to clean the rest of the Brita pitcher’s parts, including the water reservoir and lid, in the same way. If your pitcher features a chrome lid, Brita recommends using a solution of one cup of water mixed with one teaspoon of vinegar.
Step 3: Rinse The Pitcher And Parts Thoroughly
The next step involves simply rinsing the Brita pitcher and all of the parts to get rid of all soap and residue. Give it a few rinses to get rid of any traces of the cleaning agent you used.
Step 4: Allow The Pitcher And All Parts To Dry
Avoid storing the Brita pitcher right after you wash it. If there’s still water inside the pitcher, it could take on a funky odor that spreads throughout the item. You may have to wash the pitcher again just to get rid of that smell.
Also, storing wet items can lead to mildew and mold growth. Therefore, to prevent the emergence of that odor (and other unpleasantries), you should let your Brita pitcher air dry after washing it.
Let it dry upside down on top of a rack at room temperature. Do the same with the reservoir and lid. Then, you can place the pitcher in storage or fill it with water after that.
How To Deep Clean Your Brita Pitcher
Deep cleaning your Brita pitcher is a necessity every once in a while. The constant exposure to moisture could cause some unwelcome growth inside the pitcher. Prevent that from happening by reserving some time for deep cleaning.
Step 1: Completely Disassemble The Brita Pitcher And Examine The Parts
Start the deep cleaning process by disassembling your Brita pitcher. Detach the pitcher, the lid, the reservoir, and the filter. Disassembling the pitcher first makes it easier to complete the cleaning process.
With the pitcher disassembled, you can now examine it closely. You’re doing this to see if any mildew has grown inside the parts of the pitcher. Take the time to carefully inspect each part because now is the best time to address the presence of any mildew.
Optional Step: Eliminate The Mildew Using Vinegar
If you do find patches of mildew growing inside the parts of the Brita pitcher, you must remove them immediately. To do that, put about a teaspoon of vinegar inside a cup of water and use that as the mildew remover.
Dip your non-abrasive sponge or cleaning cloth inside the vinegar and water mixture then scrub the mildew away. Rinse the parts clean after scrubbing away the mildew.
Step 2: Clean The Components Of Your Pitcher
Just like before, you must clean the pitcher using the appropriate items. Use a non-abrasive sponge or cleaning cloth and then go with mild detergent or dish soap as your cleaning agent. Work on the pitcher, the lid, and the reservoir one by one to ensure they are cleaned properly.
The filter does not have to be washed. You simply can rinse it off under clean water.
If the filter on your pitcher is clogged up, you will have to replace it. Just continue leaving it to the side while you tend to the other parts of the pitcher.
Step 3: Rinse Every Part Of The Pitcher
Rinse every component of the pitcher thoroughly. If you used vinegar earlier, you may have to give the pitcher’s components additional rinses to eliminate any lingering smells.
Step 4: Air Dry The Parts Of The Pitcher And Reassemble
Now that the parts have been rinsed, you can set them up on top of a rack. Remember to keep the parts upside down so the water drips away from them.
You can now go ahead and reassemble the Brita pitcher. Don’t forget to put the filter back in place as well.
Related Questions
Why are there black specks floating inside of the Brita pitcher’s reservoir?
While disassembling your Brita pitcher ahead of cleaning, you may have noticed some black specks floating inside the reservoir. You may be wondering what those black specks are.Those black specks aren’t particles of dirt that your Brita pitcher failed to filter out. They’re actually carbon particles that likely came loose from the pitcher’s filter. The emergence of those black specks is not a big issue. They may alter the taste of the water slightly, but they’re completely harmless.Don’t ignore the black specks completely though. They could be hinting at the age of your filter. You may have to replace the filter not long after those black specks first show up.
How long does a Brita pitcher filter last?
You can purchase three types of filters for your Brita pitcher. Both the white and the gray filters can process about 40 gallons of water. On average, that means they will remain usable for about two months.The blue filters last significantly longer. They can process about 120 gallons of water, meaning they could remain in working condition for about six months.
How do I replace the filter in my Brita pitcher?
Before you use a new filter, Brita suggests soaking the new filter upright in cold water for 15 minutes. Align the filter’s groove with the notch on the reservoir and press it into place.Fill the pitcher twice in order to get water alongside the filter. Don’t drink this water as it could contain traces of carbon dust from the filter. However, you can use it to water plant instead of just throwing it down the drain.
Gary Evans is passionate about home improvement. He loves finding out how to make improvements in the easiest, most practical, and most affordable ways. Upgrading his home kitchen is one of his ongoing hobbies. Gary is also a long-time content creator and enjoys spending his free time tending to his hydroponic vegetable garden.
More by Gary Evans